Centro 8
(now discontinued)


When you first receive a Centro-8, you should connect the Ethernet port to your network, the HDMI output port to a screen (recommended), and then connect power. The unit will then power up with DHCP enabled, and be given an IP address by your network. Once the unit has booted up, the HDMI output port will show the DemoPad logo, together with the unit's current IP address / subnet mask, which you will need for the initial configuration.
Configuring a Centro-8
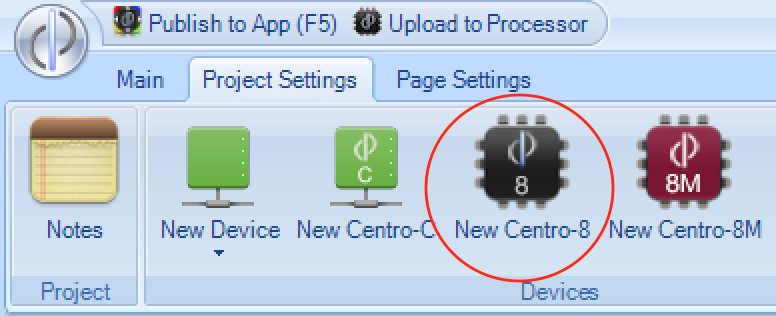
All configuration of a Centro-8 is done via the Designer PC software. First, add a Centro-8 processor to your project:
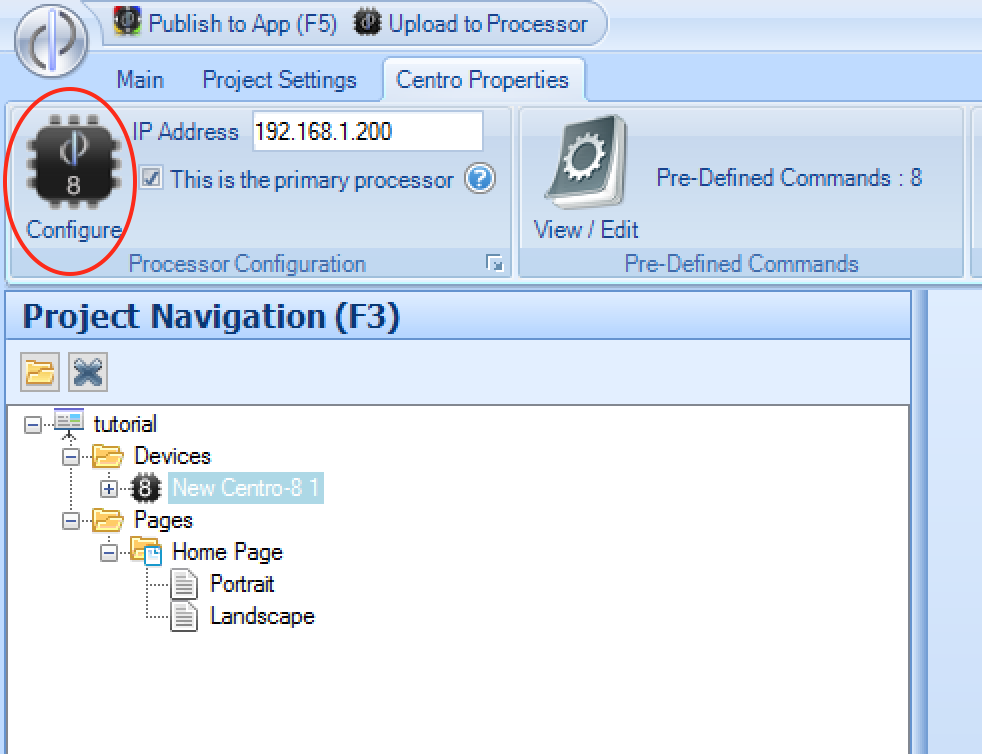
Next, enter the static IP address that you want the Centro-8 to receive, and then click on Configure to proceed:
You then need to proceed through the 3 steps shown on the next screen:
Step 1 - Initialize
The first step is to set the IP address of the Centro-8, assign an installer password to the unit, and upload the latest automation software. In the top right of the screen, enter the current DHCP-assigned IP address of the Centro-8 - this is how the software will initially connect. There should be no need to alter the communication ports, unless you are using different ports with a remote configuration operation (not recommended)
Then enter the new static IP address of the unit, and an installer password, and click Initialize / Update Processor
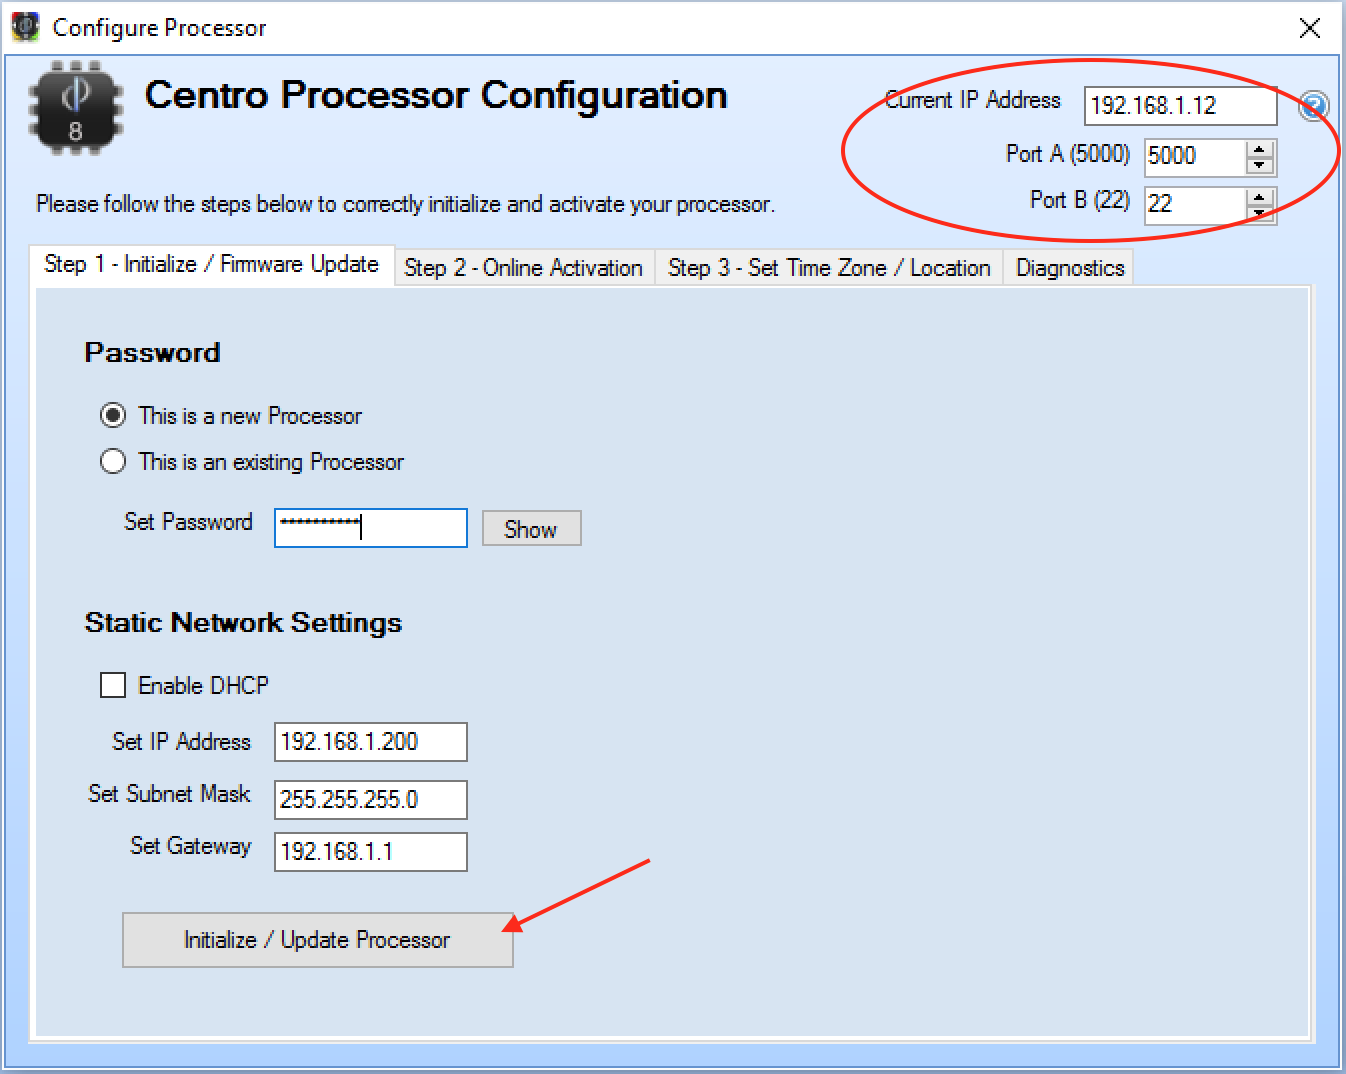
The processor will then reboot, which may take several minutes, after which the HDMI output should show the new IP address / subnet entered.
- Note - once a Centro-8 has gone through Step 1, it will have the installer password assigned - which is needed to perform uploads etc. If using the Centro-8 in another project, go to Step 1 & select:
This is an existing Processorand enter the password which was initially used - otherwise no connection will be possible to the device.
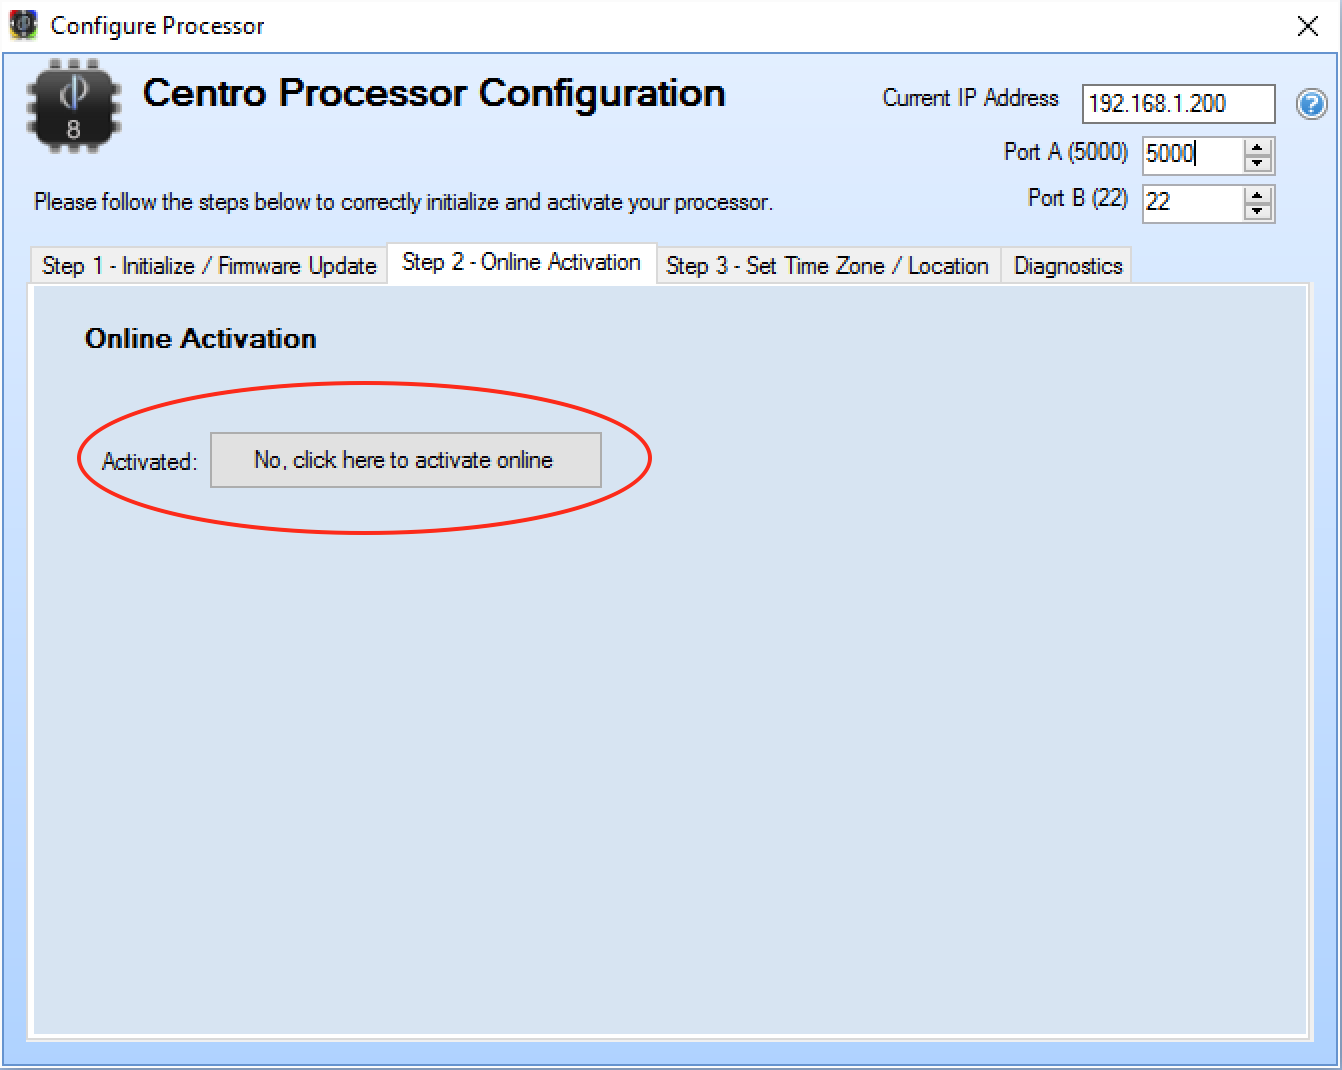
Step 2 - Activate
Next, proceed to the second tab to authorise the processor. This only needs to be done once for a given Centro-8. The PC being used must be able to communicate with the Centro-8, and the internet, for this to succeed. Therefore, if installing the Centro-8 at a location with no internet access, it is recommended to perform this operation prior to taking the unit to site:
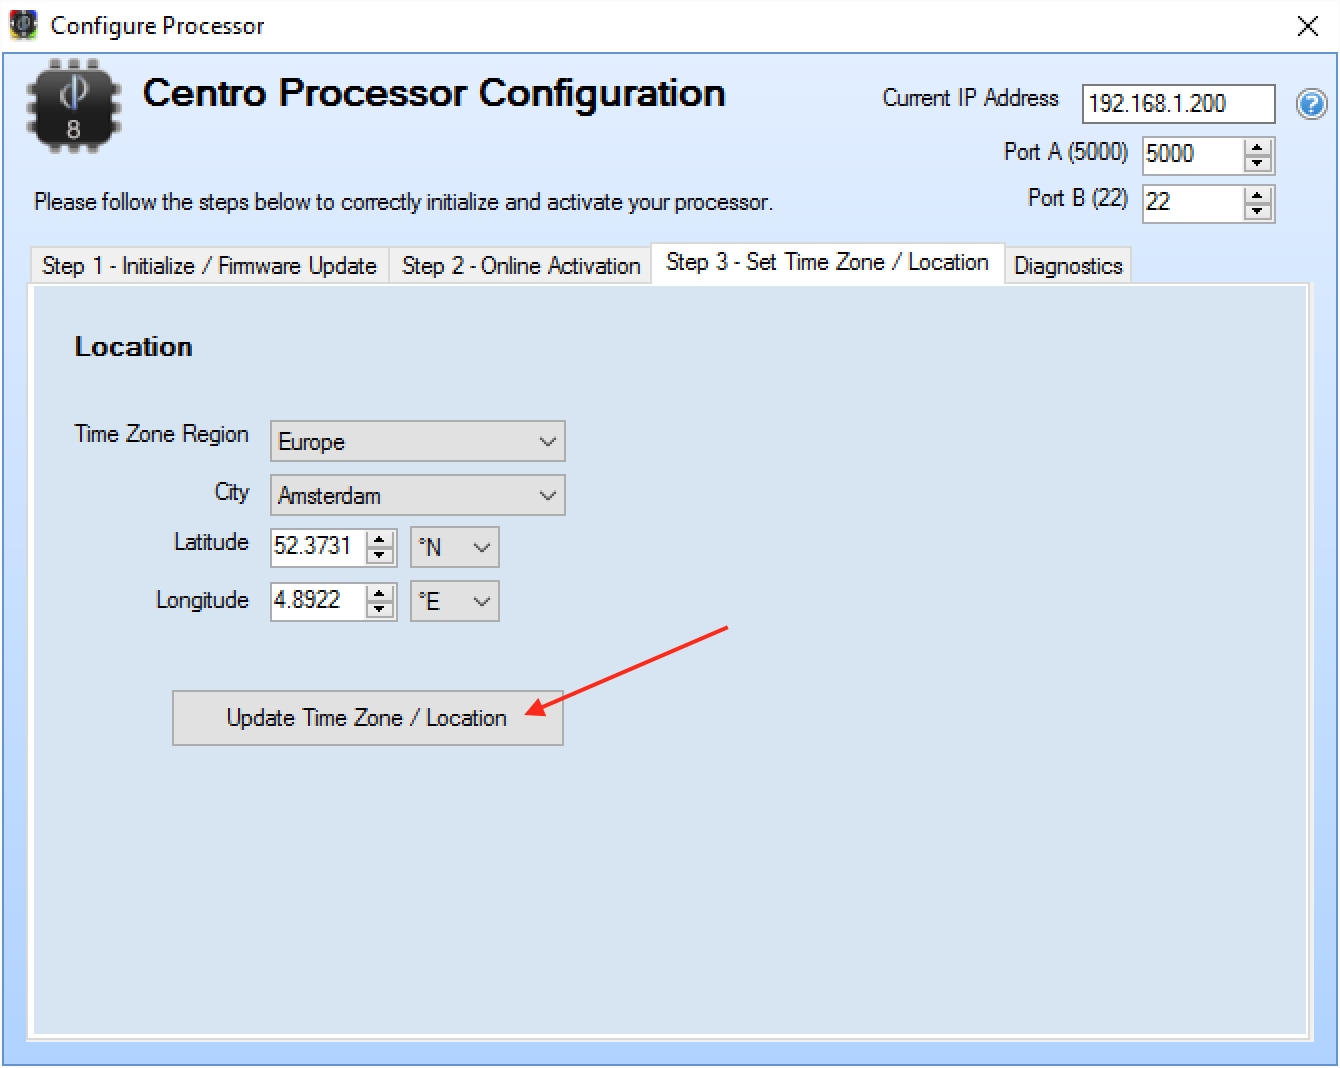
Step 3 - Locate
Finally, select the third tab and enter the location for the Centro-8. This is needed in order for the unit to calculate the sunset / sunrise times throughout the year. Select the timezone / region, and
enter the latitude / longitude of the unit, and then click Update Time Zone / Location:
Diagnostics / Shutdown
The Diagnostics tab has options for testing the relays / COM Port / IR operation, as well as options for rebooting or shutting down the processor. As a linux computer, we do not recommend simply removing power from the
device, instead you should shut down the unit using the options here, before disconnecting power.