Centro-C / CM Configuration
The Centro-C and Centro-CM configuration steps are identical.
The first step is to connect the unit to your network using a hard wired ethernet cable, and then connect the supplied power unit to the device. By default, the unit connects to the network via DHCP, so it will be given an IP address by your network DHCP server. The CentroControl app is capable of finding a Centro-C / CM on the network, however in cases where there are several units, or for best practice, you should assign a static IP address to the unit.
Centro-C / CM configuration tool
As the Centro-C / CM can be controlled via 3rd party control systems, there is a separate software tool to configure the units.
This can be downloaded via our cloud server at https://cloud.demopad.com - there is both a Mac and PC version of this software.
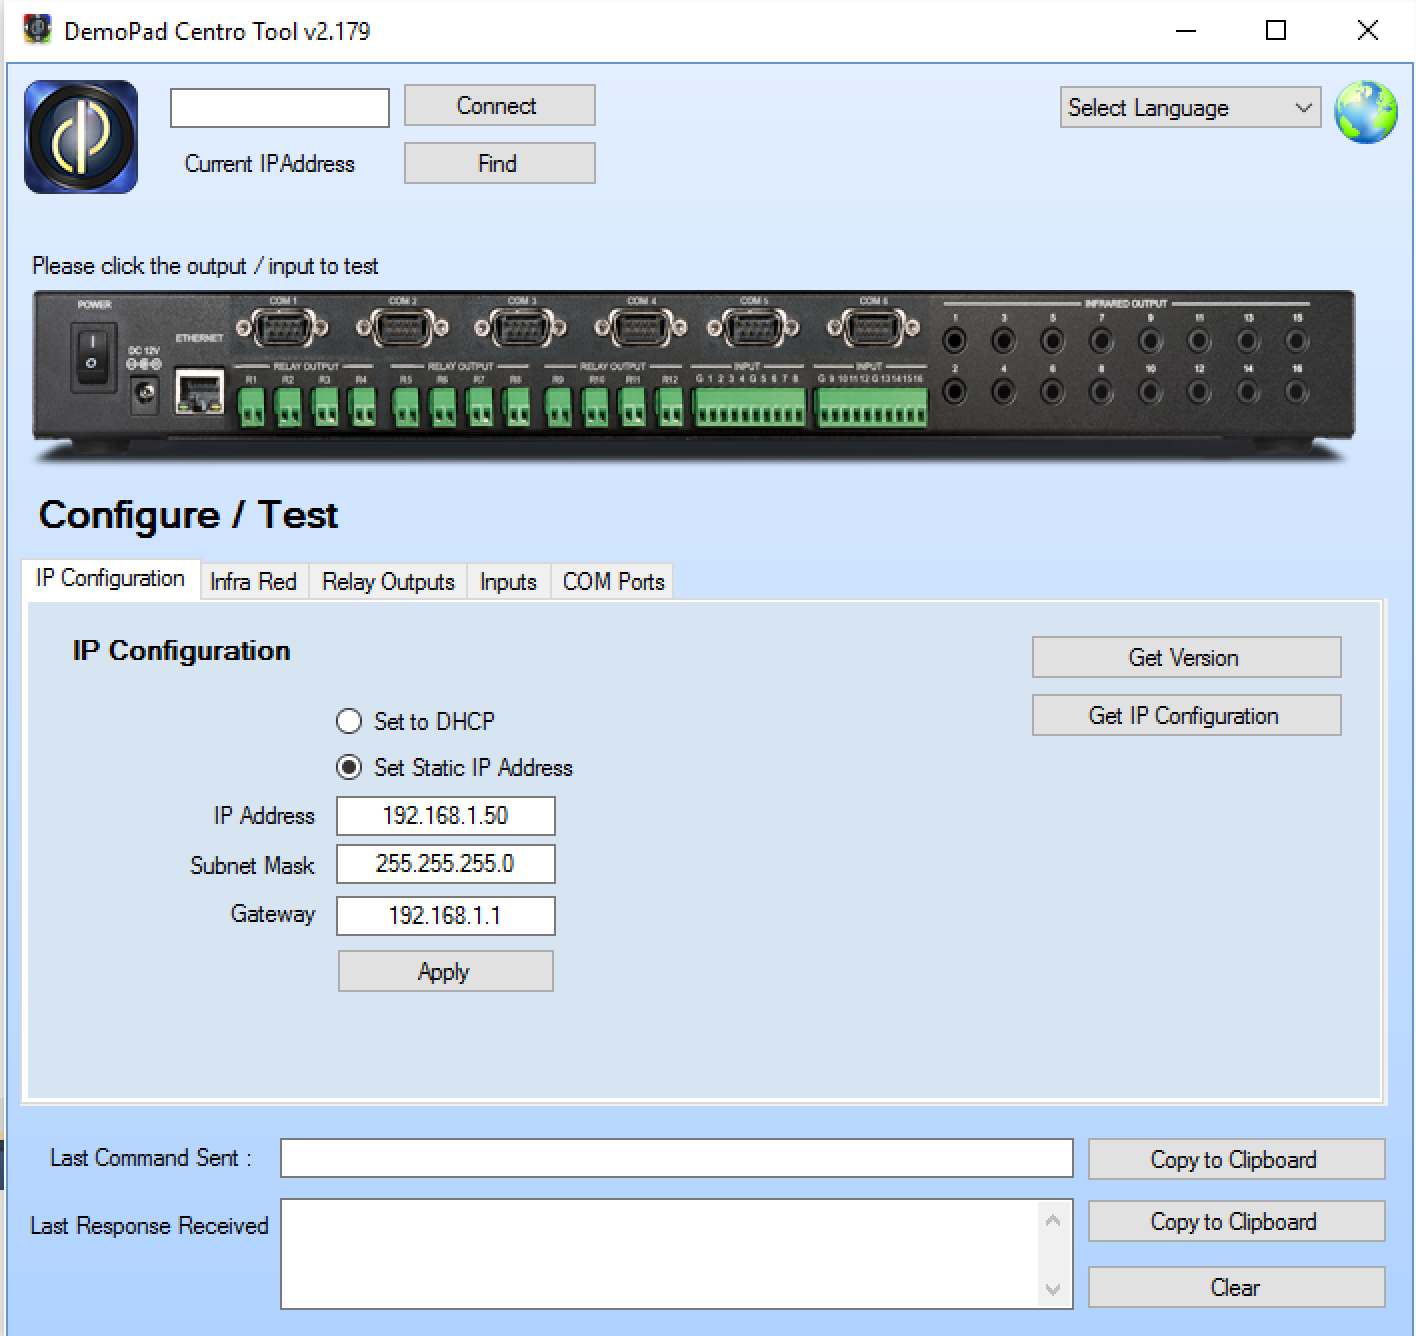
Once the software is installed & run, you will see the following screen:
Click on the Find option to scan the network for Centro-C / CM units. If any are found, they will be listed here and you can click Connect to establish a connection to them:
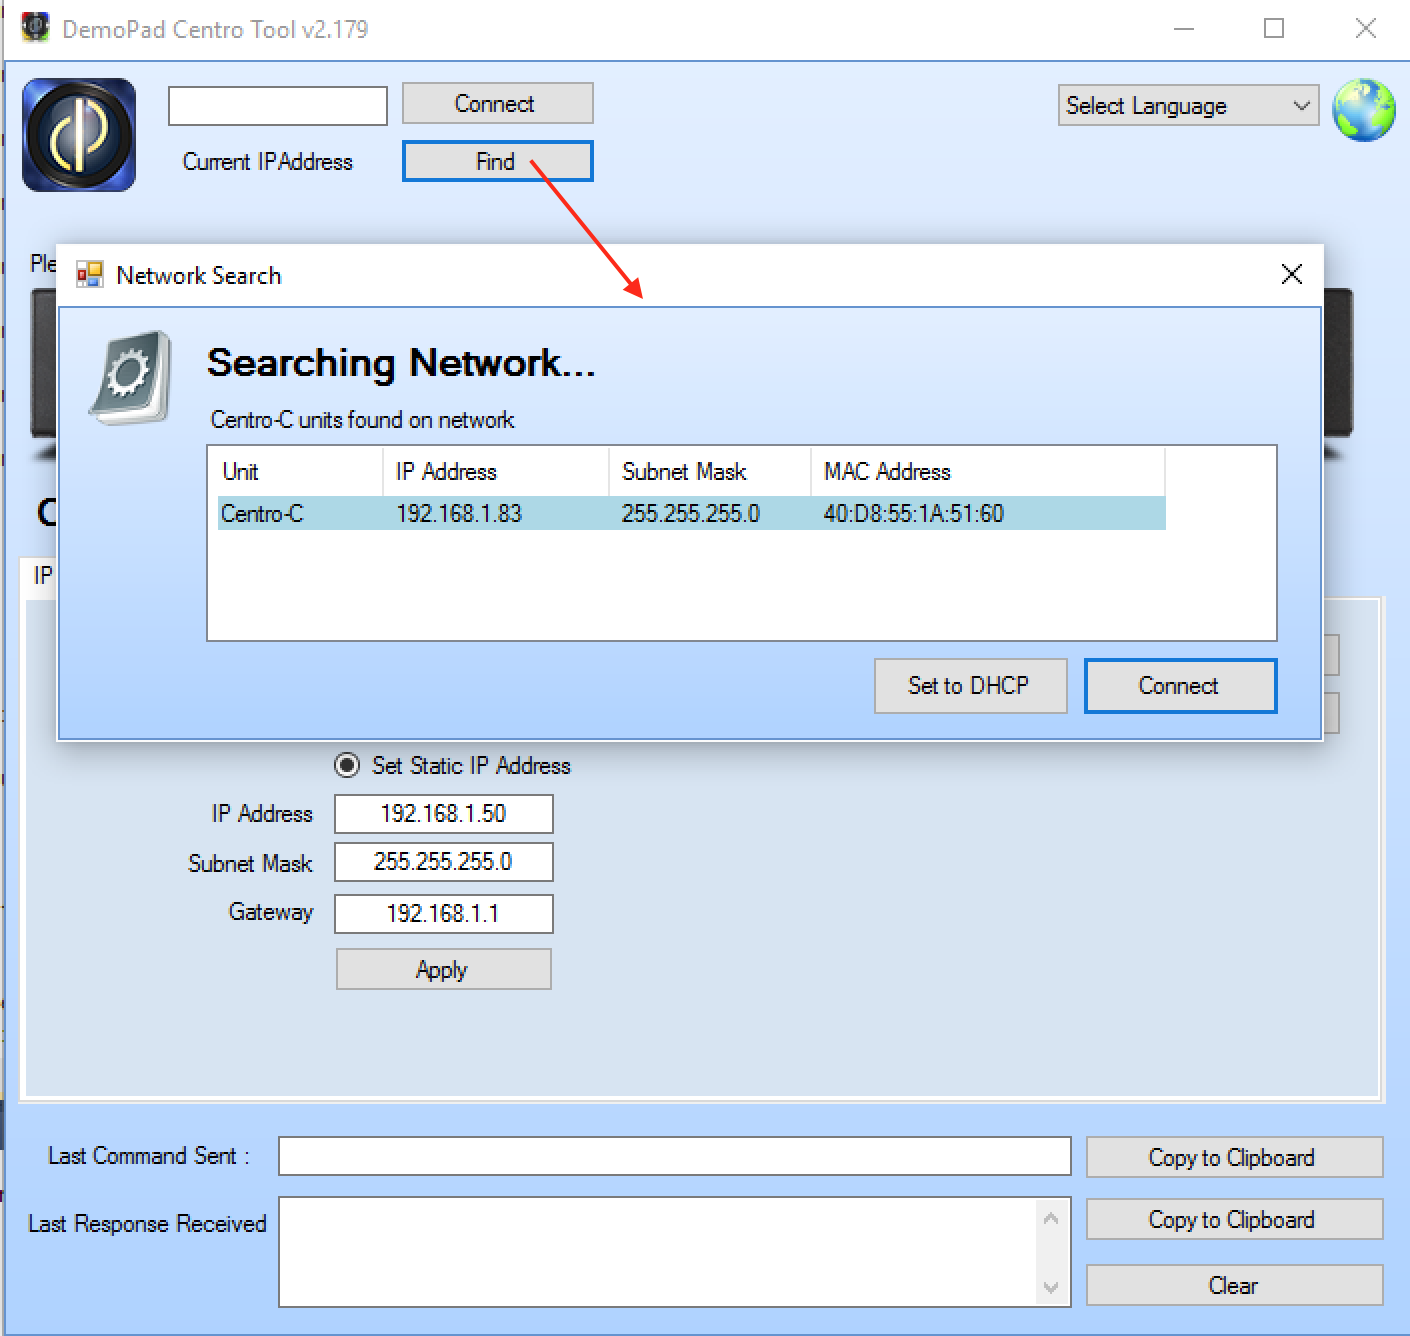
Note - if your computer is on a different subnet to the Centro, you will be unable to connect - in which case you should change your computer subnet to match, or use the Set to DHCP option to bring the Centro
onto the current DHCP assigned subnet first.
Setting IP Options
Once connected, you can send commands to change the IP network setup of the unit from the IP Configuration tab - either setting it to DHCP, or specifying an IP address, subnet mask & gateway and then pressing Apply. The unit will then
reboot with the new settings.
You can check the status of the network connection at any time using the Get IP Configuration option on the IP Configuration tab - the associated information will appear in the Last Response Received area.
Testing Relay Operation
Simply navigate to the Relay Outputs tab, select a relay, and use the Open Relay and Close Relay buttons to test the relay operation.
Testing Infra-Red Operation
Navigate to the Infra Red tab, select an IR output port, and enter an IR command in the text area provided, and click Convert and Send IR Command to send the command. You may enter an IR command in either
Pronto Raw (starting with '0000') or Global Cache (starting with 'sendir') formats.
Testing Inputs
Navigate to the Inputs tab, and notice the input icons. As the trigger changes, the crosses will change to green ticks. Making a connection from GND to one of the input numbers should trigger the input.
COM Ports
To configure the COM ports, navigate to the COM Ports tab and select a COM port. Clicking on Get COM Port Parameters will retrieve the current setting for that particular COM port, and you can then alter
the Baud Rate & Parity before clicking Set COM Port Parameters to apply the new settings.
You can then enter some data in the Send Data text area & click Send to transmit the COM data out of the specified port, and any incoming data will be shown in the Received Data area. You can choose
to view the data in ascii text or \x hexadecimal format.