Centro 8M
Configuring a Centro-8M
To configure a Centro-8M, please refer to the seperate documentation at http://centro8m.docs.demopad.com
Adding a Centro-8M
To add a Centro-8M processor to your project, simply select the New Centro-8M option:
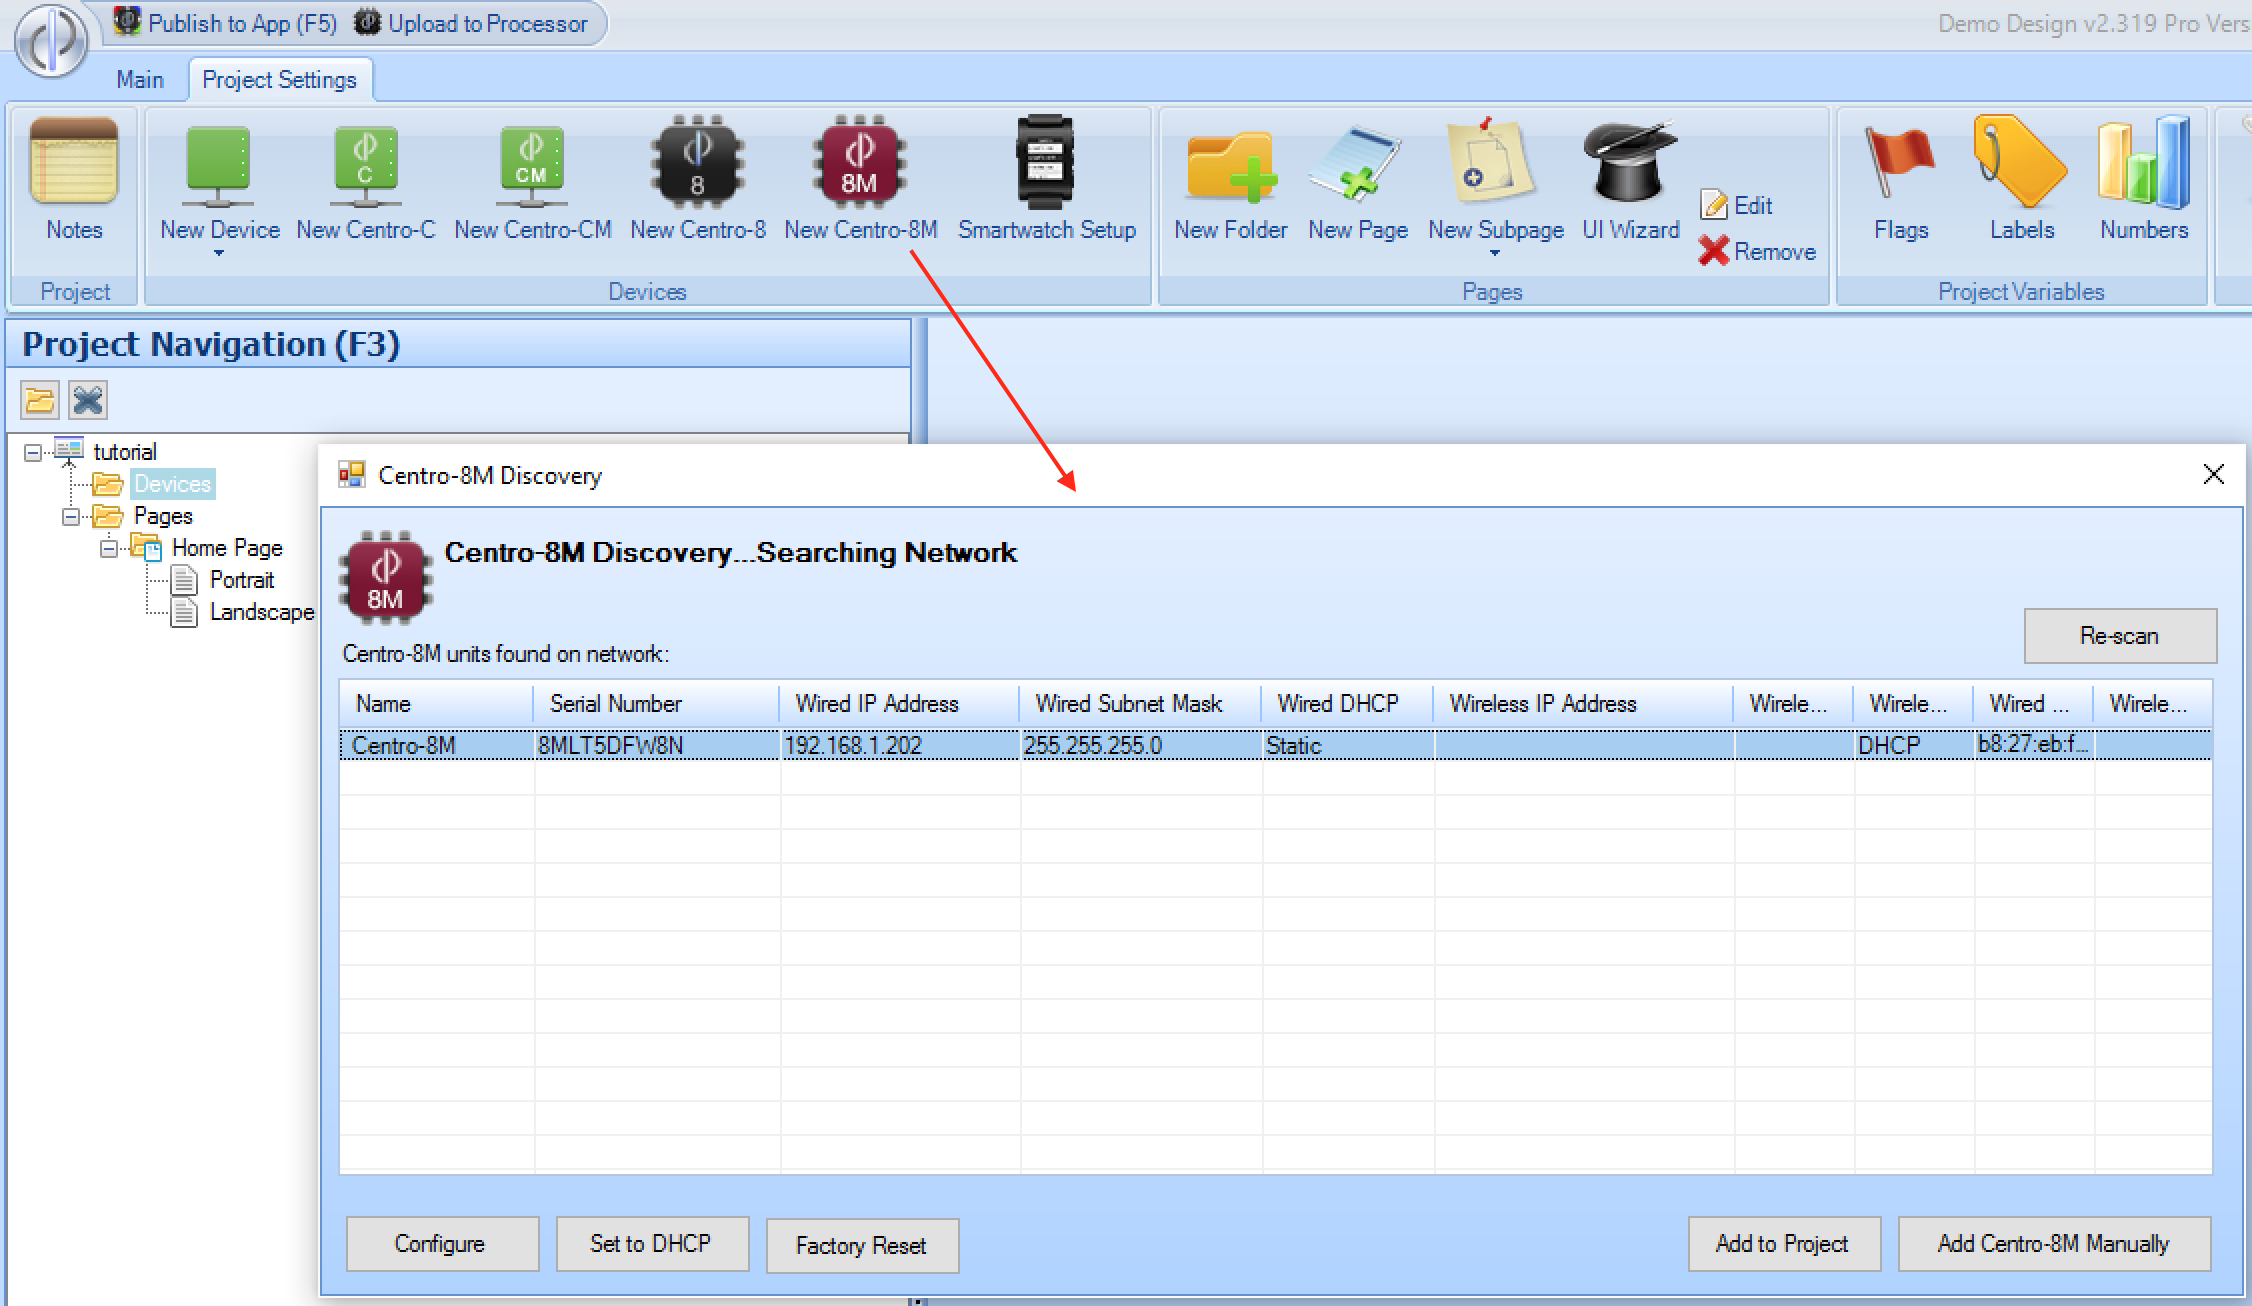
The software will scan the network & report any discovered Centro-8M units on the network You can then choose to Add to Project to add the Centro-8M. If you do not yet have the Centro-8M, or it does not show
up here, you can Add Centro-8M Manually
From this screen, you can also select discovered Centro-8M units and access the configuration web page, set back to DHCP, or perform a factory reset if instructed to do so by DemoPad Support.
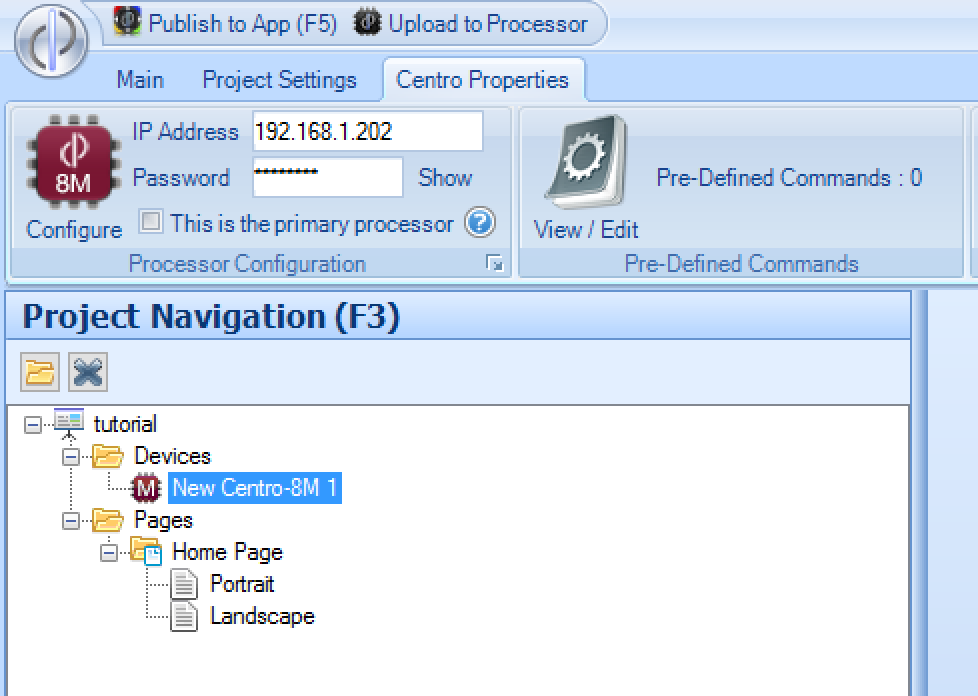
Next, enter the IP address (if not automatically entered) and installer password assigned to the unit. This is the password used to access the web configuration screens (default is 'password' though we strongly recommend this is changed)