Tutorial #3a - Single Room UI
In this tutorial we will begin generating a complete single room 'home cinema' solution using 3 sources, an AV receiver / amplifier, projector, and motorised screen:
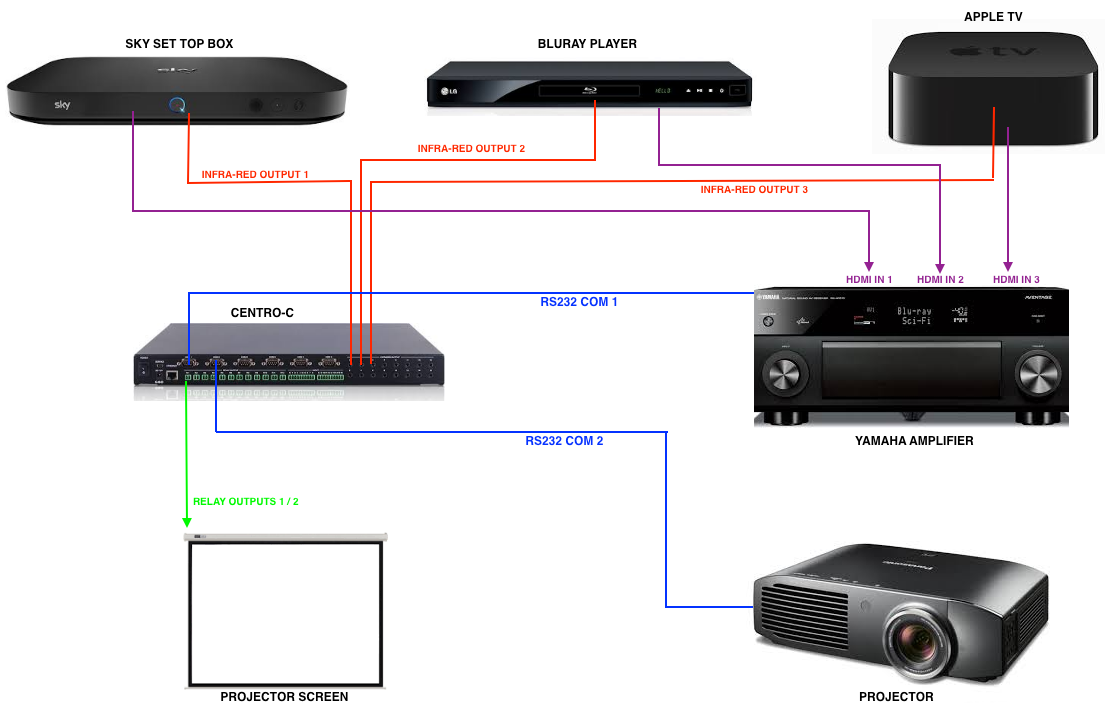
A DemoPad Centro-C IP gateway will provide control over the components via several infra-red outputs, RS232 COM port connections, and 2 relay outputs (up/down) for the motorised screen.
In this tutorial though, we will concern ourselves with the user interface only. Indeed, this is usually the approach one would take when designing projects, as it can be completed off-site, without necessarily requiring access to the physical equipment.
Create the Project
First create a new blank iPad project called
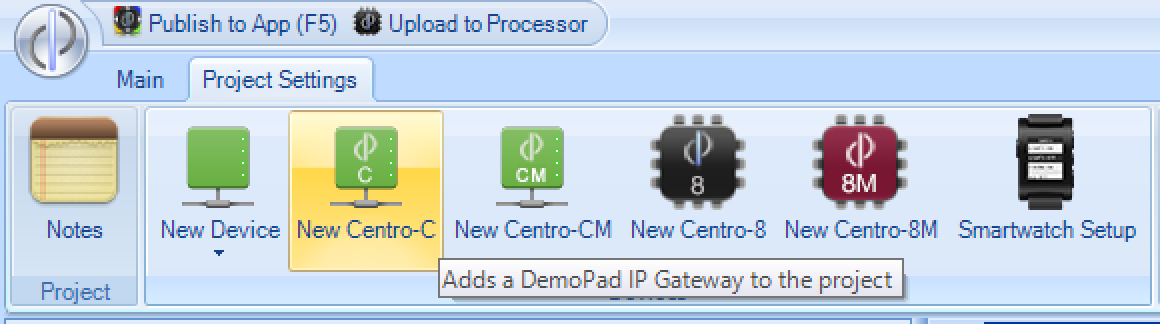
singleroomand save it somewhere on your computer (see Creating a Project)Next, add a Centro-C device to the project. This will be used in a later tutorial to control the equipment:
- Next, go to the
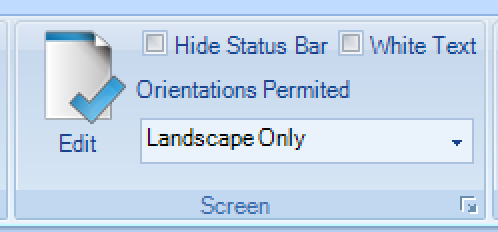
Project Settingstab and expand theScreenmenu. Then set theOrientations PermittedtoLandscape Only. This will prevent use of the portrait orientation on the device.
Creating the Splash Screen
It is common for projects to have an initial screen which is presented to the user when they launch the app. This might show your company logo, or an appropriate image relating to the project.
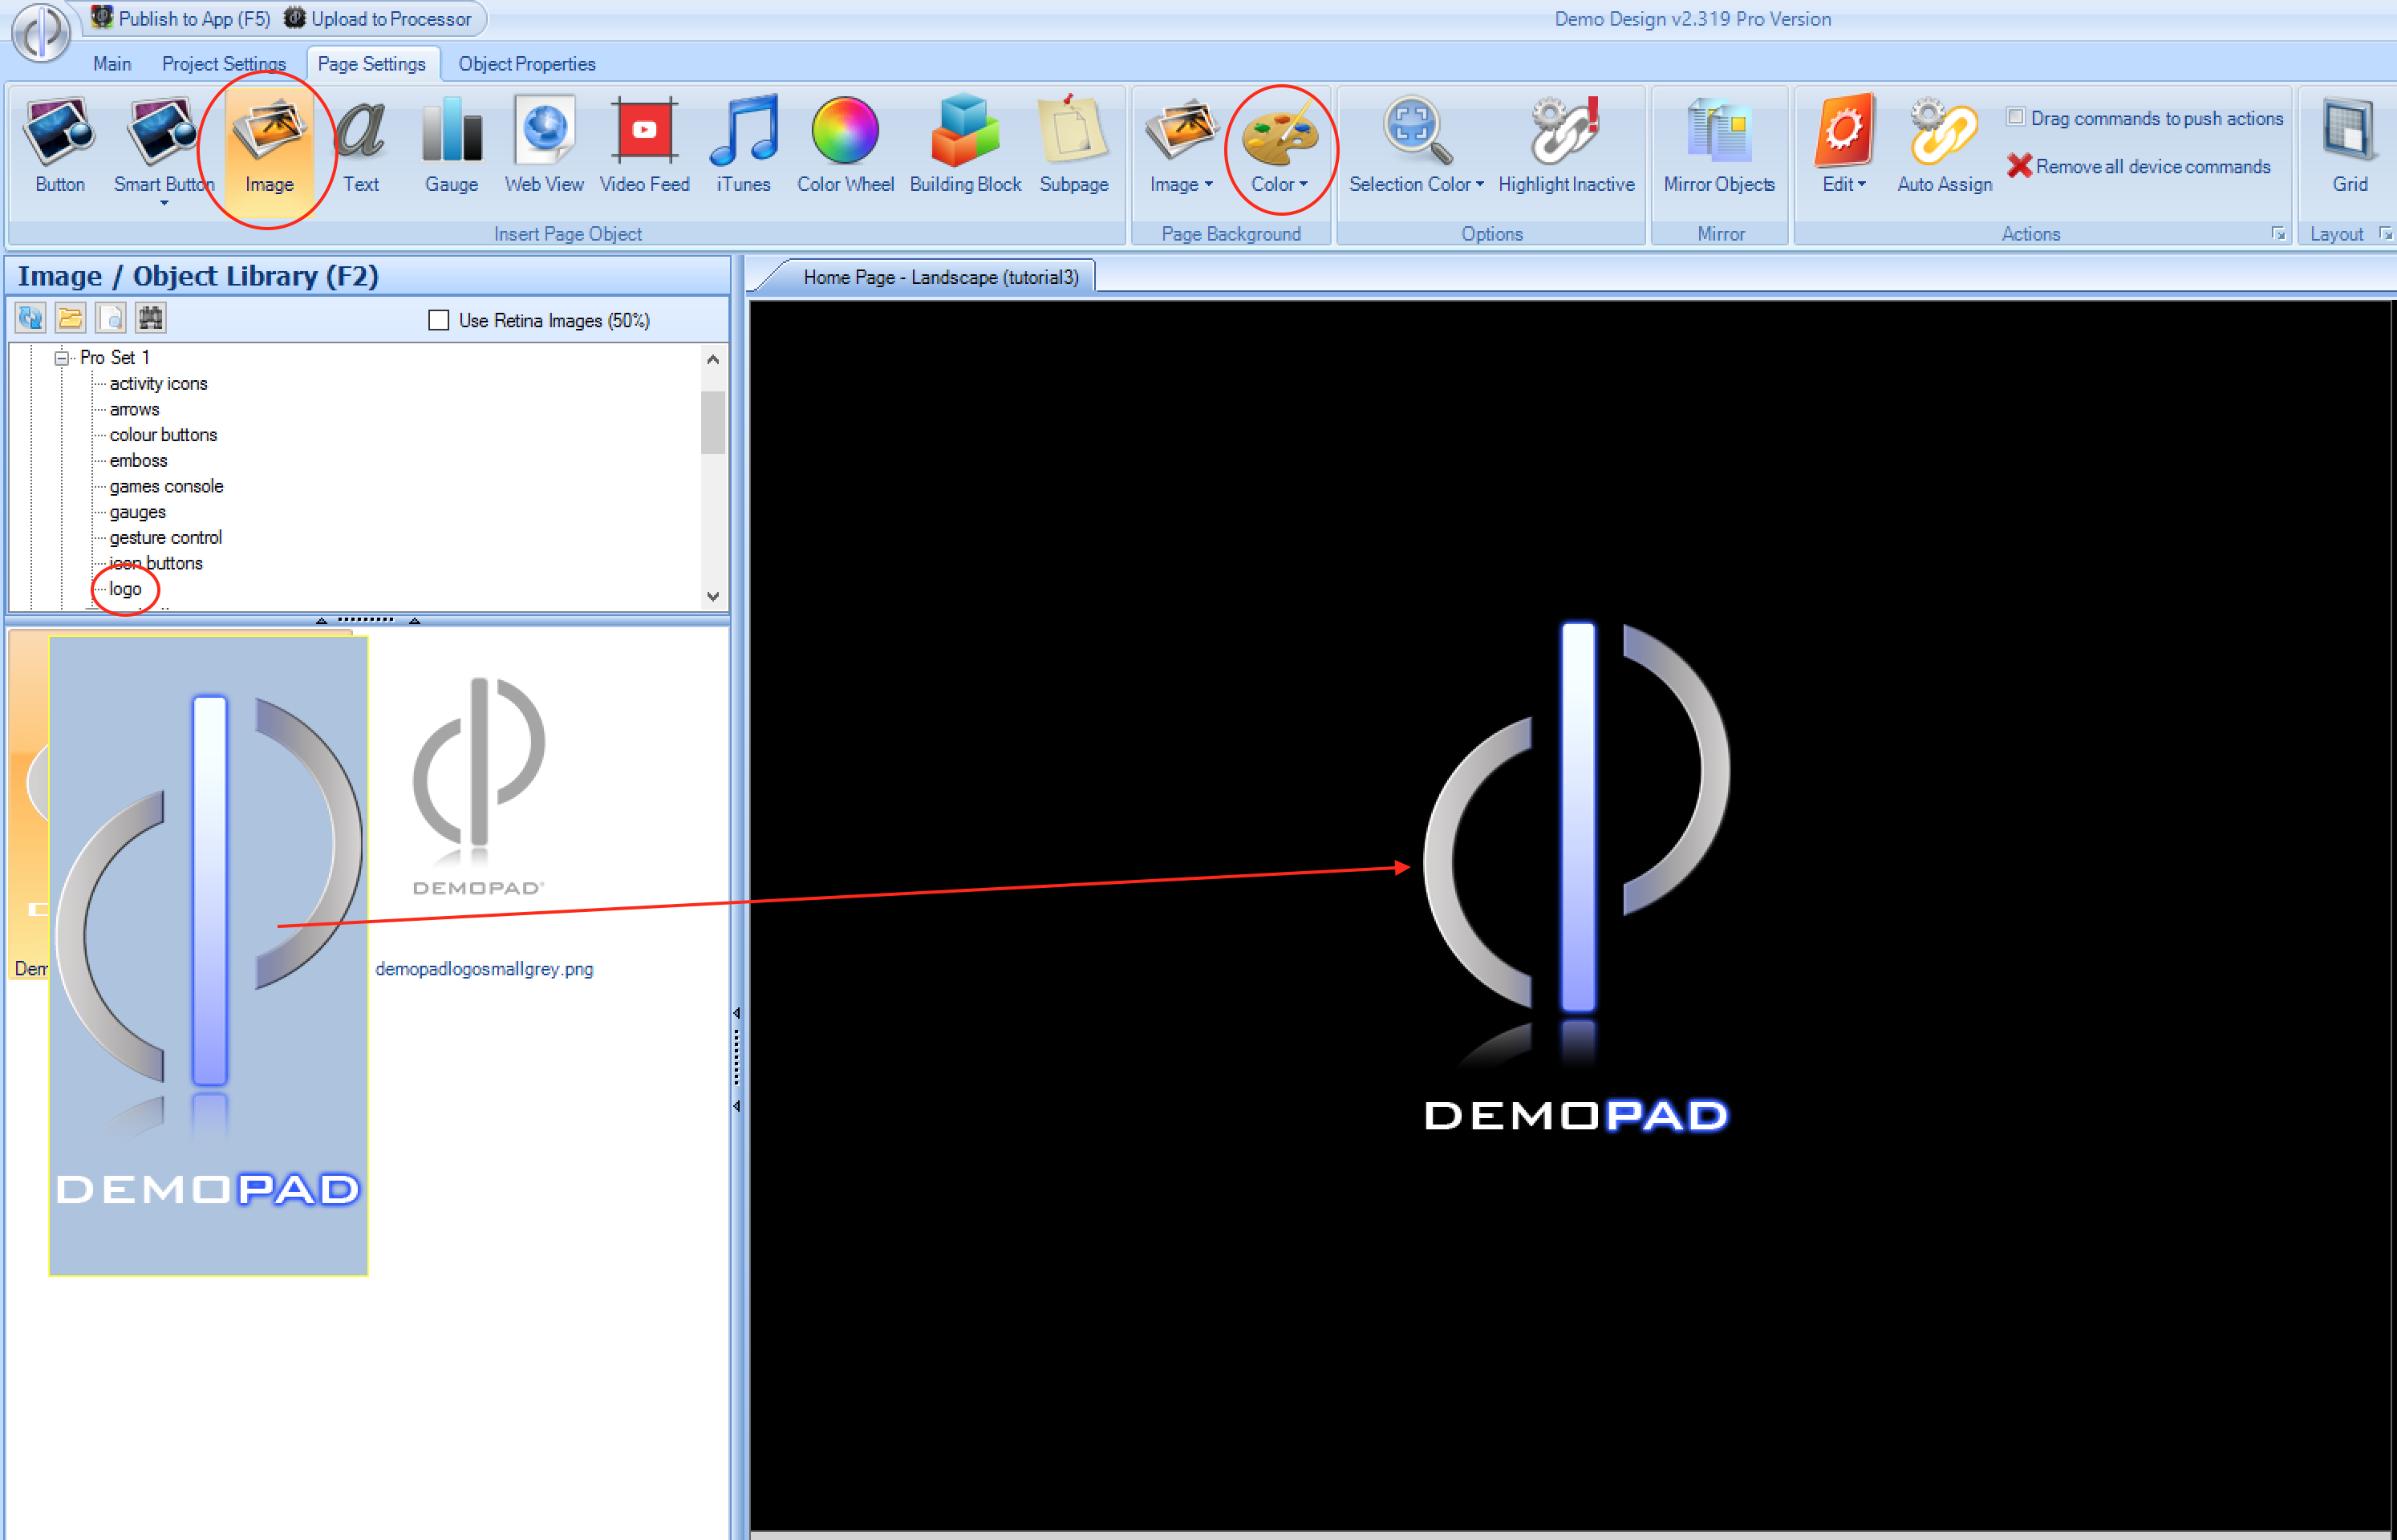
Click on the
Landscapeoption of theHome Pagefrom the tree view, and select a black background color using thePage Backgroundmenu option.Then choose the
Imageoption from theInsert Page Objectmenu on thePage Settingstab, and navigate to thePro Set 1\logodirectory, and drag on the DemoPad logo to the center of the screen:
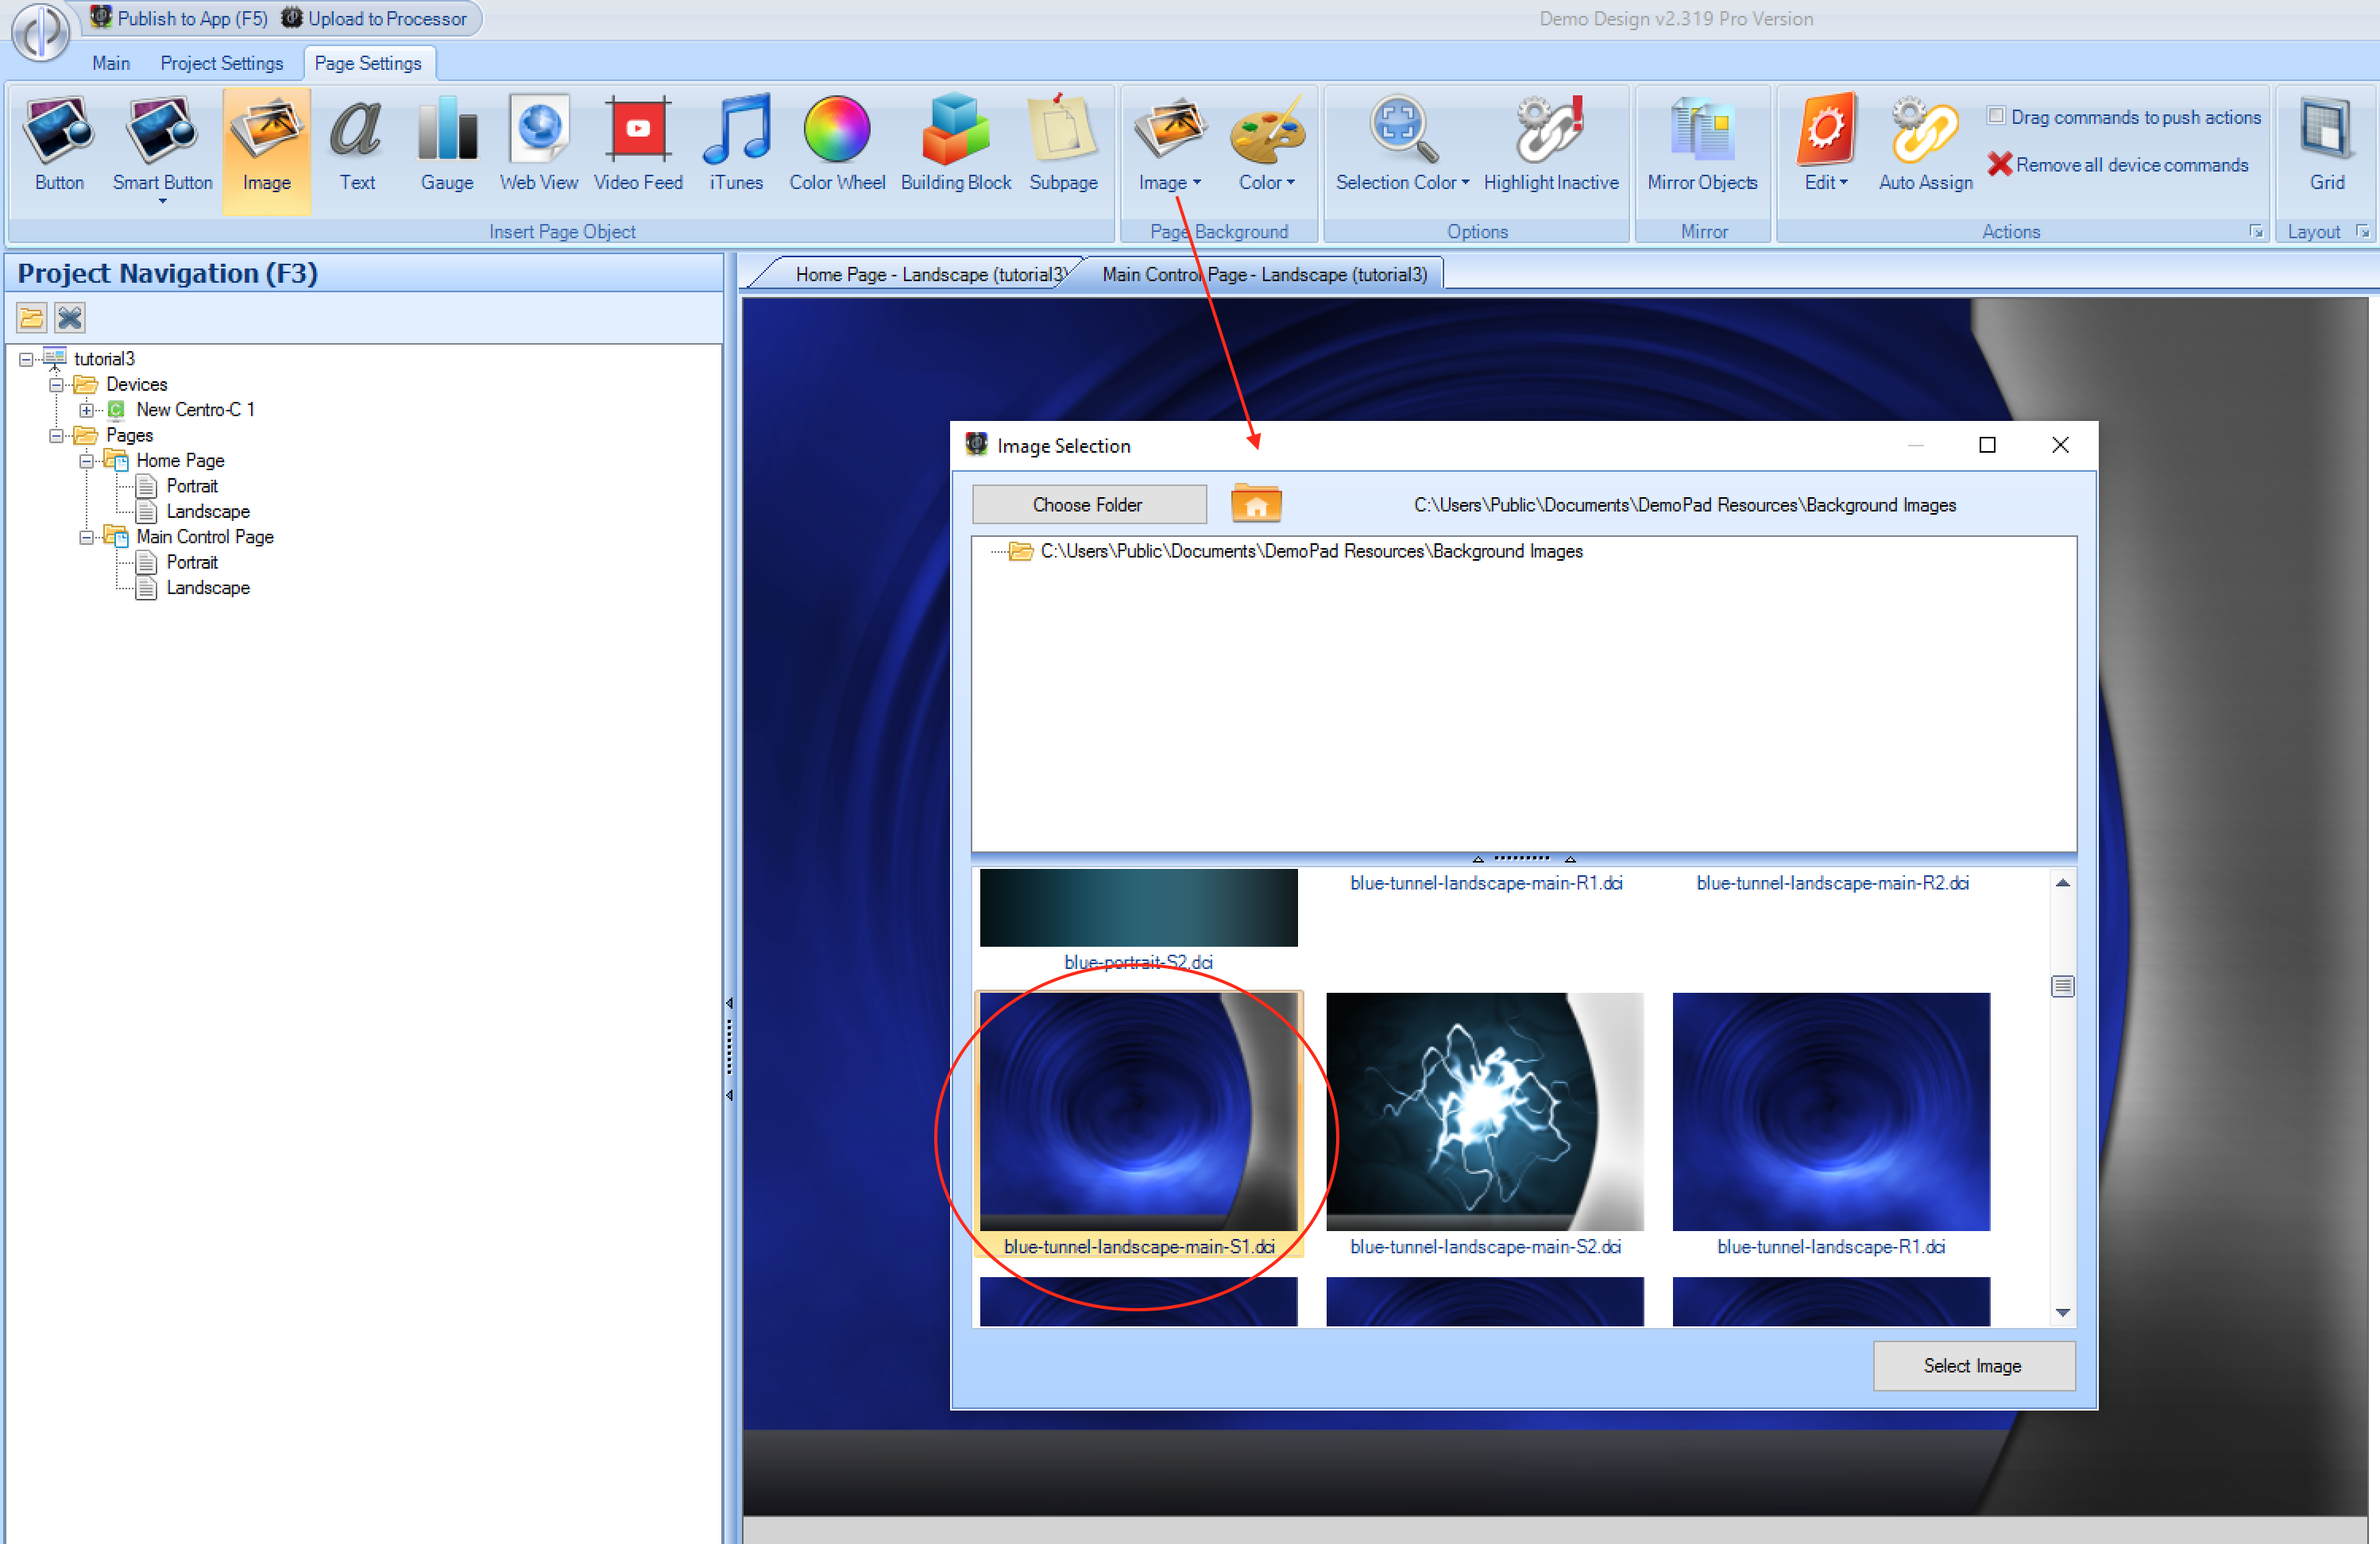
Creating the Main Control Page
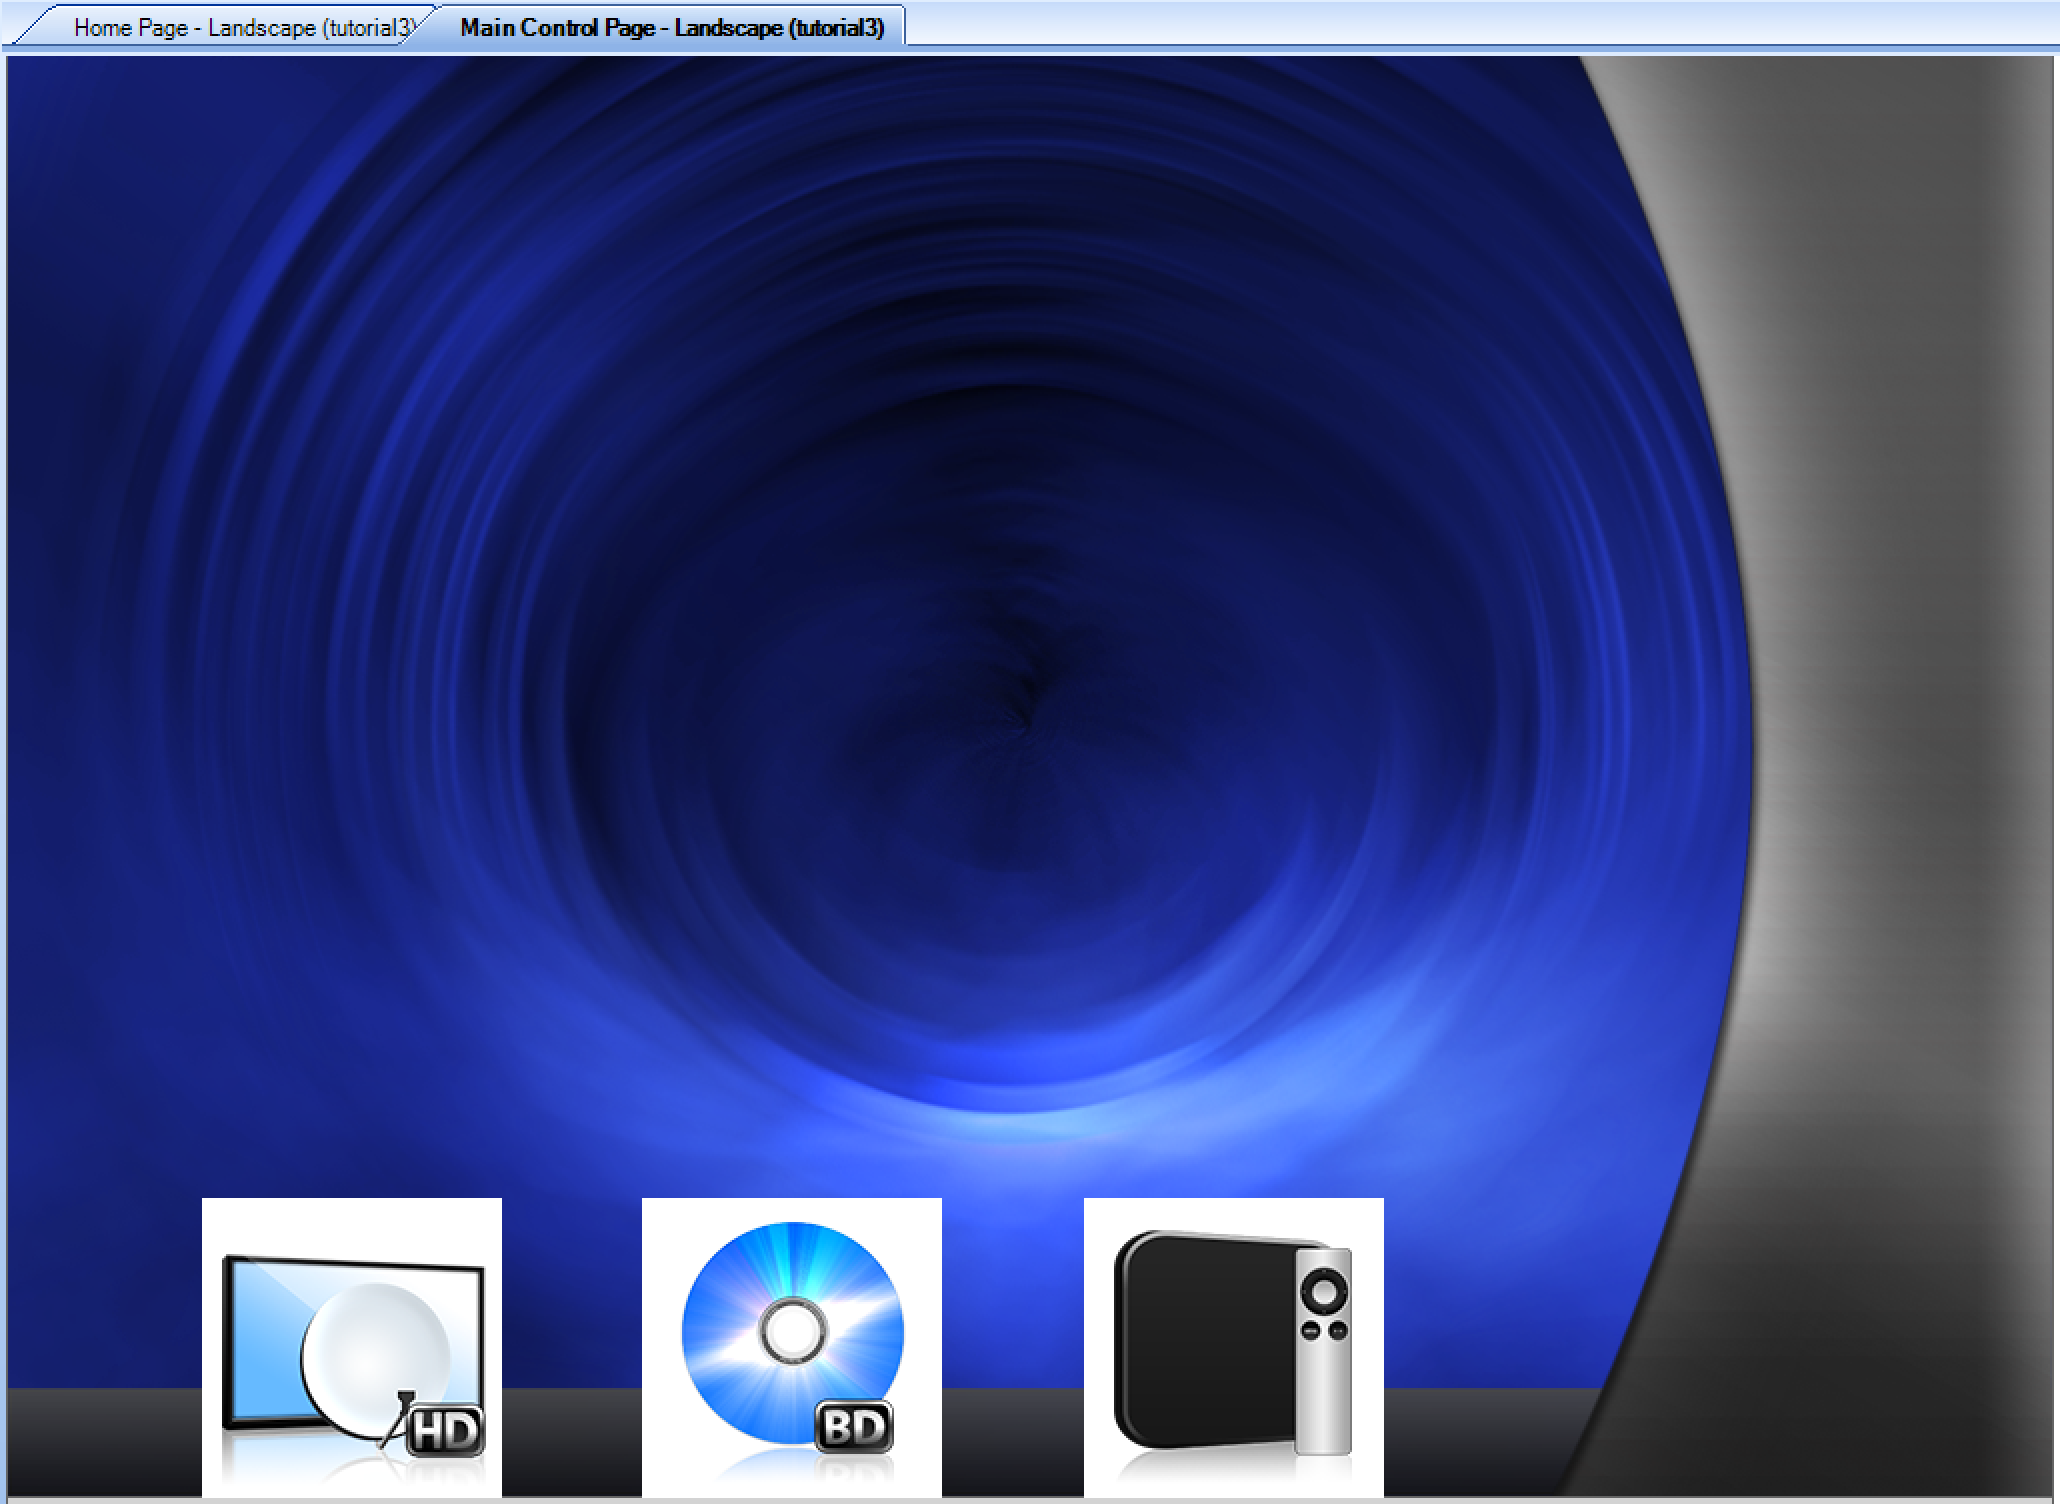
* Next create a new page called Main Control Page (see Adding a Page). Click on the Landscape icon from the navigation tree and set a background image for that page using the Choose Image with Preview option and selecting the image below:
Navigation to the Main Control Page
Now that we have the initial logo screen and the main control page, we need the app to jump to the main control page automatically after a few seconds of the app loading. This is done using a Page Load Action
on the Home Page:
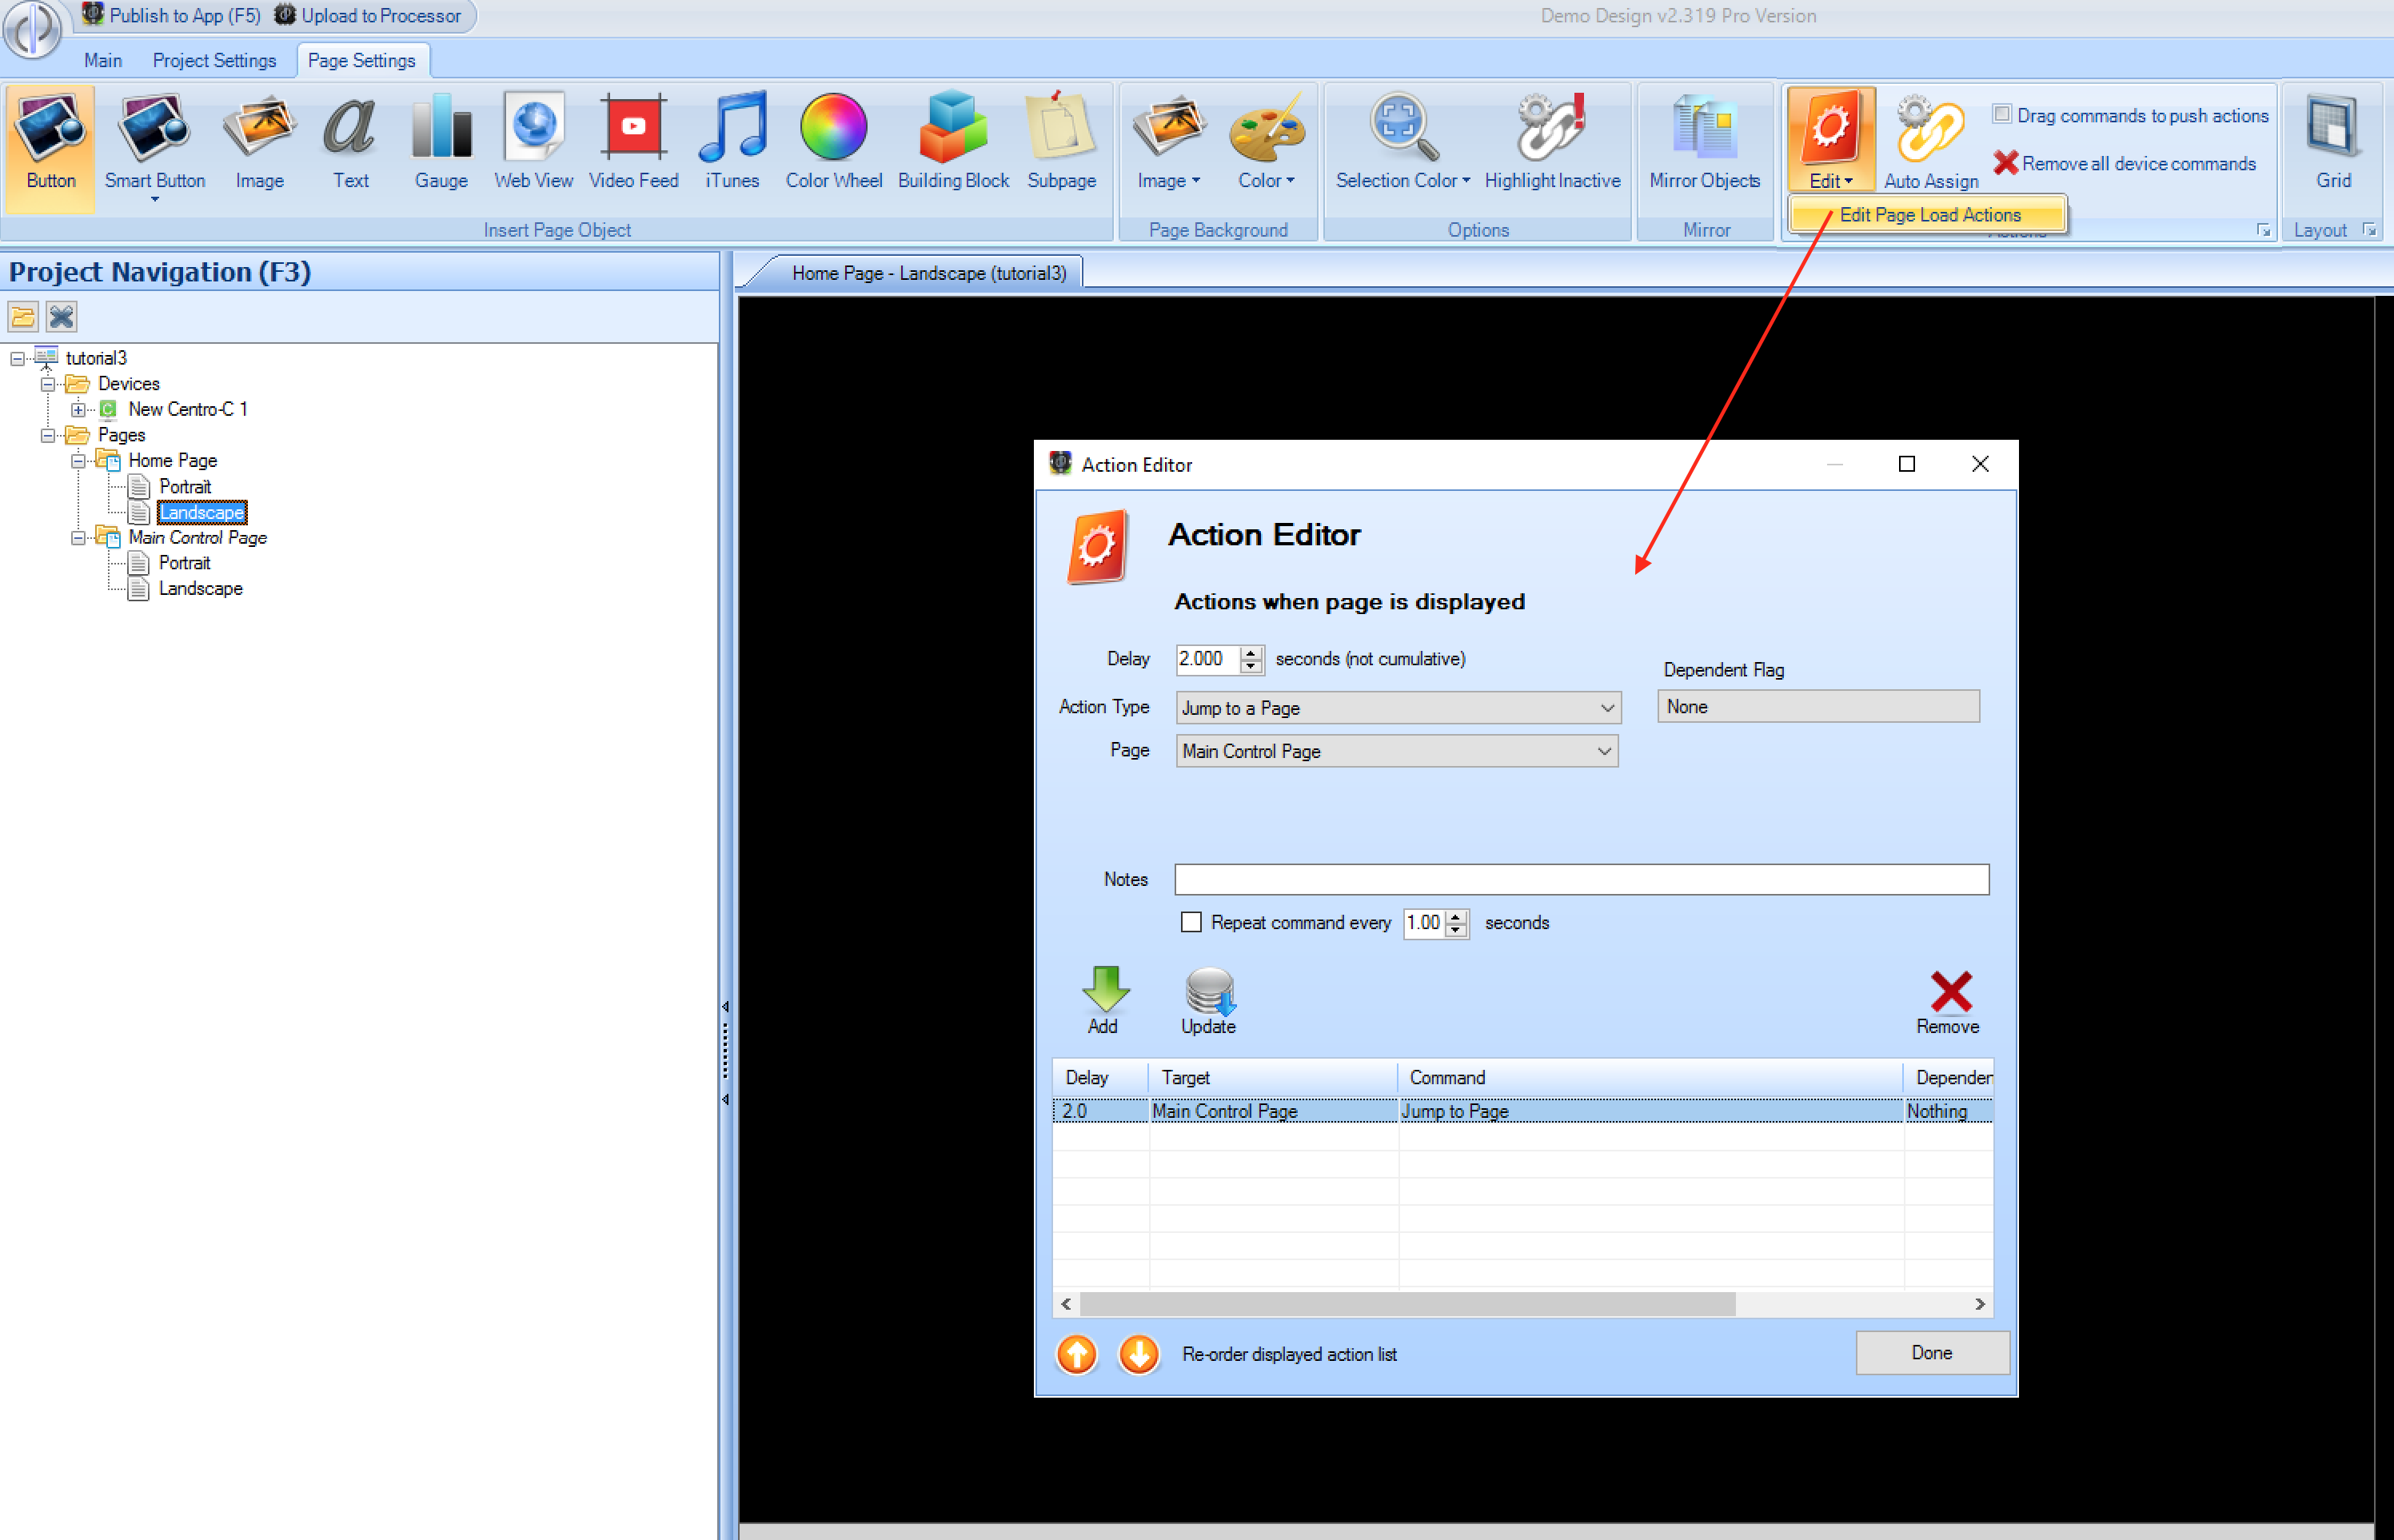
If you were to upload the project at this point, you would see the black screen with the logo for 2 seconds, before the app jumped to the main control page with the blue background.
Source Selection Buttons
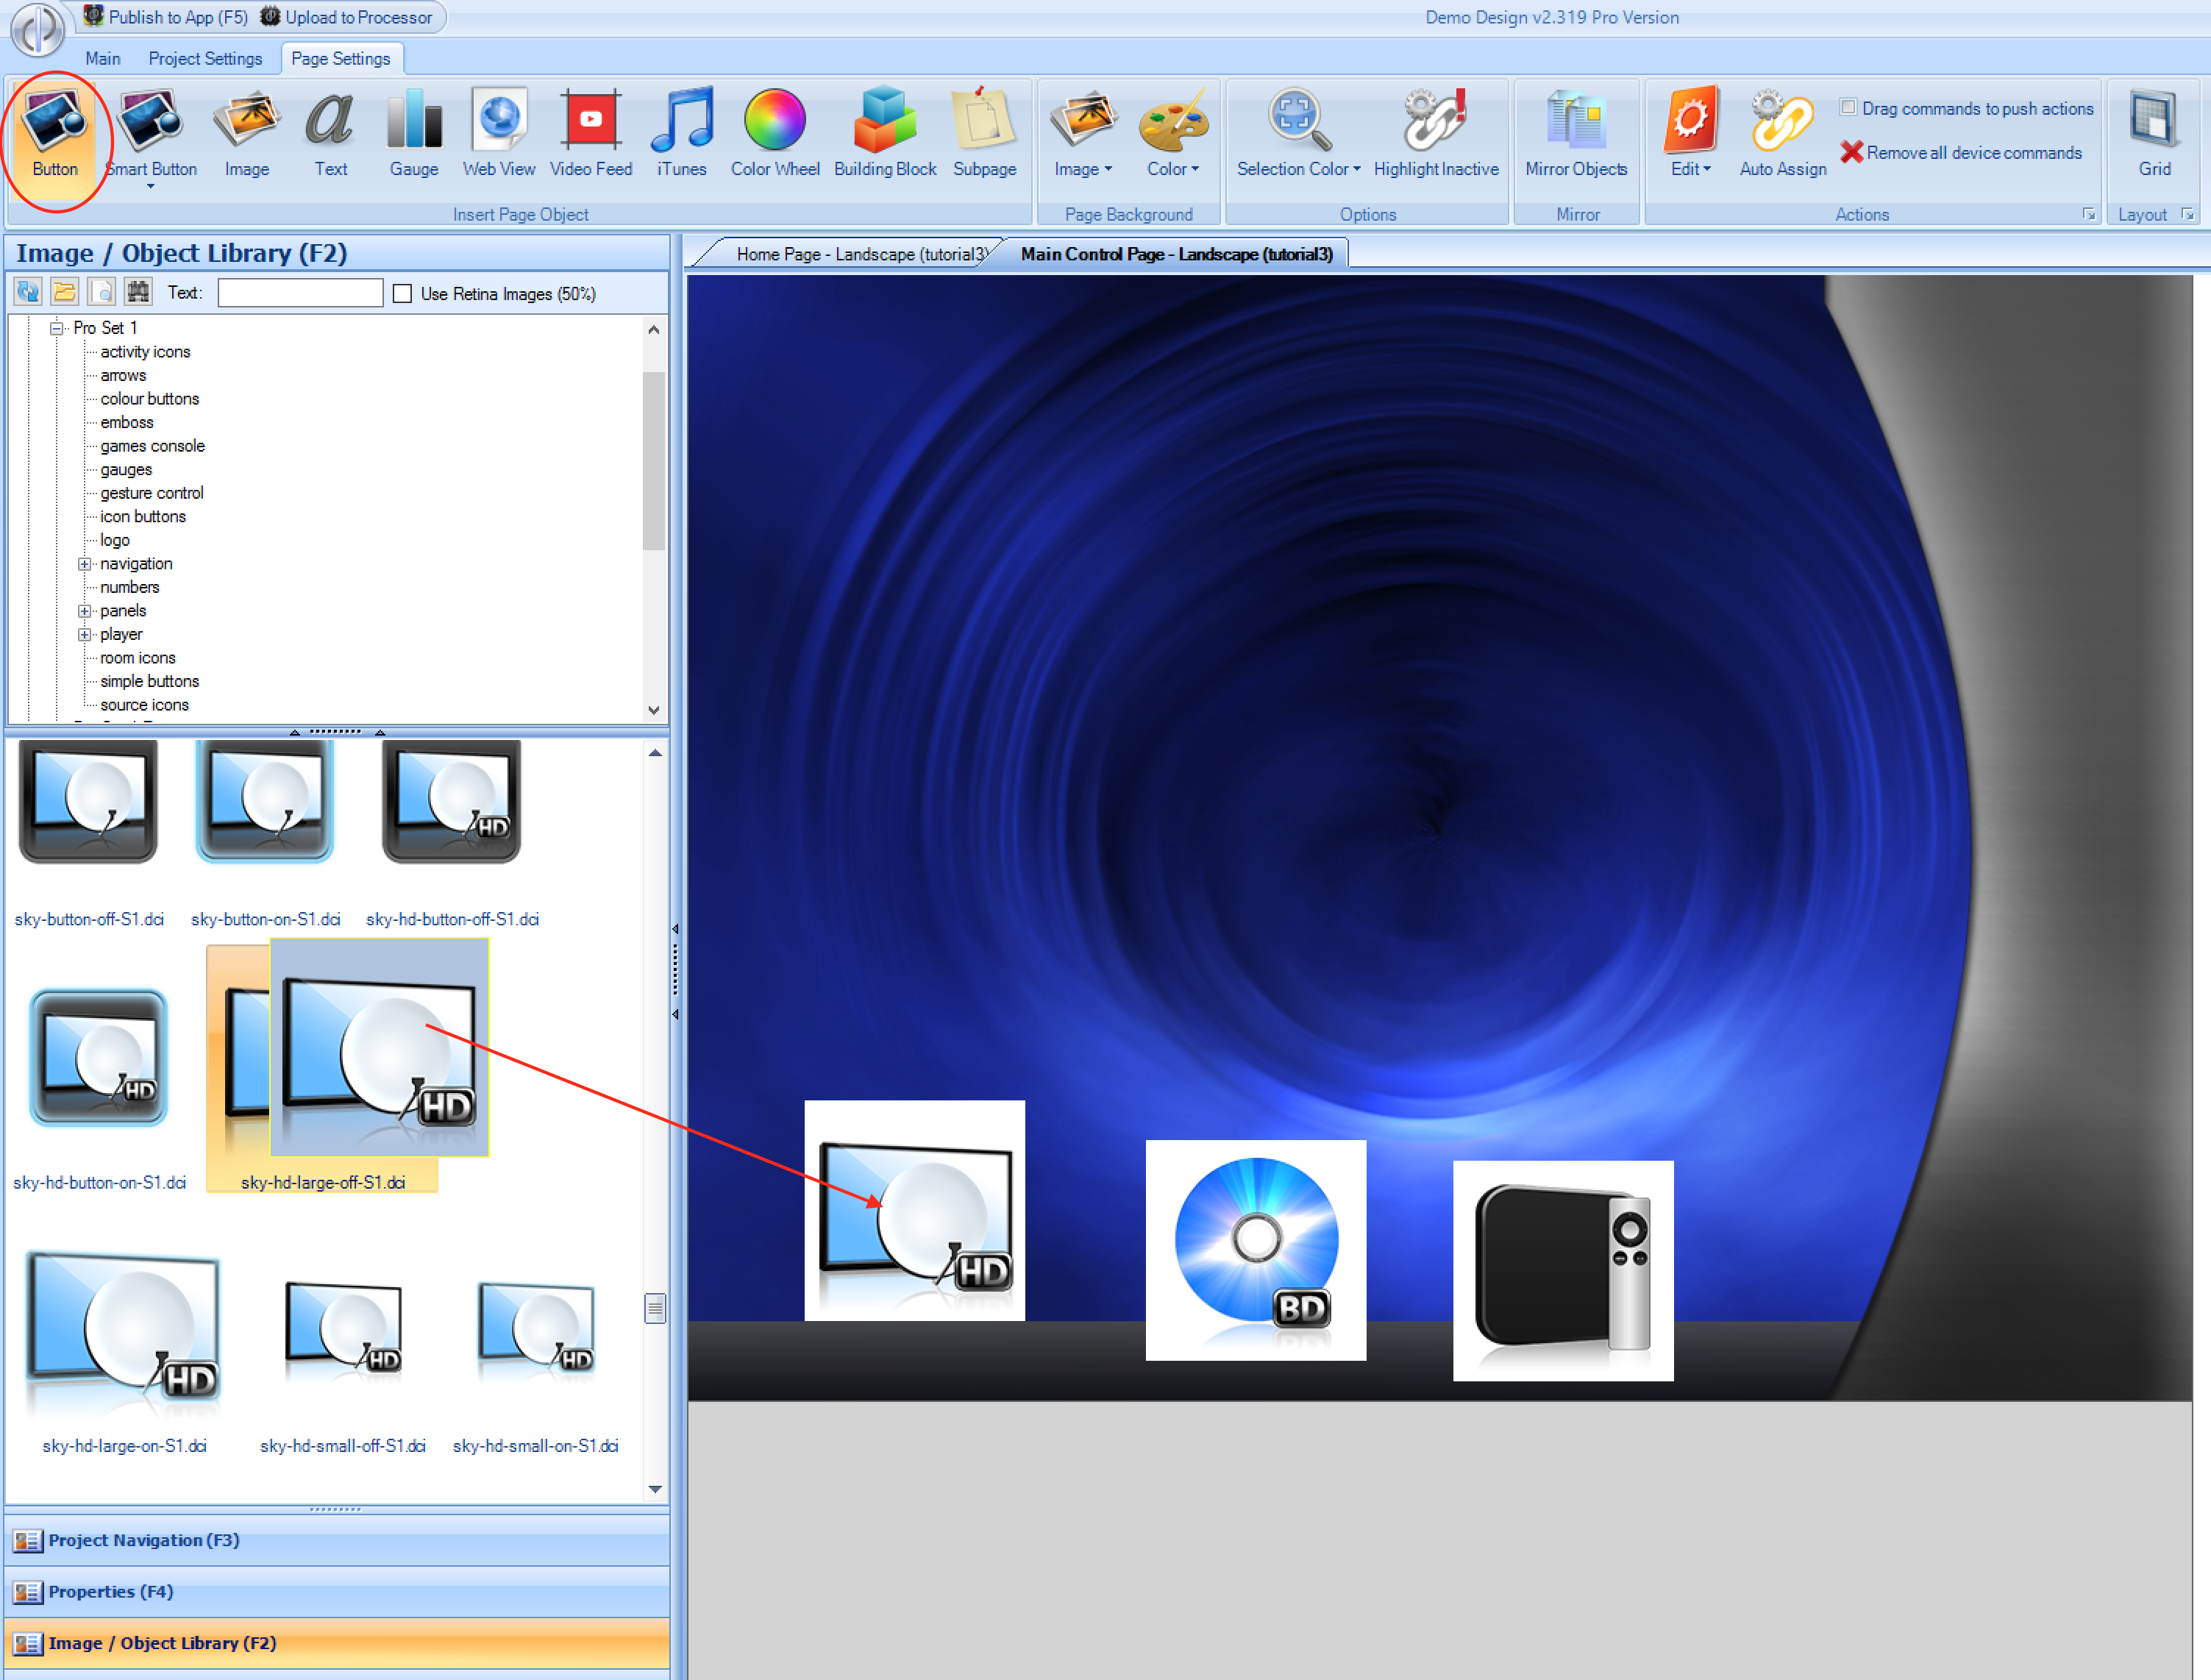
- Next, on the main control page, we want to create 3 buttons - one for each source, for the user to select. We want to set them up such that pressing the button makes it highlight.
If you are using the professional version of the software you can use a Smart Button to quickly generate these buttons by dragging on a button and selecting / creating a flag. If you are using
the standard version of the software, this will need to be done manually:
Add Source Selection Buttons
Add 3 buttons (see Adding Buttons), one for each source. We recommend you use the Pro Set 1\Source Icons graphics as shown:
If you add a button by mistake, you can single click it and press the delete / backspace key to remove it from the page.
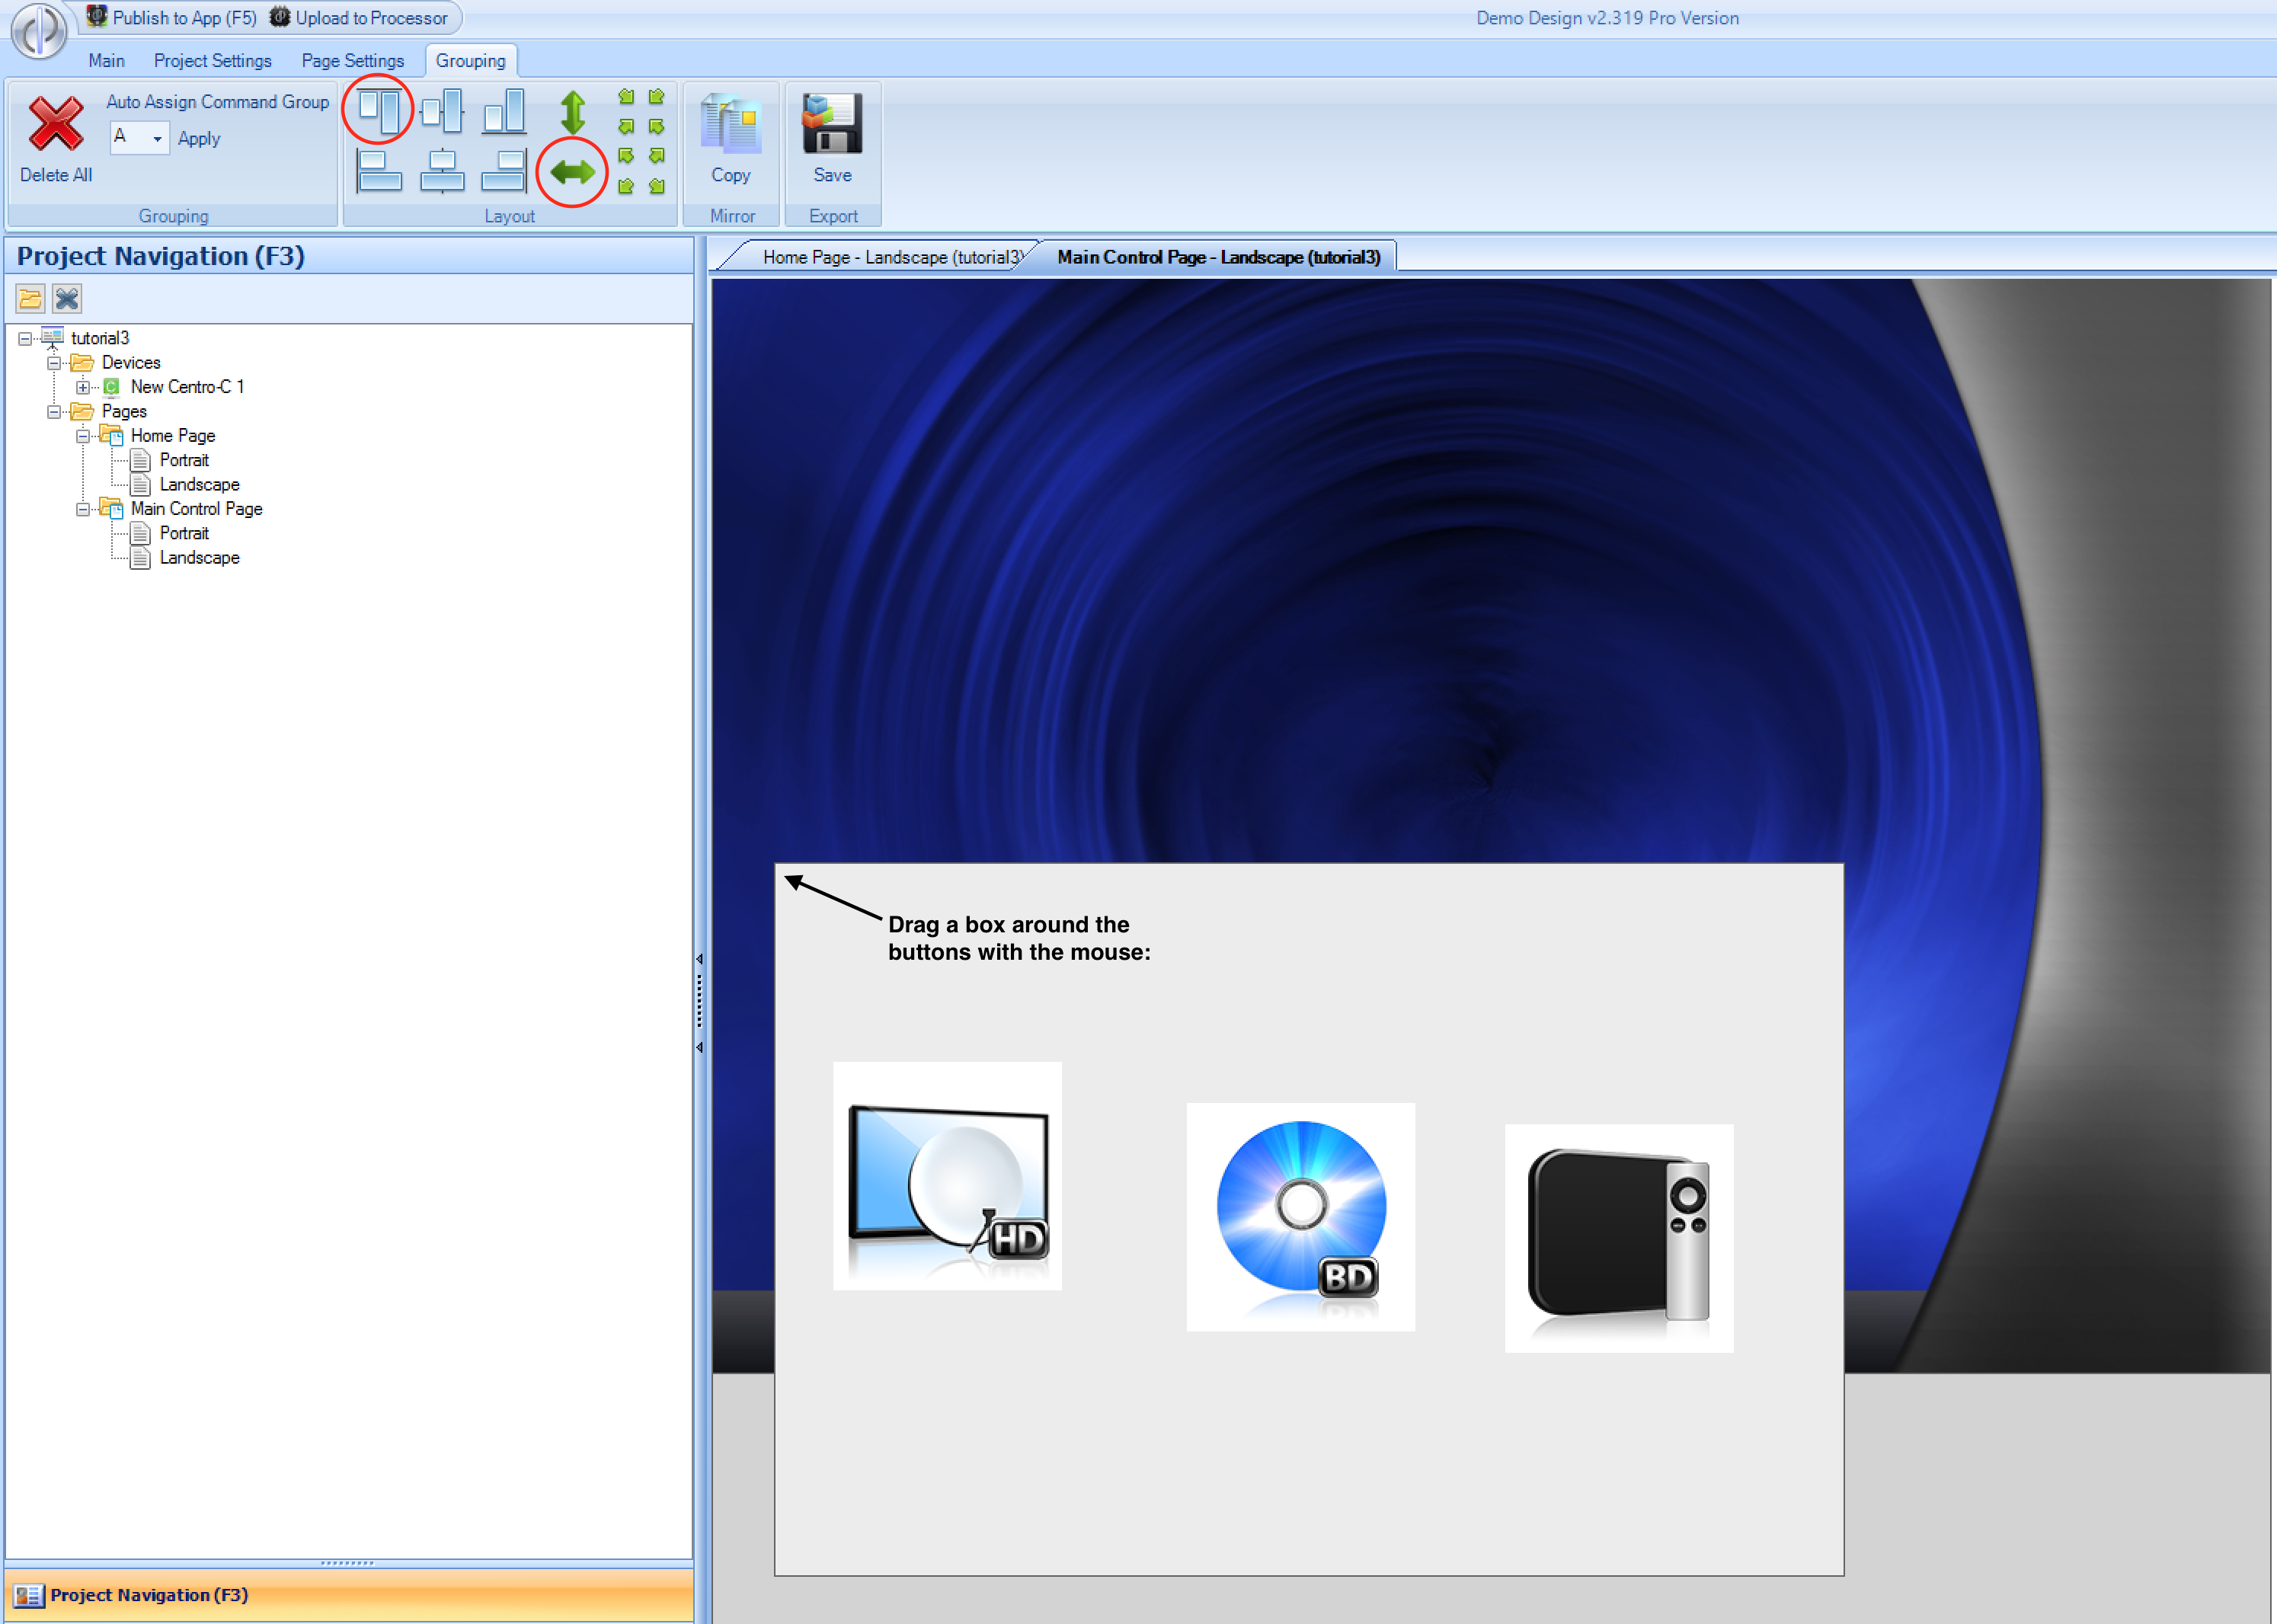
Align Buttons
- Now that we have our 3 buttons, we want to align them and space them out evenly. Left click and drag your mouse completely around all of them to select them (or
Control-clickeach button), and then with the 3 buttons selected choose theAlign TopandSpace Evenly Horizontallyoptions from theGroupingmenu which appears:
Once the buttons are aligned, click and drag them all with the mouse so that they are moved to the bottom of the page:
Highlight Source Buttons
- We now want to associate an alternate highlight image with the button (see Altering Buttons) and link that image to a Flag. Click each button in turn, and select a blue glow version of the button as the highlight image, and
create a flag for each button which determines when the blue glow image is shown. In the example below, the flags are called
Source1Selected,Source2SelectedandSource3Selected:
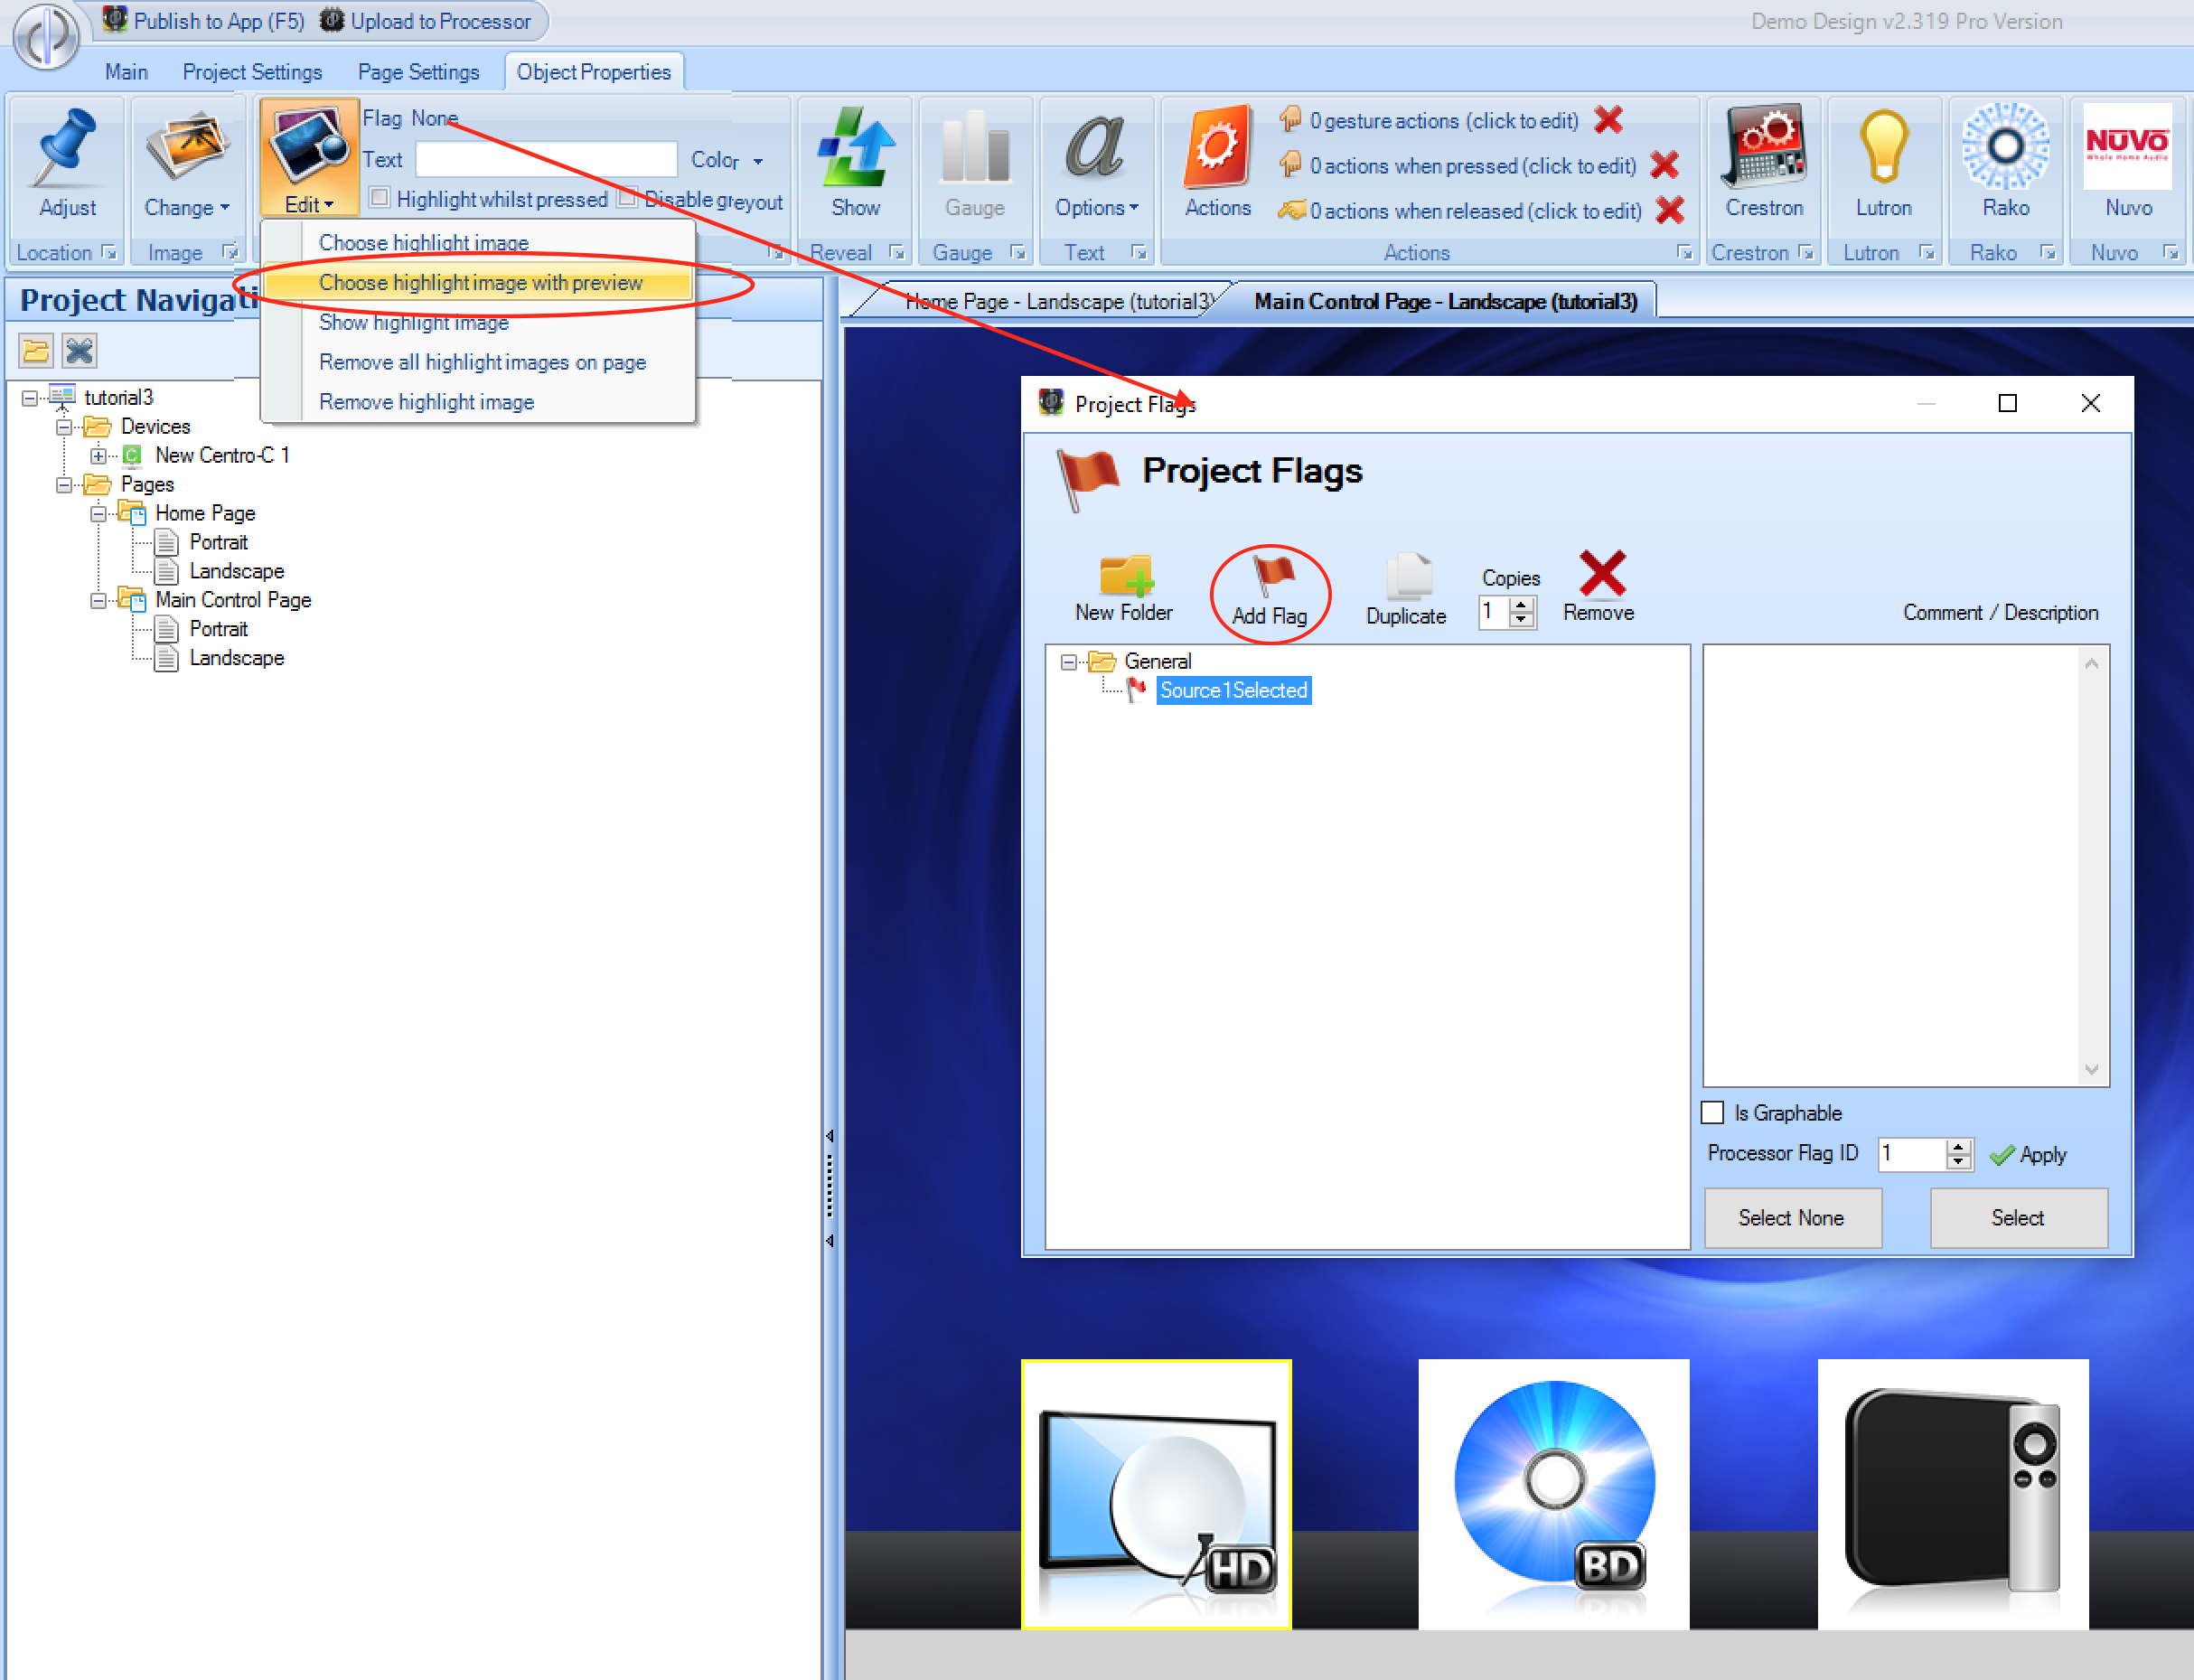
Set Source Selection Flags
- Now that each button has an alternate highlight image, and a highlight flag associated with it, we need to actually set the flags when the user presses the buttons, to put them in the highlighted state. To do this,
double click each button to enter the released action editor, and set the associated flag to
Exclusively ON: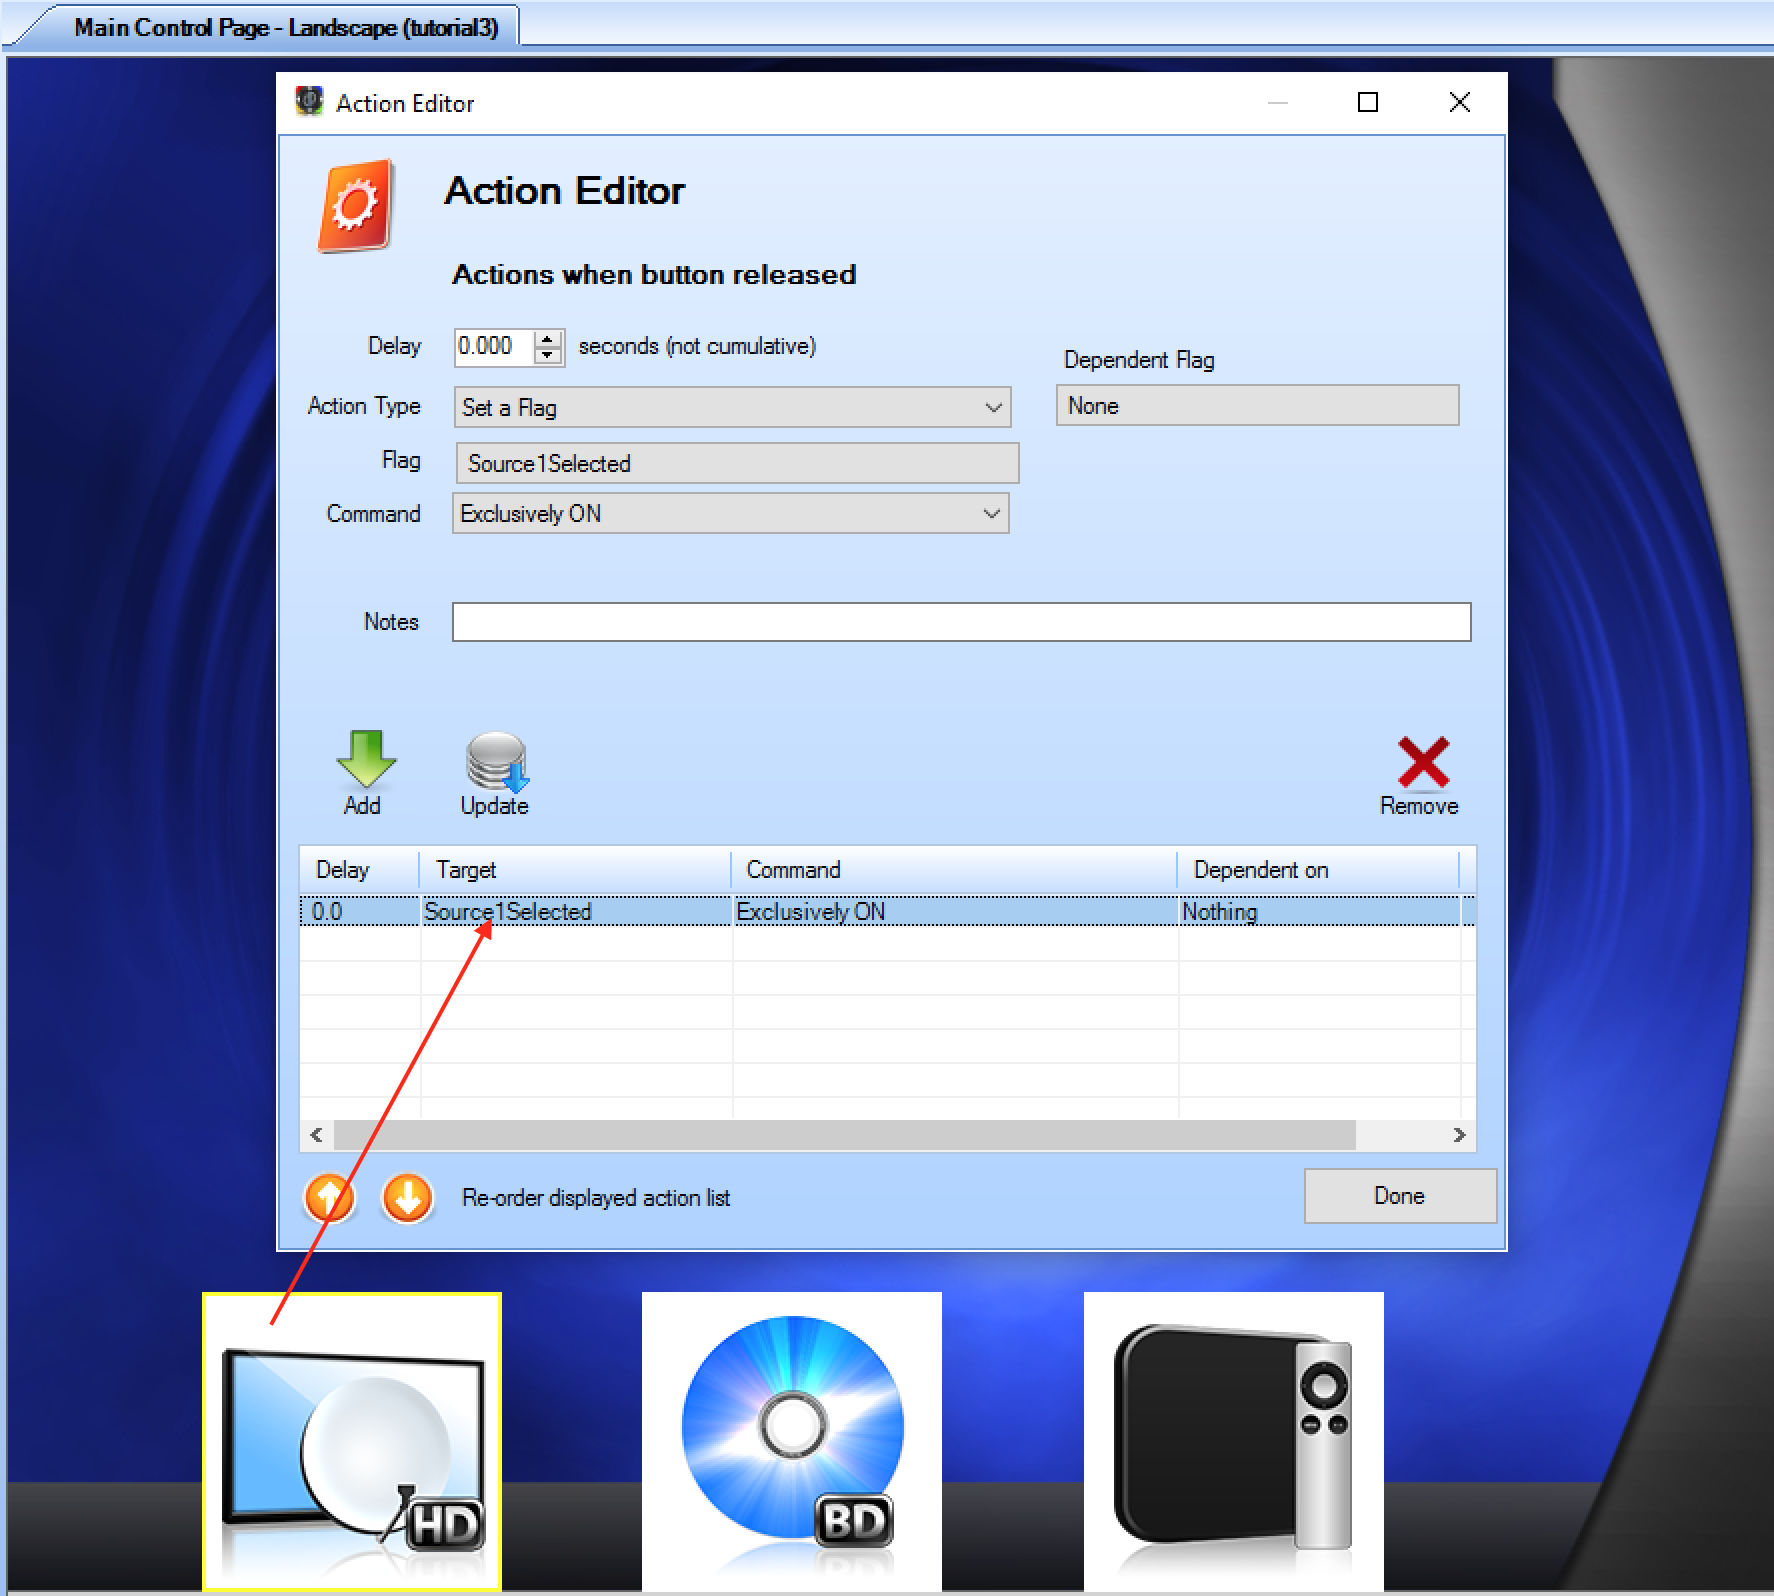
Setting Source Flags
Once you have done this for all 3 buttons, you may wish to upload the project and ensure that pressing each button causes it to change image, and that only 1 button at once is in the highlighted state.
Create Remote Control Subpages
- For each source, we would like a remote control subpage which slides on to the user interface when the associated source button is pressed, to allow the user to control the source.
To do this, create a subpage for the first source (see Subpages), click on the
Landscapeoption from the project navigation tree view, and choose the following background image from thePro Set 1\panels\curved\landscapefolder:
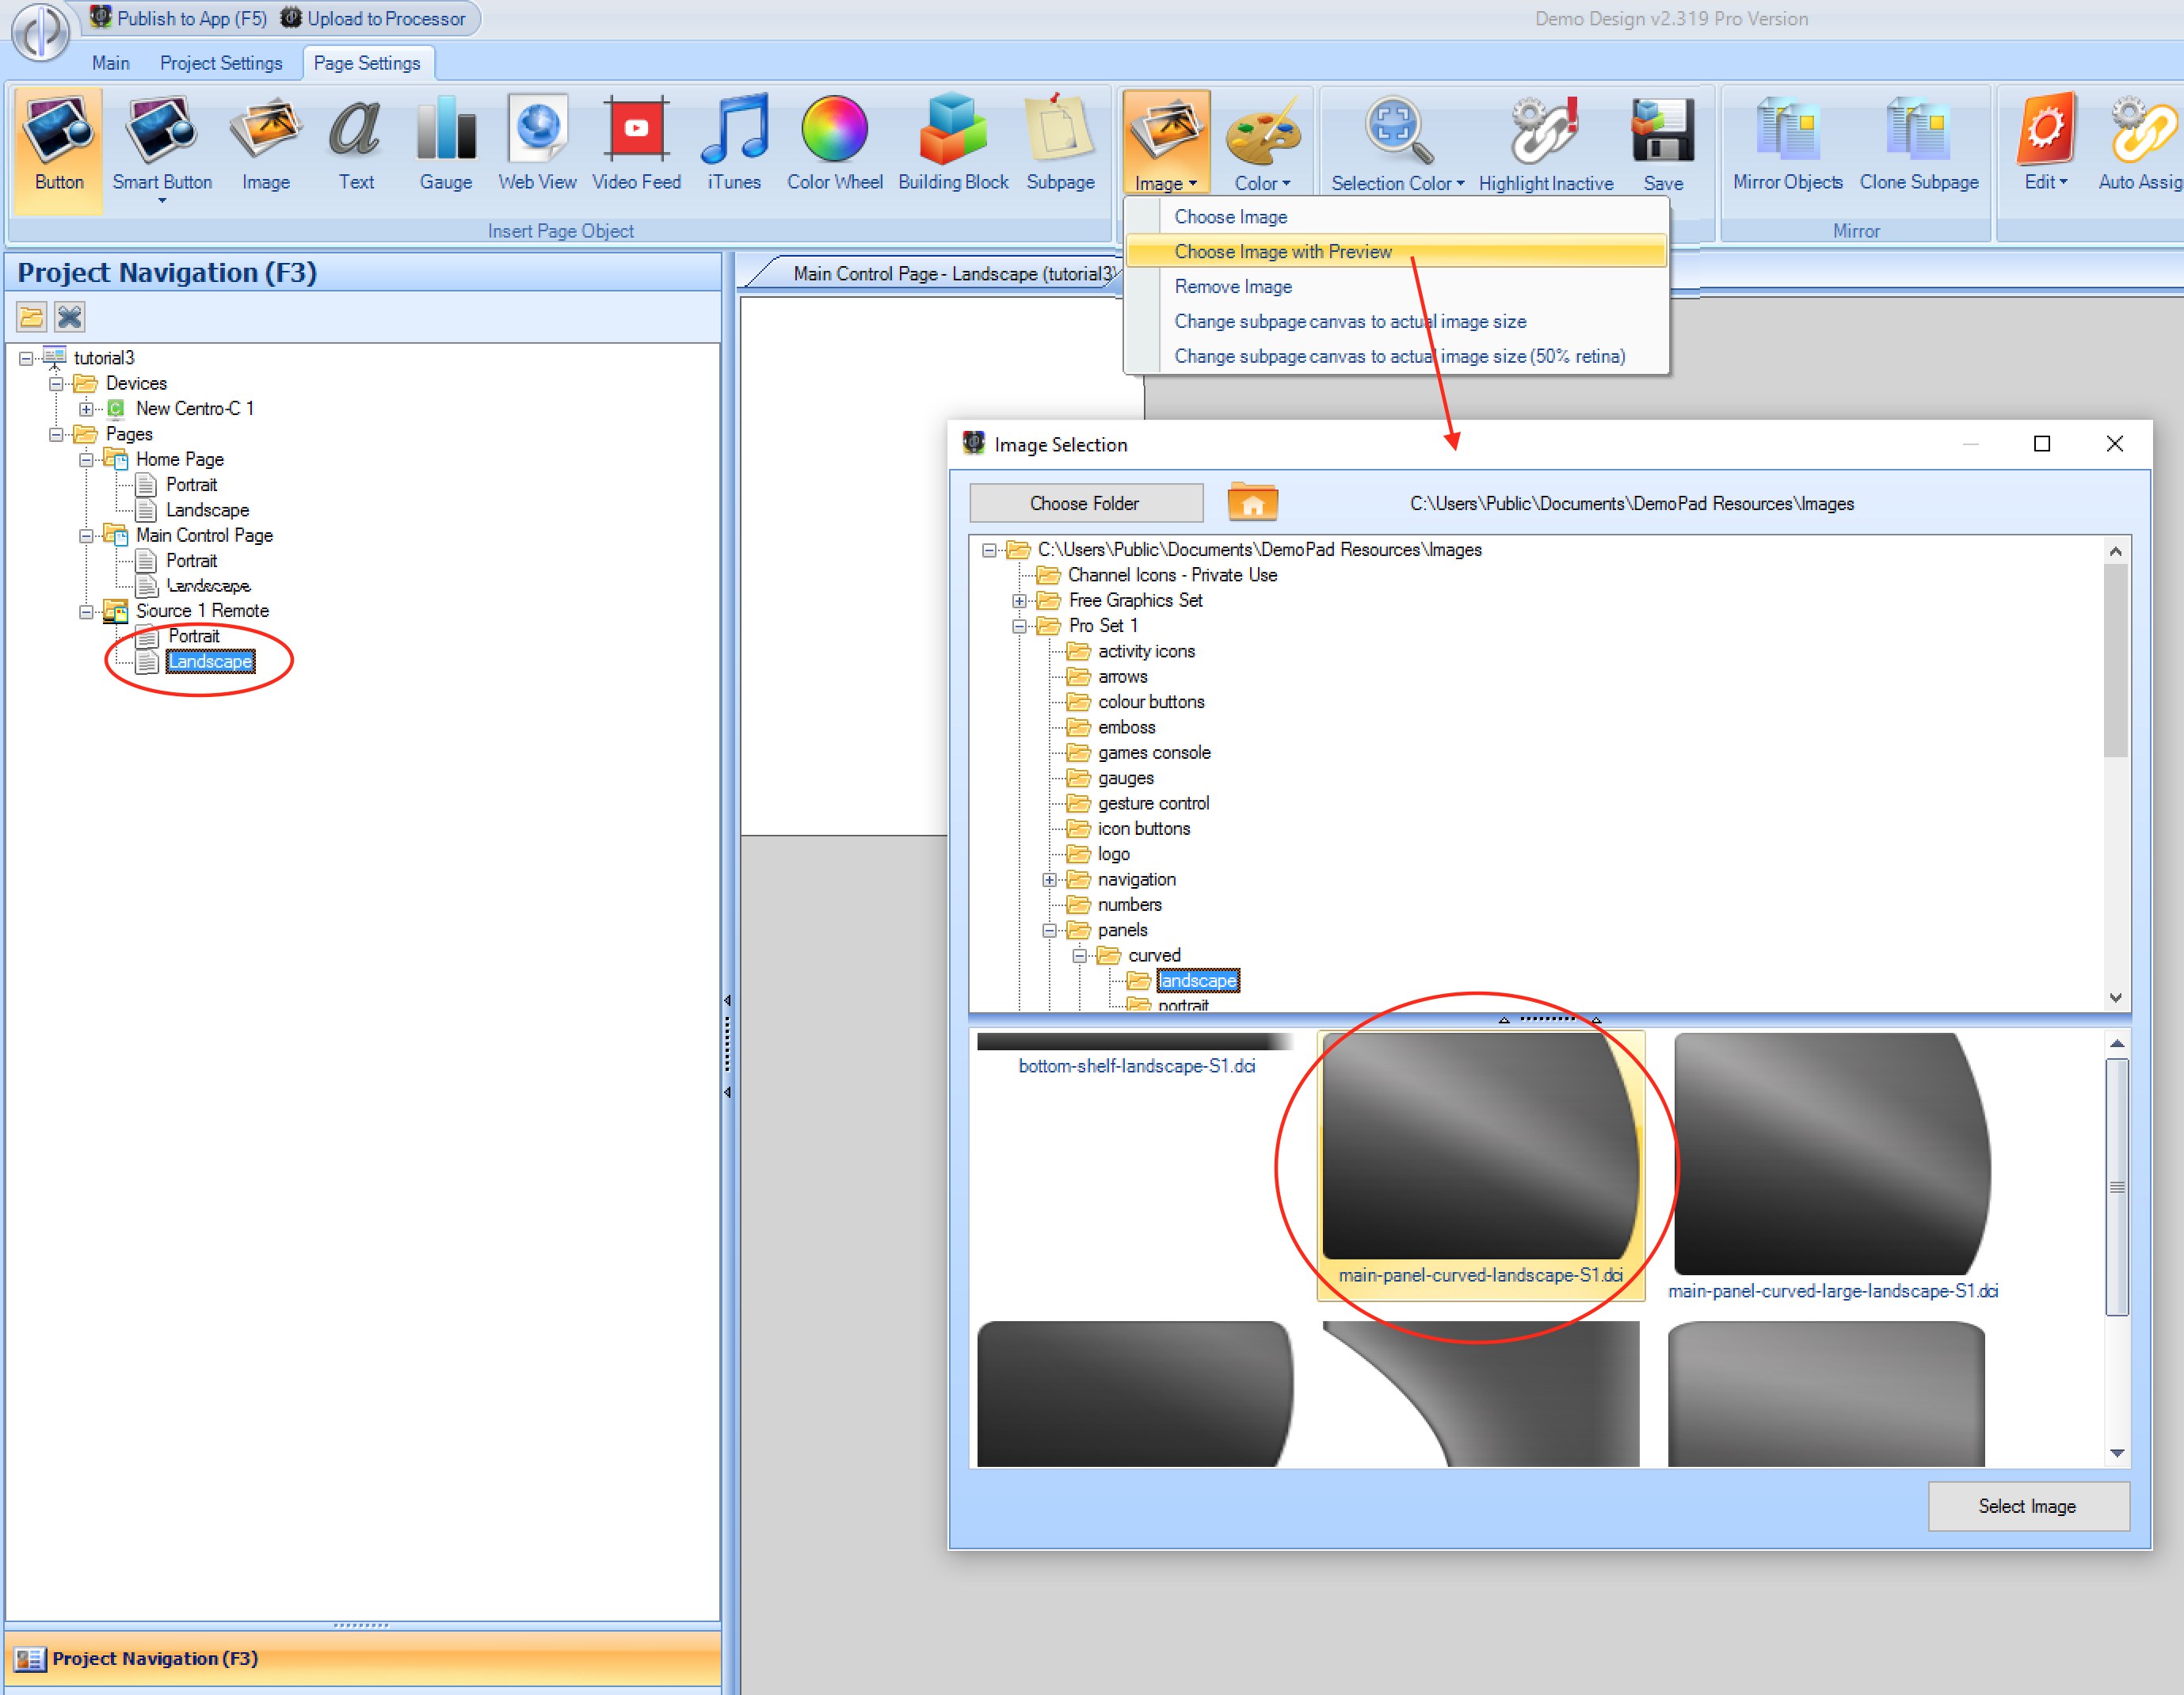
When prompted to do so, select Yes to the prompt: Resize subpage to match actual image size?. This will alter the subpage canvas size to match the physical dimensions of the image selected,
which in this case is desirable, as the background image selected fits nicely with the main page background image.
- At this point we have a blank subpage, with a background image, to which we will add source remote control buttons. First though, click on the subpage name from the tree view, and press
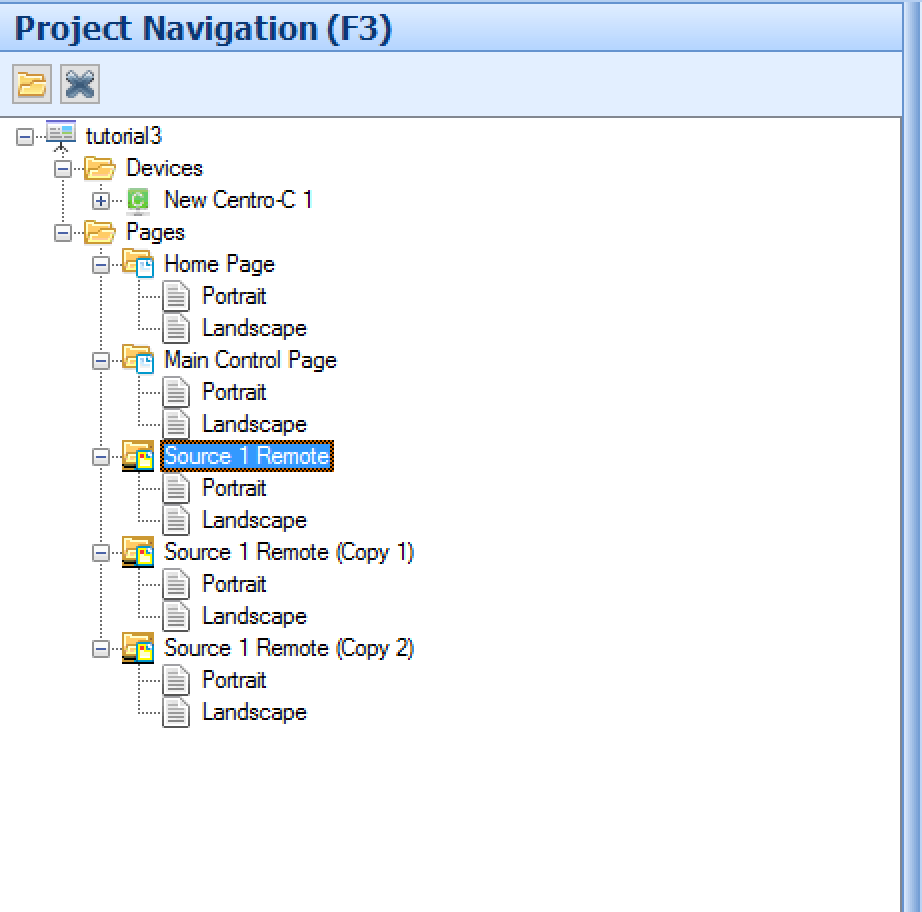
Control-C(to copy) followed byControl-V(to paste) twice. This will create 2 additional copies of the subpages which we will need later:
Populate Subpages with Building Blocks
Whilst we could create the remote controls using individual buttons, a far quicker way is to use a pre-saved building block of page objects. Select the Source 1 Landscape option from the tree view,
and select Building Block from the Insert Page Object menu. Then navigate to Pro Set 1\pages and hover over the Sat Remote building block, and click and drag the objects onto the subpage,
ensuring that the top left of the building block is fully on the subpage canvas area:
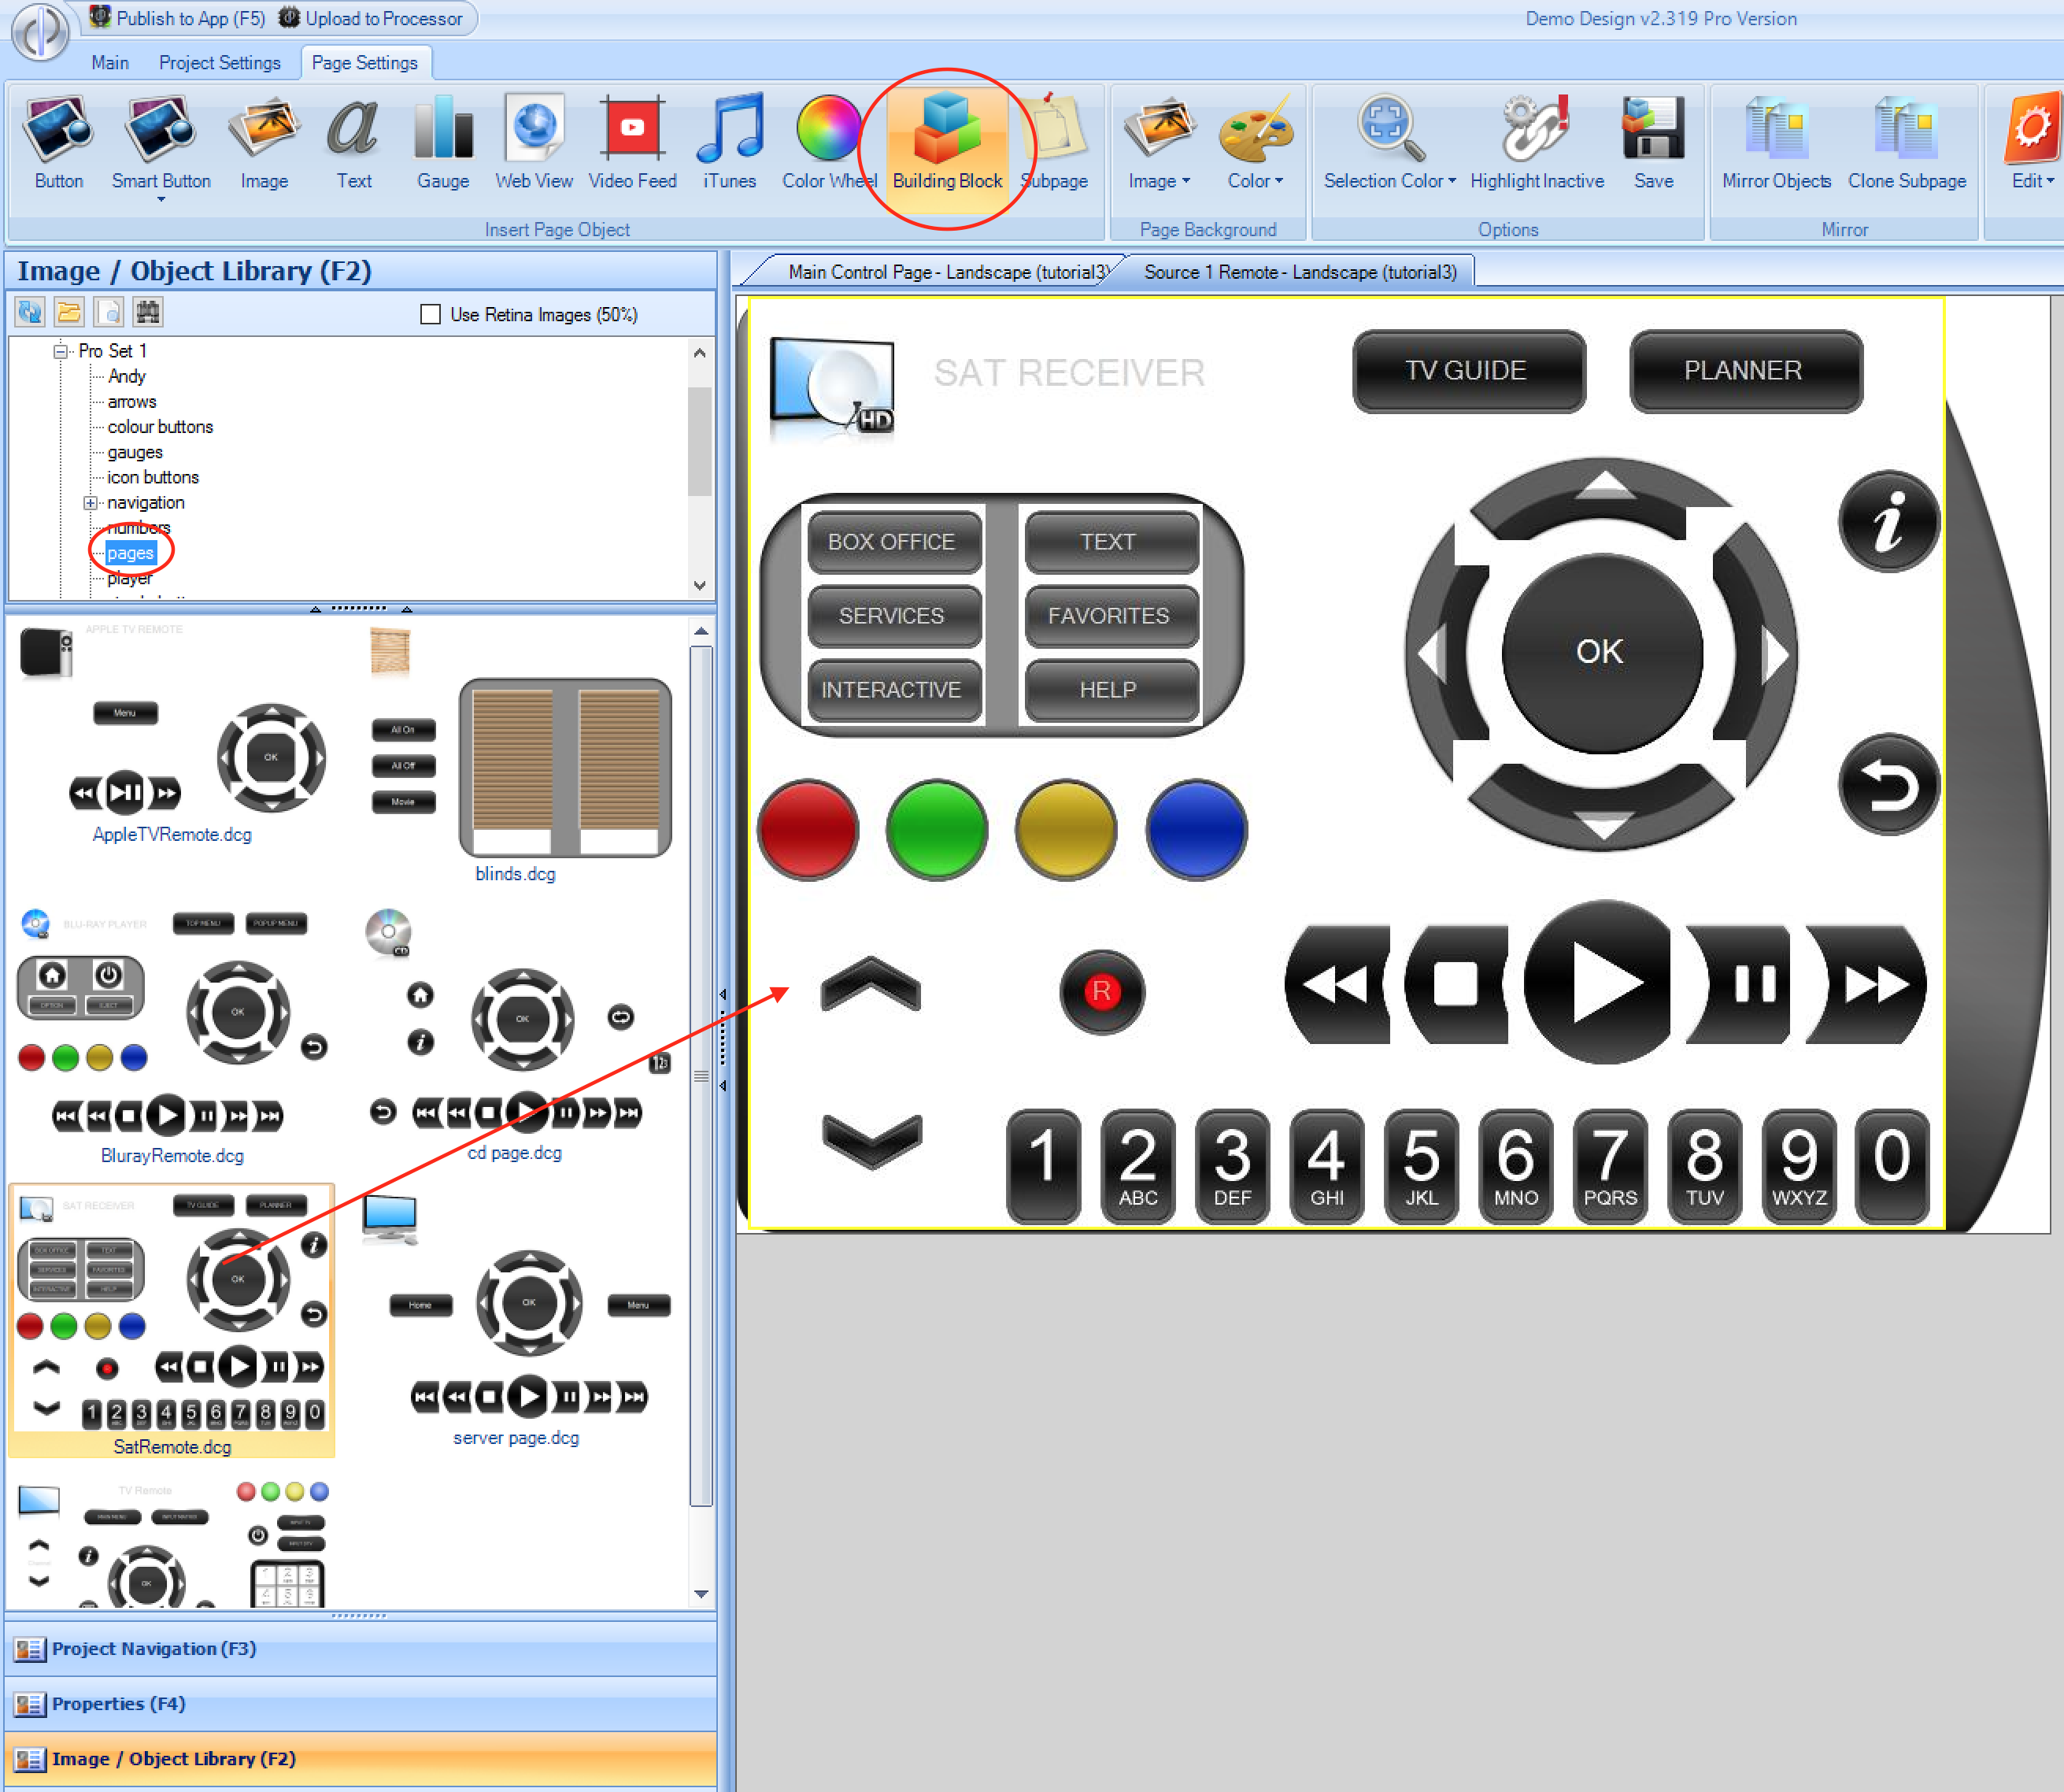
When prompted, accept that any image files may potentially be overridden, and choose No when asked whether to Auto Assign Commands and the building block will be placed on the subpage. You can then drag all the objects to place them appropriately, if some
of them are outside the background image area. (Note Control-A will select all objects on a page to allow you to move them all at once)
Perform the same steps for the other 2 subpages, choosing the BlurayRemote and AppleTVRemote building blocks accordingly.
Add Subpages to Main Control Page
- The next step is to add the 3 subpages to the Main Control page - please see Using Subpages which explains how to drag each subpage onto the main page:
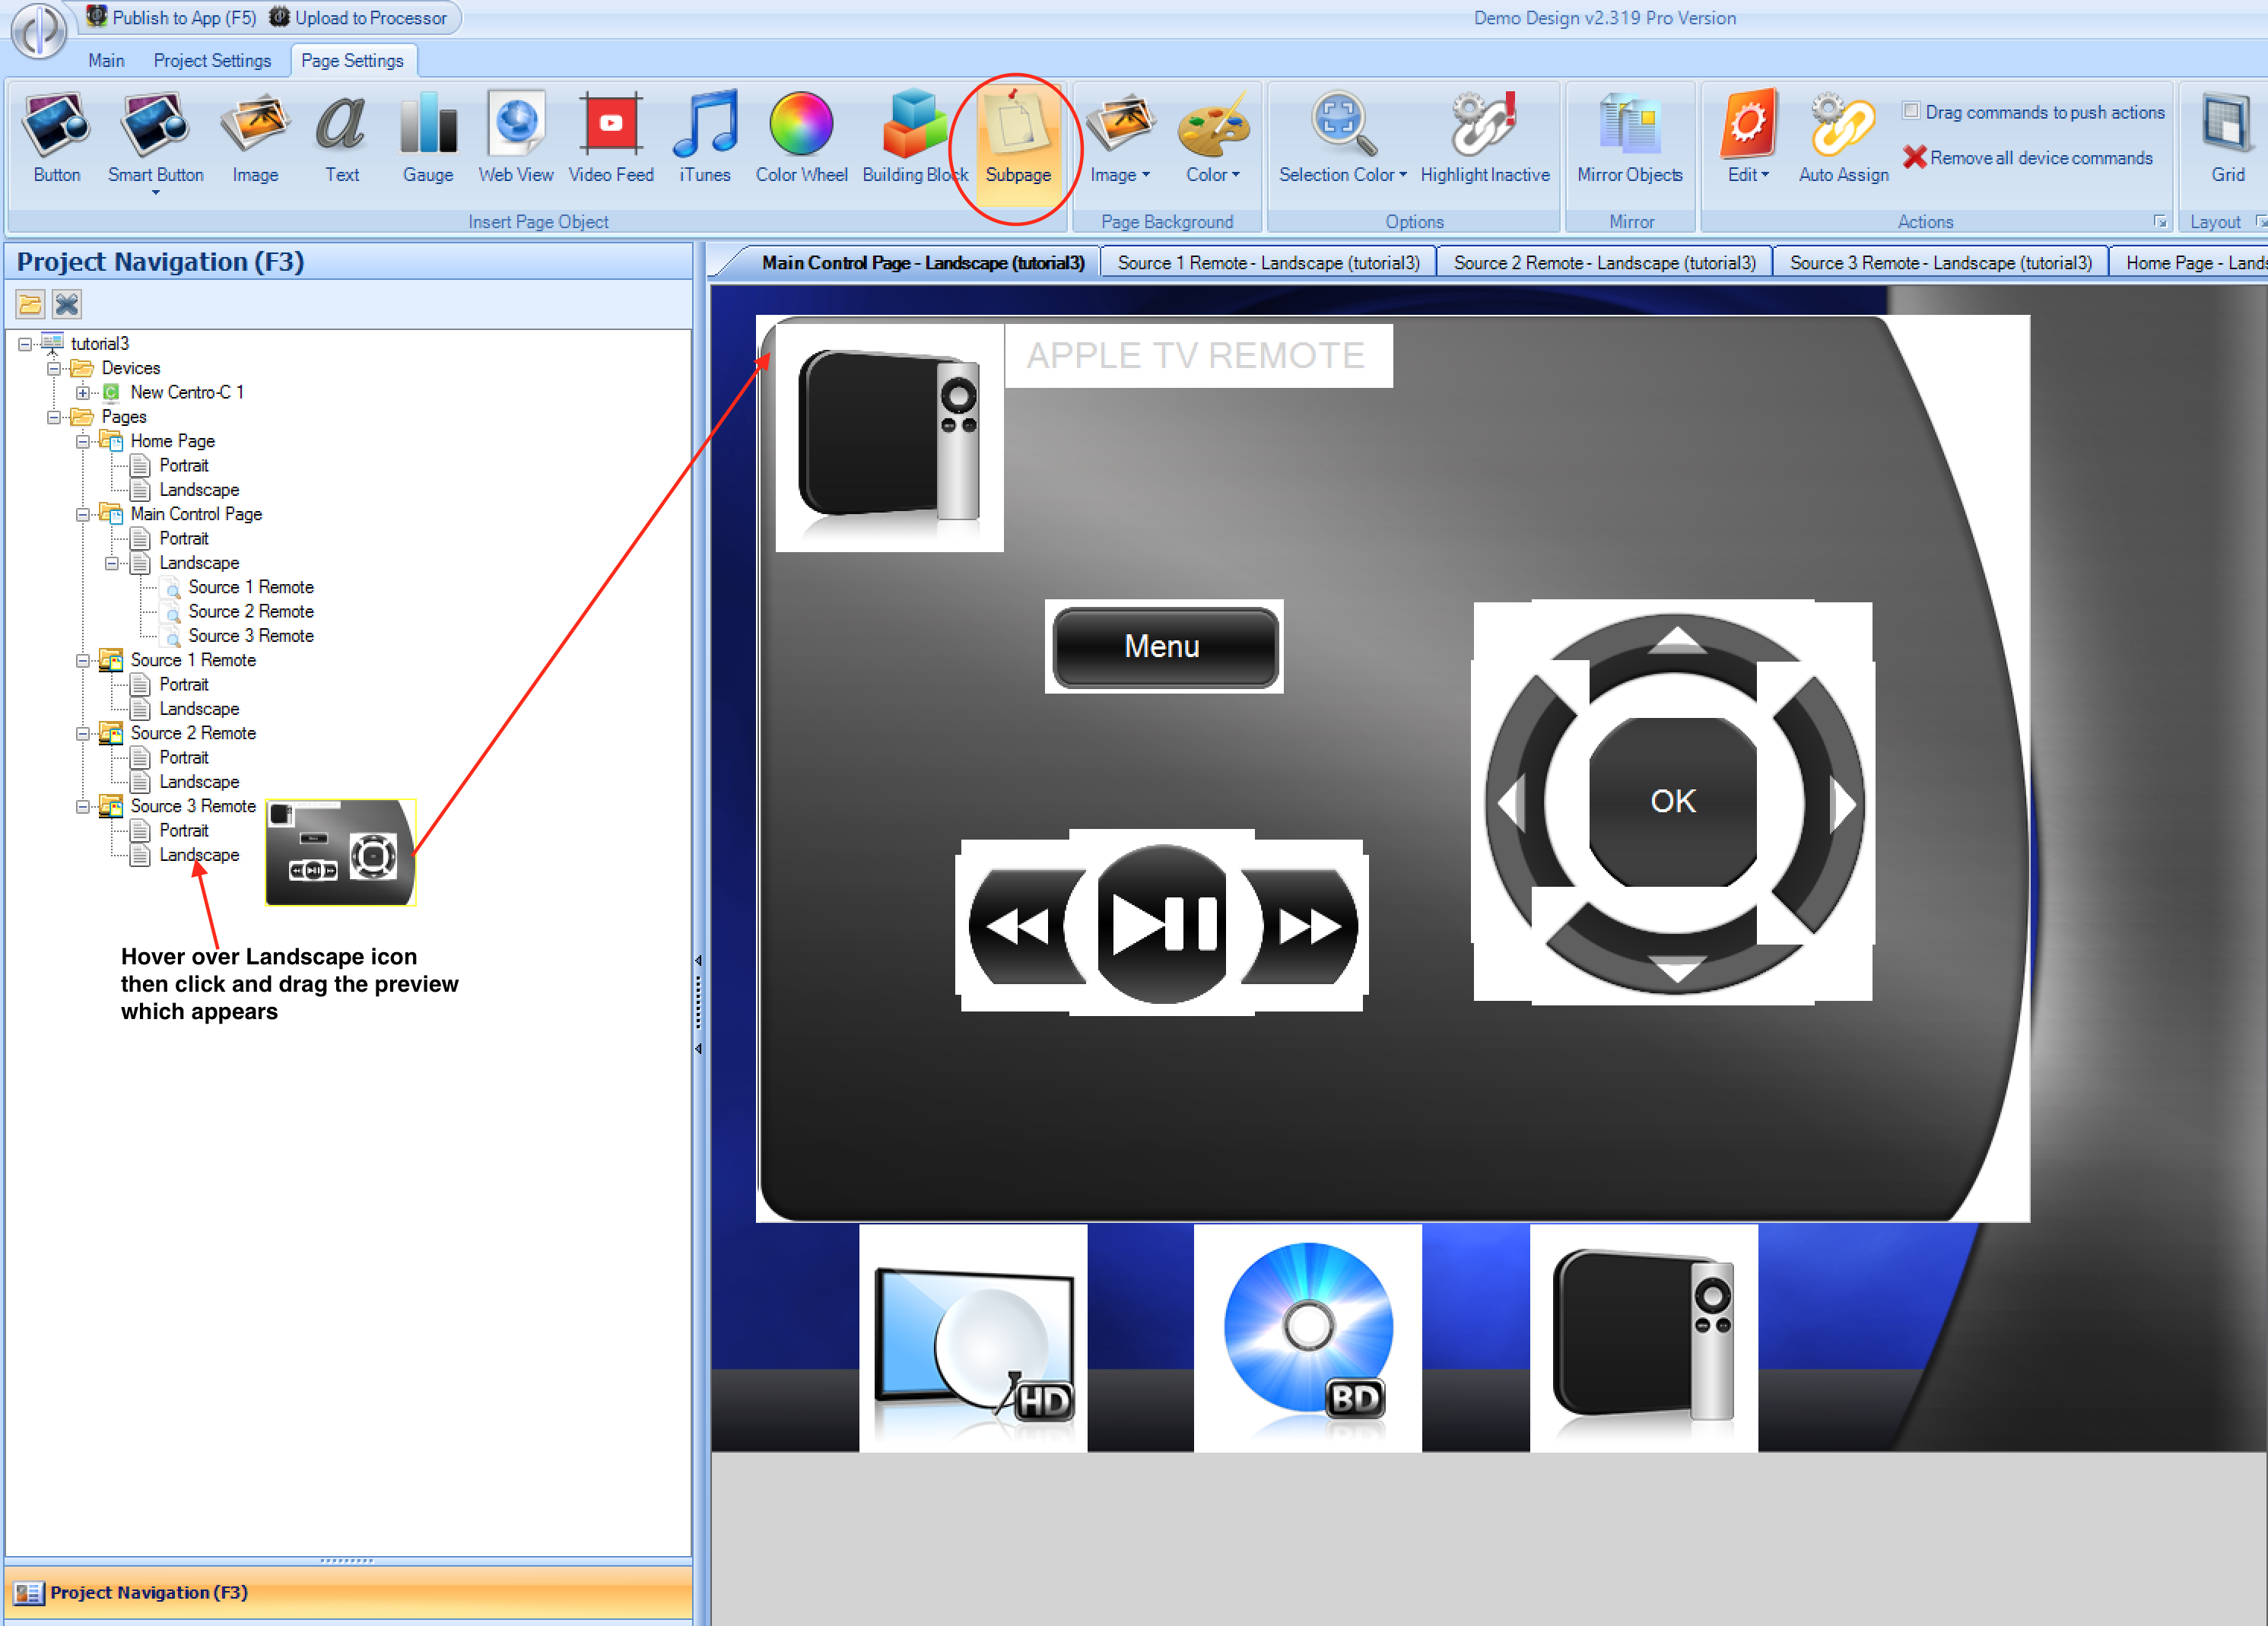
You should position each subpage in the same place, as only one will be visible at any one time. This will be achieved using the Reveal menu option for each page. Click on each subpage in turn
and expand the Reveal menu, and choose the same flag which you created previously for each source selection button. Also set the Transition option to from left:
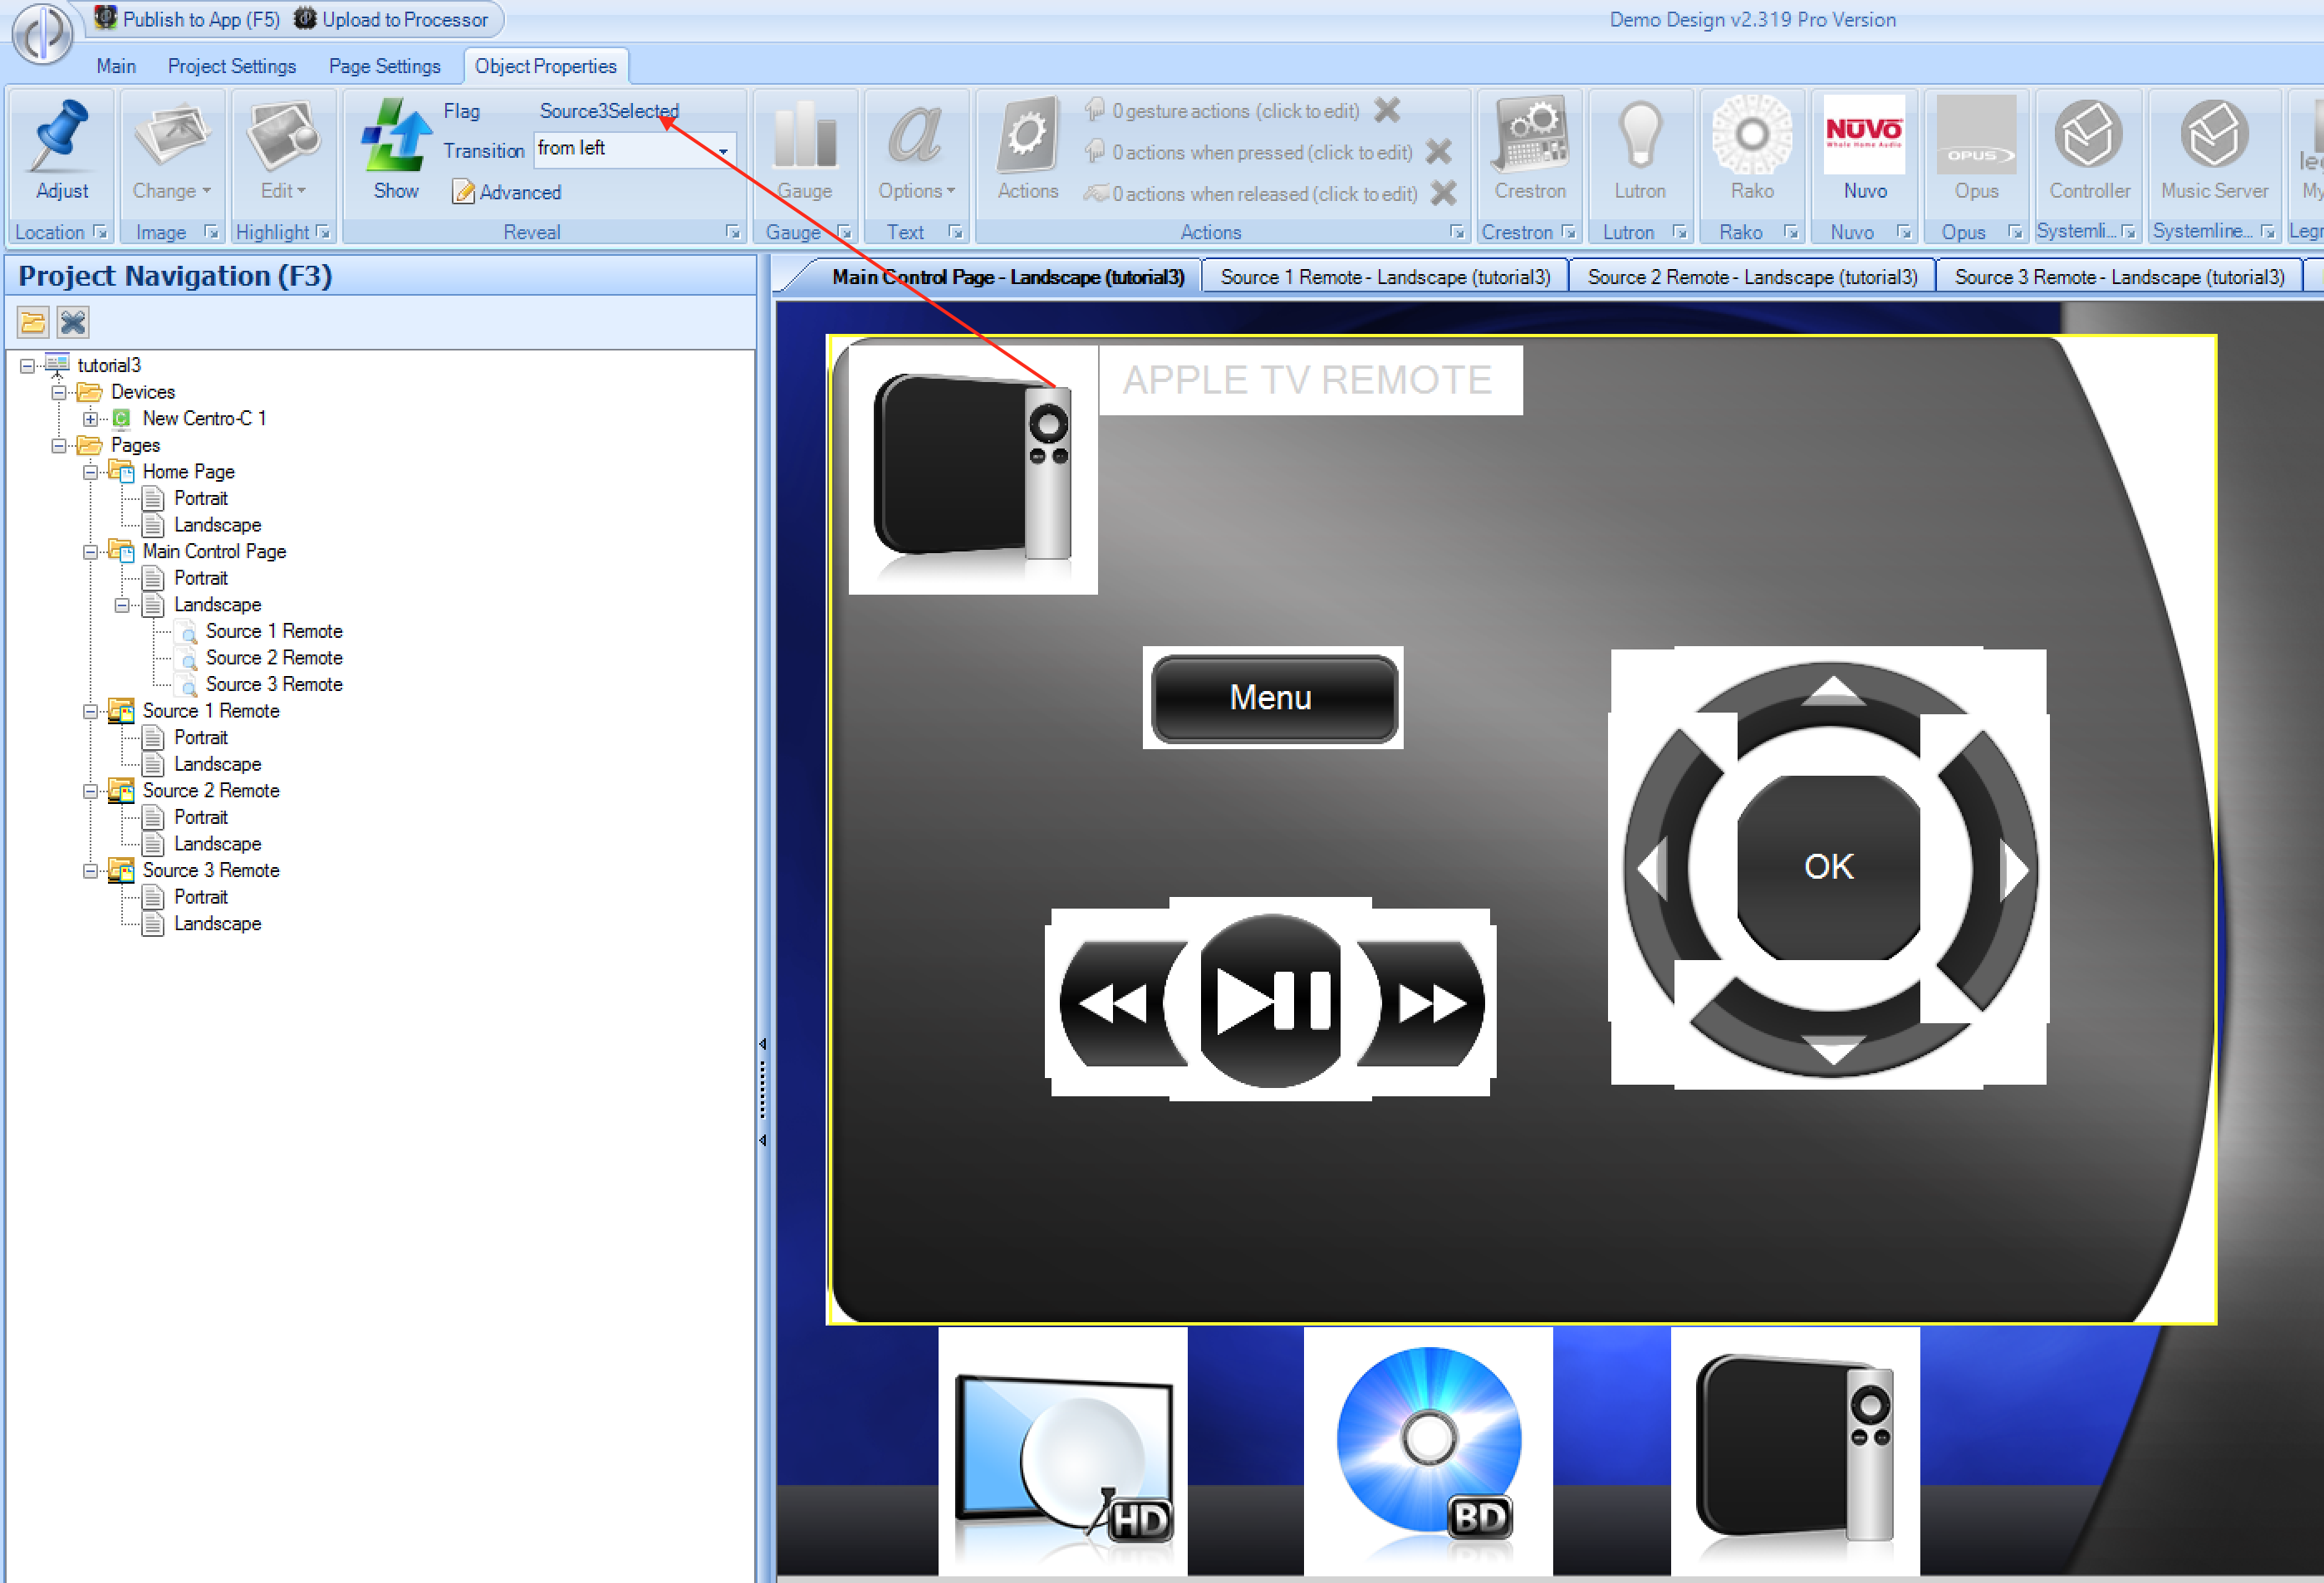
NOTE - when page objects (eg subpages) are placed on top of each other, as in this case, you can navigate to the ones underneath by clicking with the right mouse button. This will send the top most object to the bottom, allowing you to then click to select the object which is now on top. Note this has no effect on the control app z-order, it is simply a way of accessing hidden objects in the designer software.
Publish to App
You are now ready to upload the project to the app & test the UI operation. Please refer to Tutorial 1 - Uploading a Project
Once the project is downloaded, you should see the black icon page, followed by the main control page with the 3 source buttons. Pressing any of the 3 source buttons should cause the button to highlight, and the associated remote control to appear based on the flag.

If you wish you can download the working project to your control app from our cloud server using the following QR code:

Or you can download the complete project from http://designer.docs.demopad.com/tutorials/tutorial3.zip