Number Actions
It is possible for the Centro Control app to respond to changes in a number variable's value, and perform a set of actions, depending on what the number value is equal to.
This is how actions are generated for Gauges, Color Wheels, or X,Y Buttons where a 3rd party driver is not being utilised.
Setting up Ranges
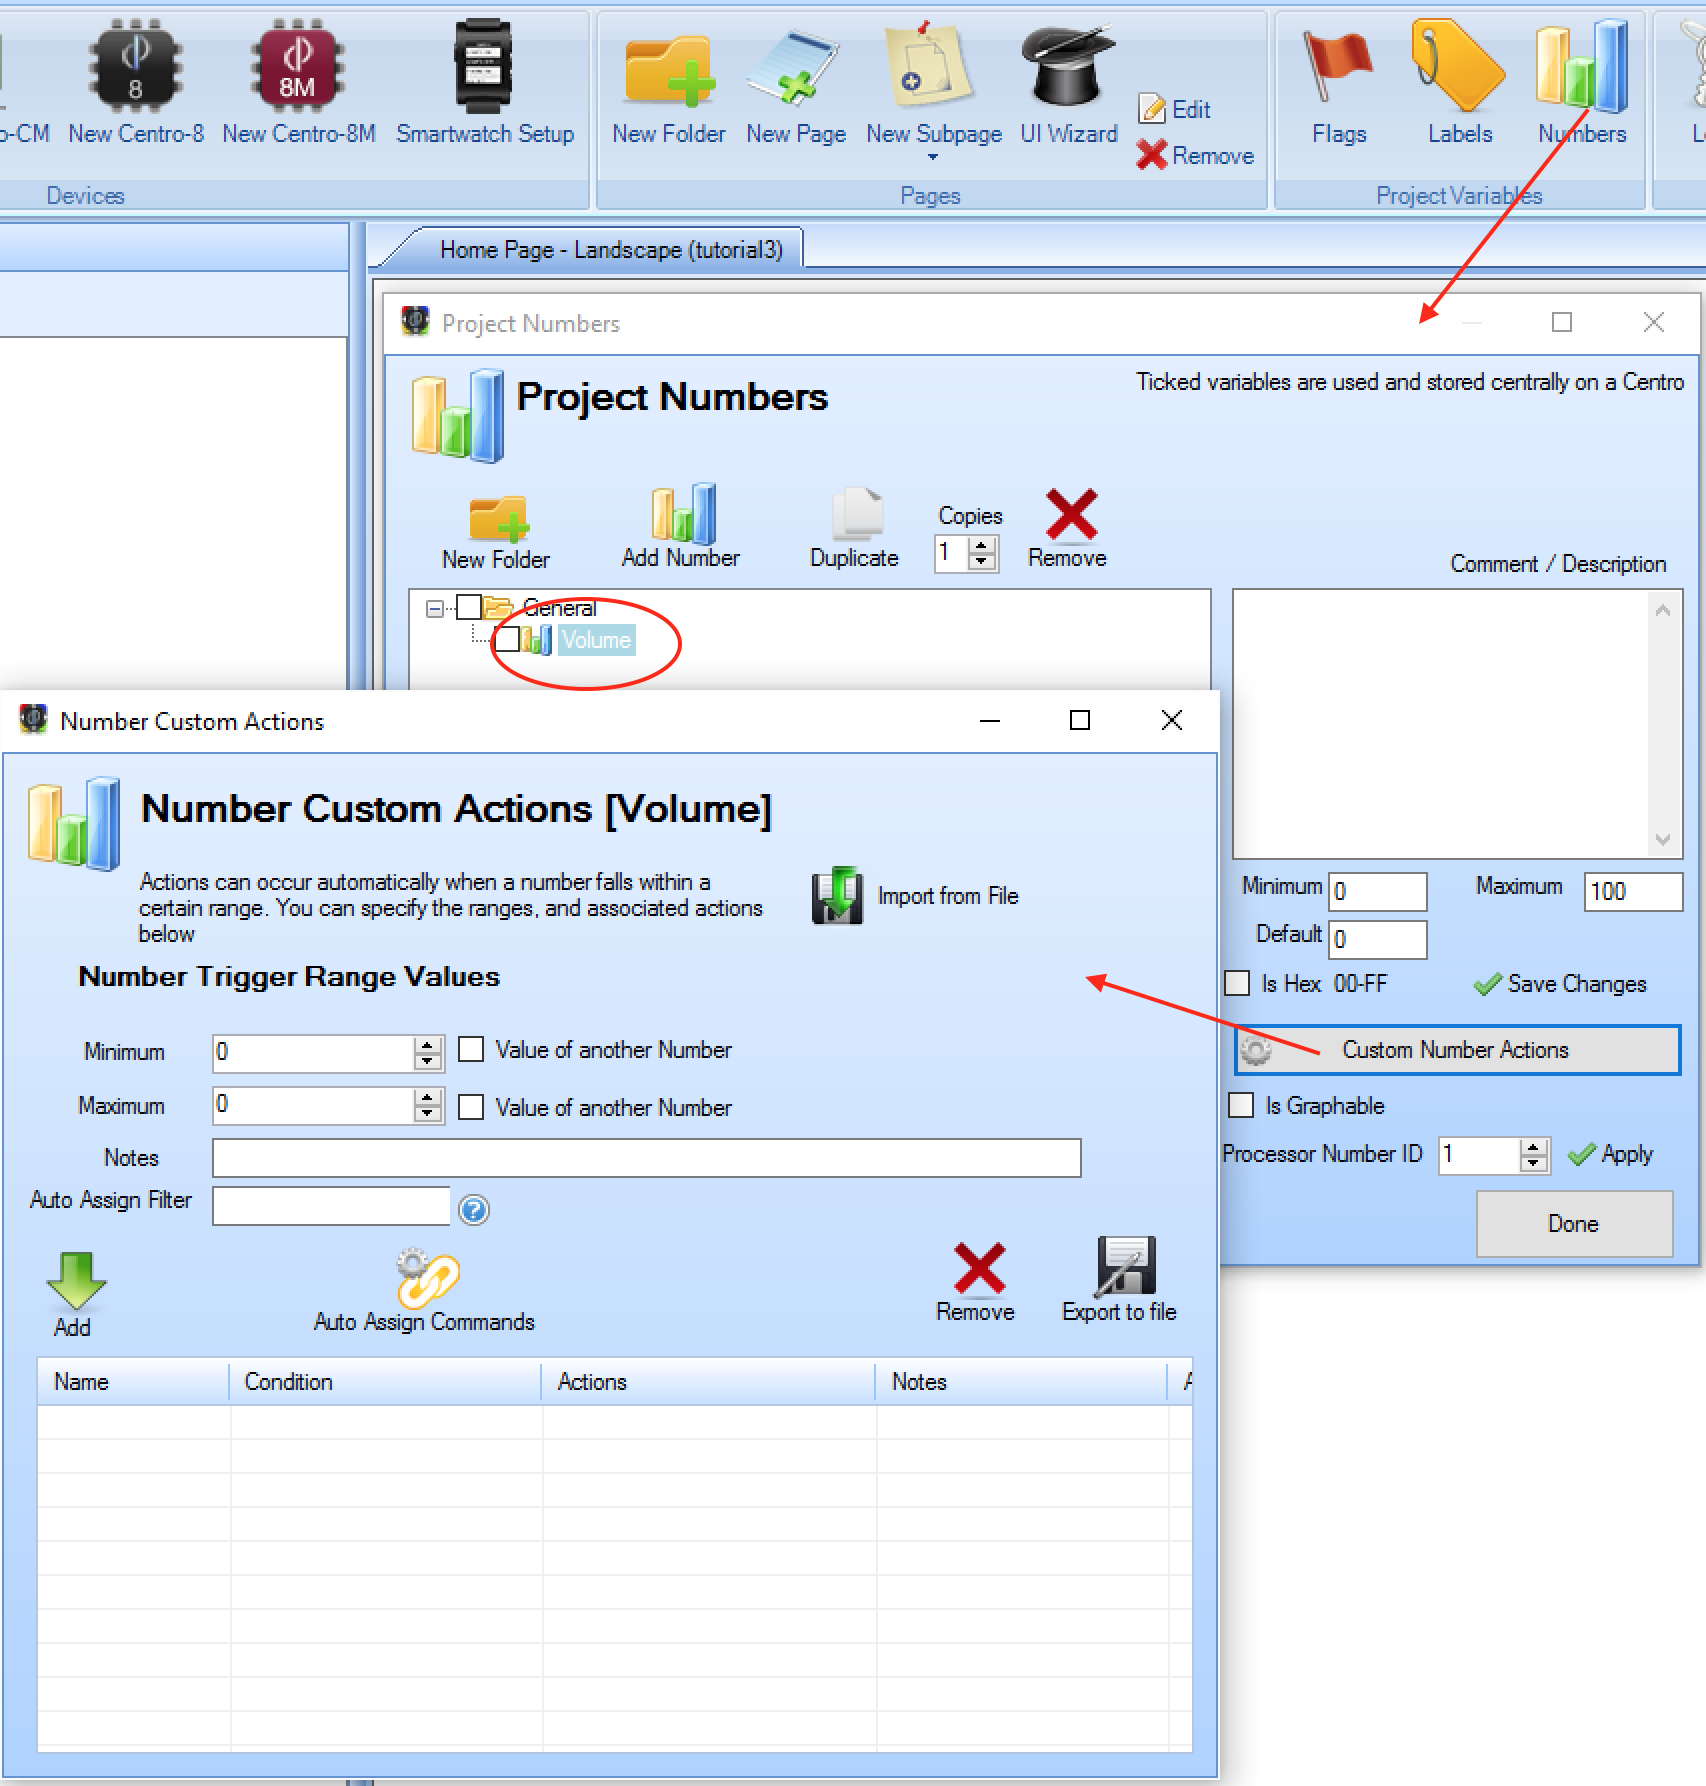
You can access the custom number action setup screen from the numbers configuration screen:

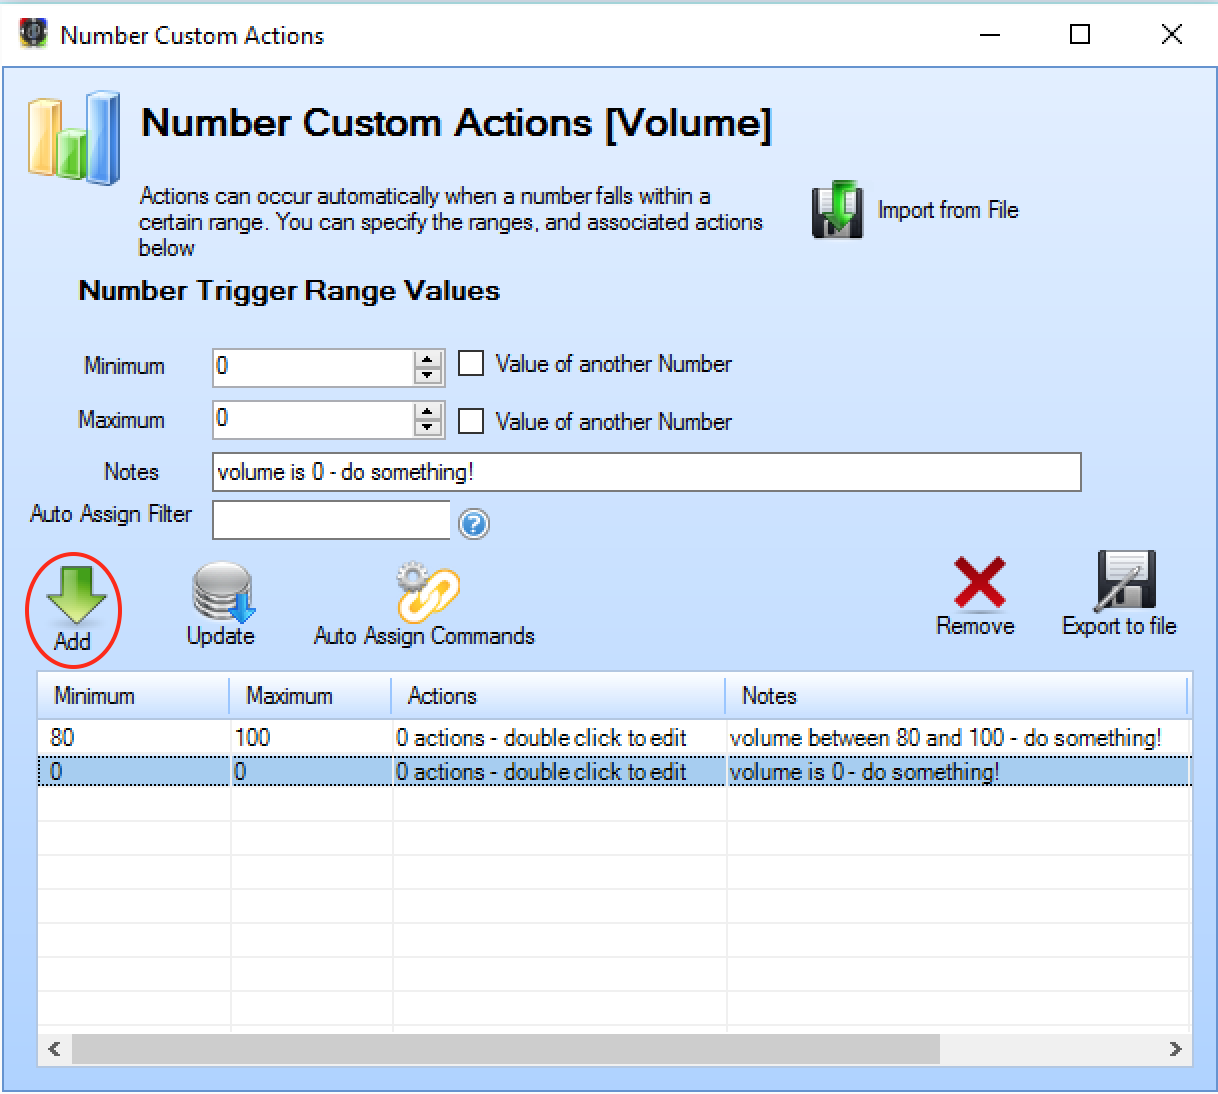
You can then begin to enter the values that trigger specific actions. The values are entered as ranges with a minimum and maximum, eg if you wanted to perform some actions if the volume of an amplifier was turned up more than 80% (between 80 and 100), and if you wanted to generate different actions if the amplifier was set to exactly 0% (or in other words, between 0 and 0), you could set up the following ranges:

You can enter as many ranges as you wish, and then decide what actions to perform if the number falls within that range, by double clicking the line entry and entering actions.
Triggering the Actions
Once the ranges have been set up with actions, the control app will execute them in the following situations:
with a set number action - you can manually set a number variable as an action type, which will then execute any associated number actions. It is often convenient to have a number variable called
MACROfor example, and create ranges of single values to trigger specific functions, eg from 1-1 execute 'cinema on' actions, and 2-2 execute 'cinema off' actions. With this approach, you can set the number variable to 1 or 2 throughout your project, but only have to maintain a single list of associated actions.via a linked gauge - by default, a number which is linked to a gauge will change when a user lifts their finger from the gauge, and will be set to the new level indicated by the gauge. There is however an option to
execute actions whilst slidingwhich will cause the number variable to change whilst the user is sliding their finger. Care should be taken when selecting this option, as it may potentially cause many commands to be sent to a device, which may not necessarily be able to process them quickly enough.via a linked color wheel - similar to a gauge, up to 3 number variables will change when the user lifts their finger from the color wheel, and any associated actions will also trigger. Again there is the option to
execute actions whilst slidingNOTE - when capturing feedback data with a regular expression to a number, custom actions will NOT fire by default - this is to prevent a loop of commands / feedback. If you do wish to execute the associated custom number actions, you should add a feedback action which sets the number equal to itself using { } brackets - this will then fire the custom number actions.
Example - controlling the volume of a Yamaha Amplifier
An example IP/RS232 command to set the volume of a Yamaha Amplifier's main zone is:
@MAIN:VOL=-60.0 - which would set the volume to -60dB.
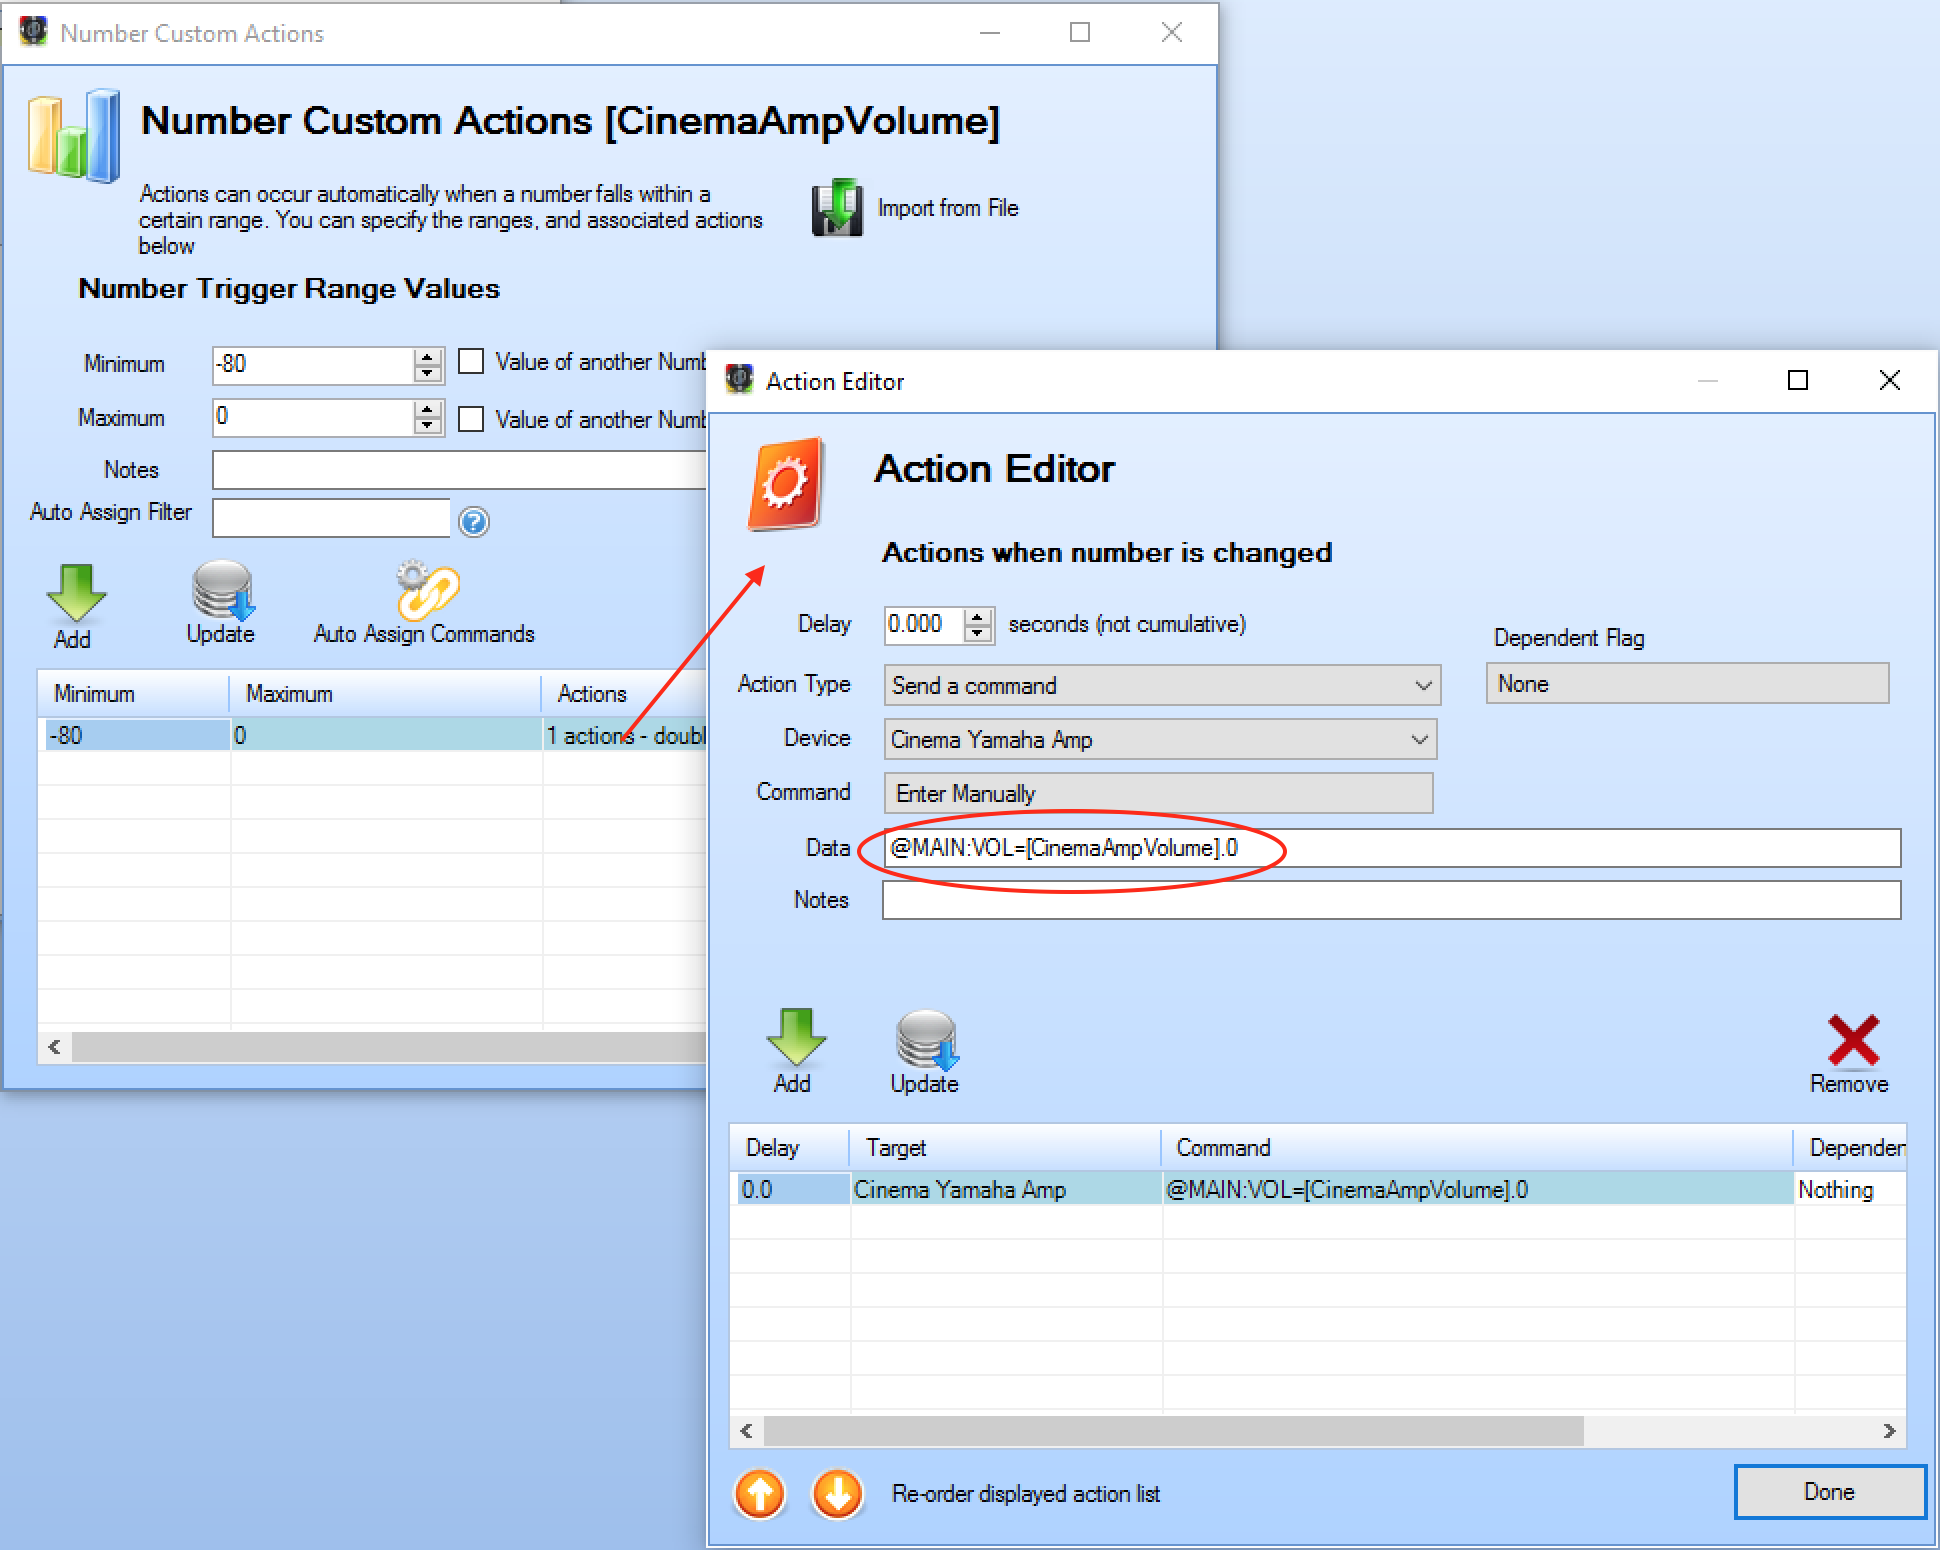
Using a flag called CinemaAmpVolume with a range of -80 (minimum) to 0 (maximum), we could specify a custom number action which covers the entire range of the variable (-80 to 0) and send the following
command as a custom number action:
@MAIN:VOL=[CinemaAmpVolume].0
With this number variable linked to a gauge slider, this provides 1-way control over the amplifier's volume:
