Tutorial #2 - Controlling your first device
In this tutorial we will simply be adding some buttons onto a page and assigning commands to them, uploading to an iOS device & testing the commands.
First create a new blank iPad project called
testand save it somewhere on your computer (see Creating a Project)Next, add a device to the project. You can either use a blank, generic device and add commands to it manually, or one of the pre-defined devices from the drop down list (see Adding Devices)
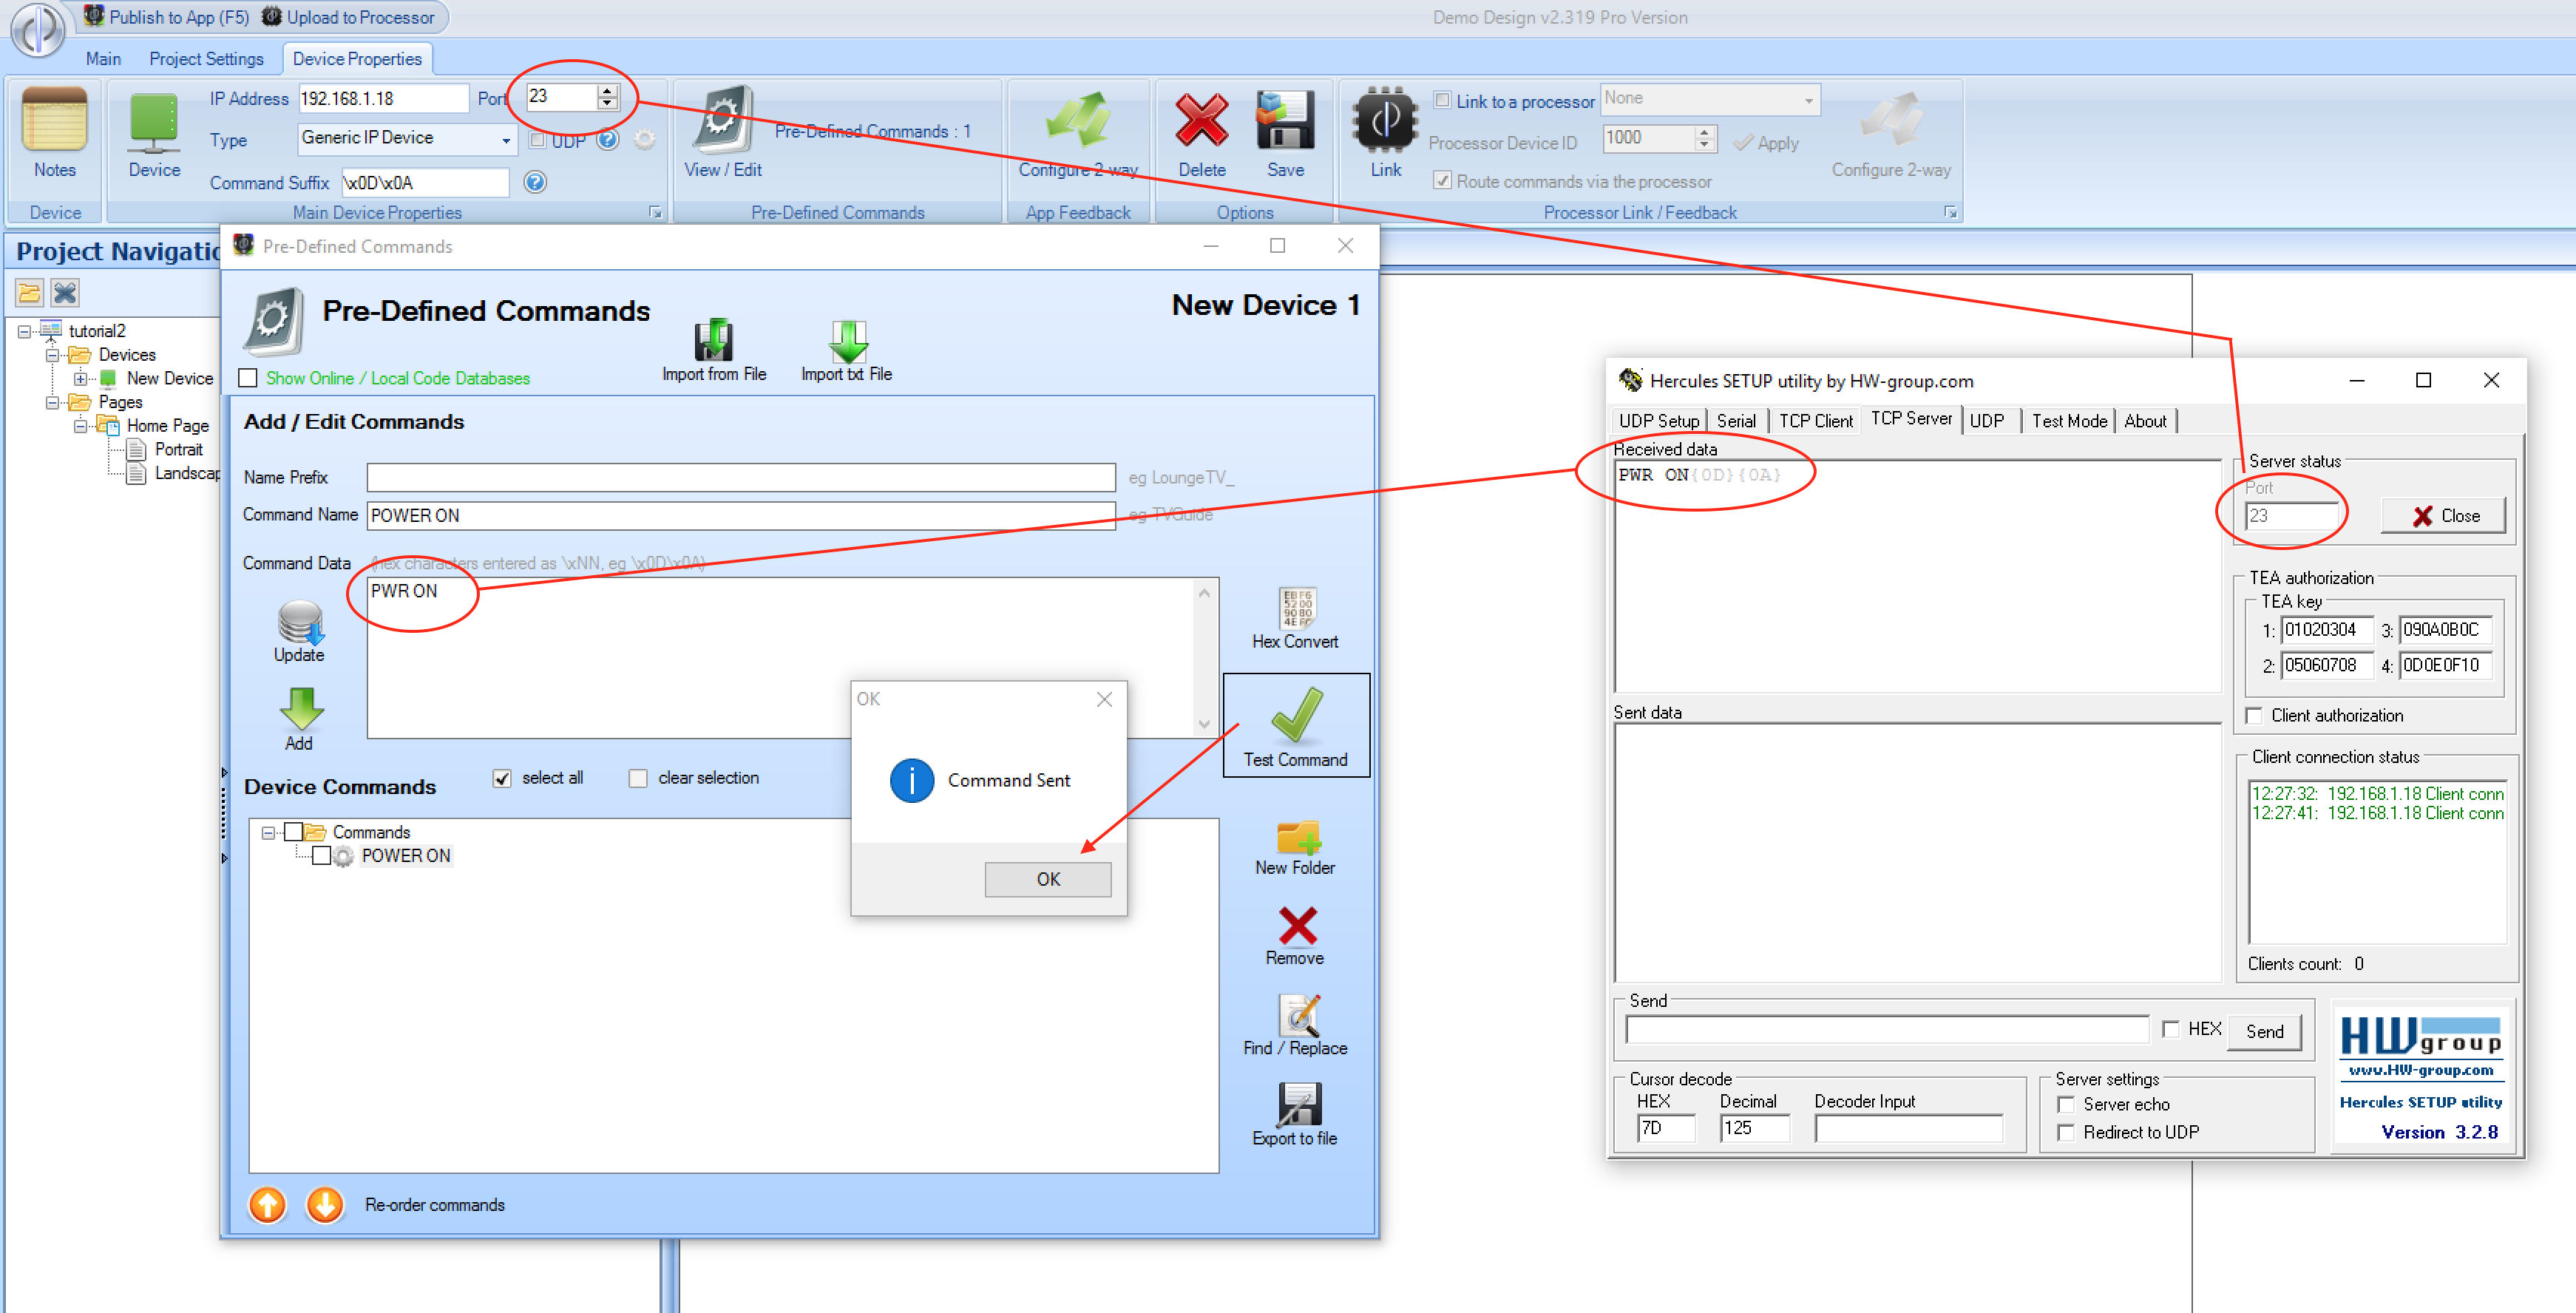
Enter the IP address and port of the device you have entered. If you wish, you may attempt to control a physical device, but for the purpose of testing we would recommend you set the IP address to that of your PC, and choose a port, say 23, so that the project sends commands back to your PC. You can see the commands by using a listener program, eg Hercules in the
TCP Servermode.
Test that the commands from the pre-defined commands section show up in Hercules when you press Test Command:

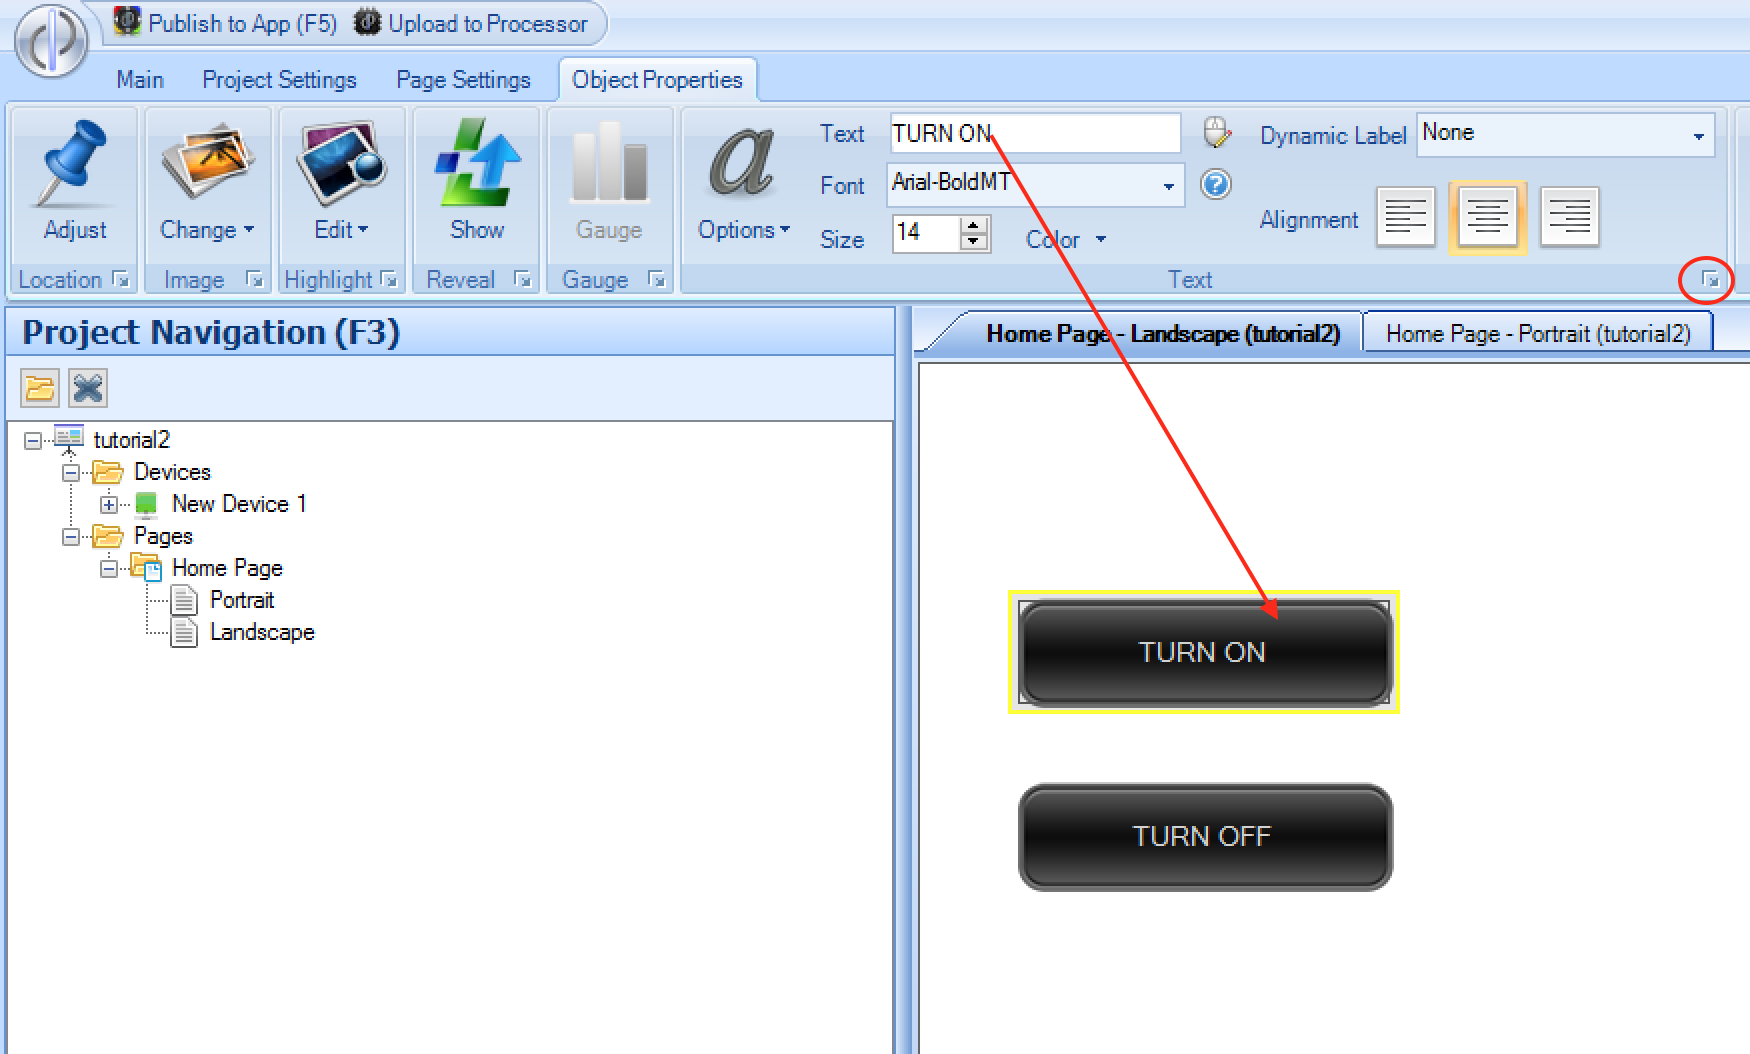
- Next, add 2 rectangular buttons to the page from the
\Pro Set 1\simple buttonsimage folder (see Adding Buttons) and put a text label on them both:

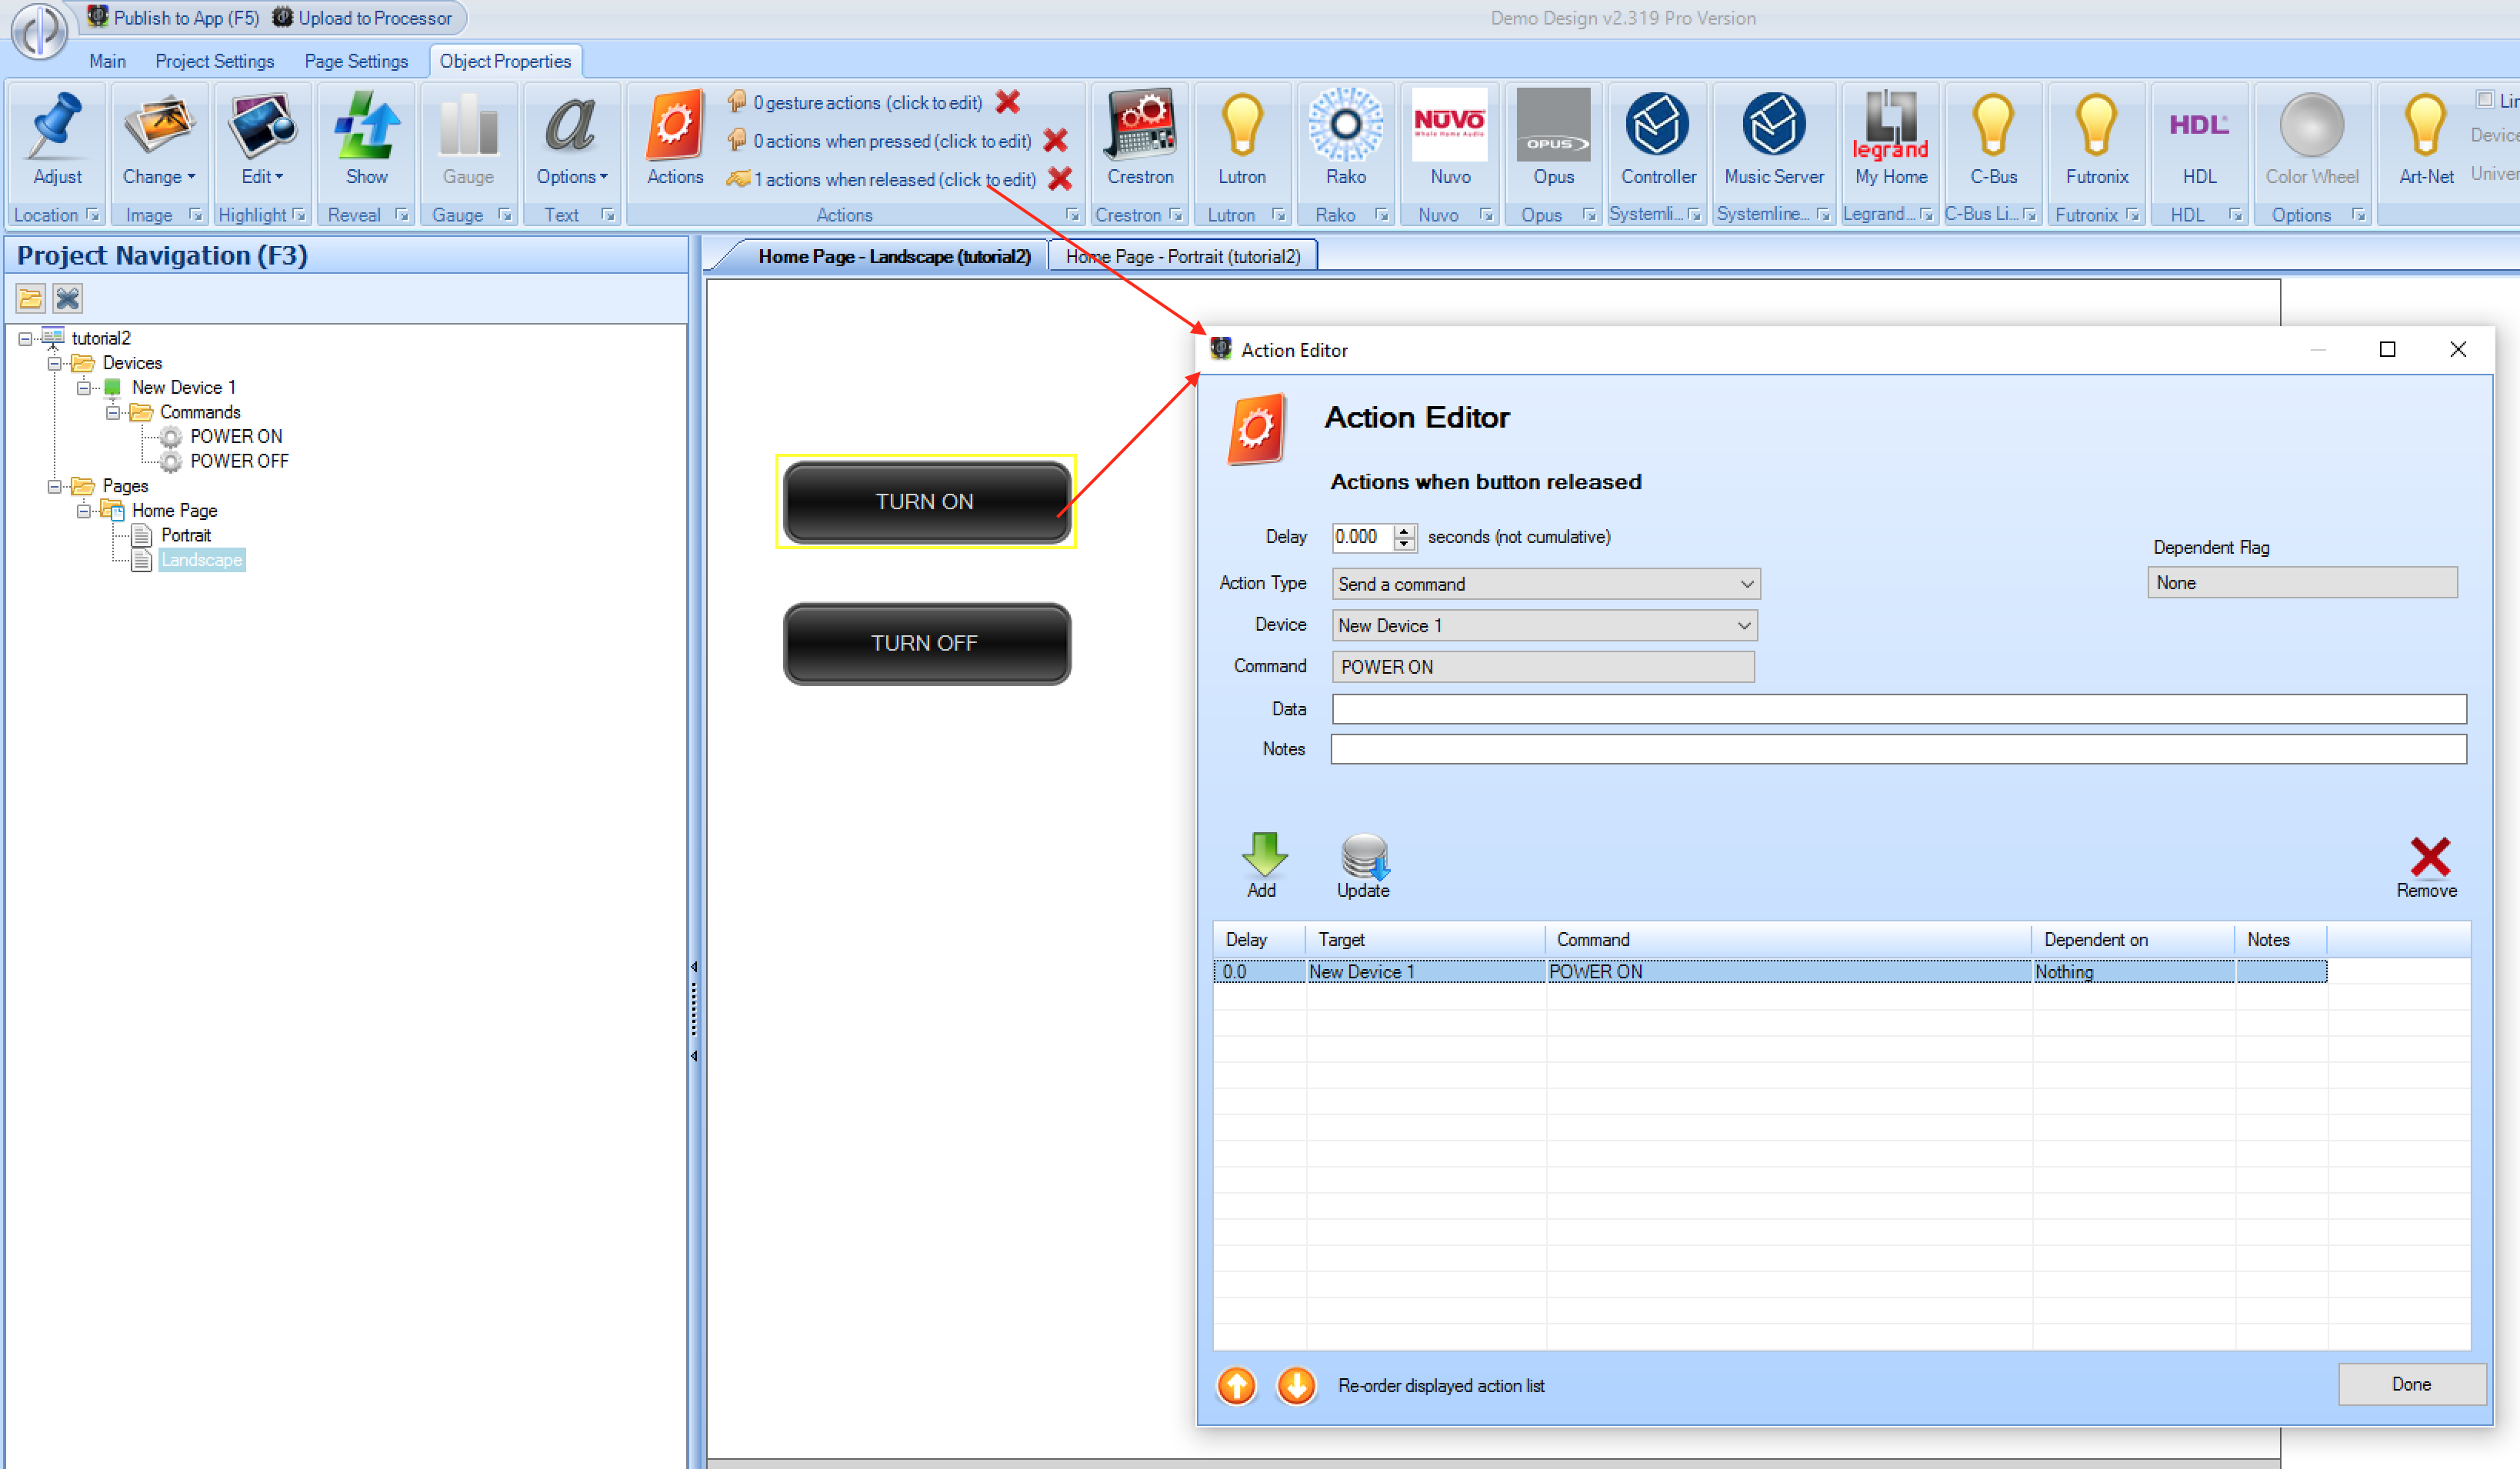
- Finally, add commands to the 2 buttons, using either the drag drop method, or by double clicking the button to access the action editor for the released actions:

Uploading to iOS device
You are now ready to upload the project to the app & test the operation. Please refer to Tutorial 1 - Uploading a Project
Once the project is downloaded, you should see the 2 buttons you have added, and when you press them you should see the command appear in the Hercules TCP Server tab.
Note - if you only see a pure white screen, then it is likely that you are looking at the wrong orientation - rotate the iOS device to landscape / portrait to see the buttons.
Once you have confirmed that the commands appear in Hercules, you can change the IP address / port of the device to the physical device you have, to confirm correct operation. Re-upload the project to test.